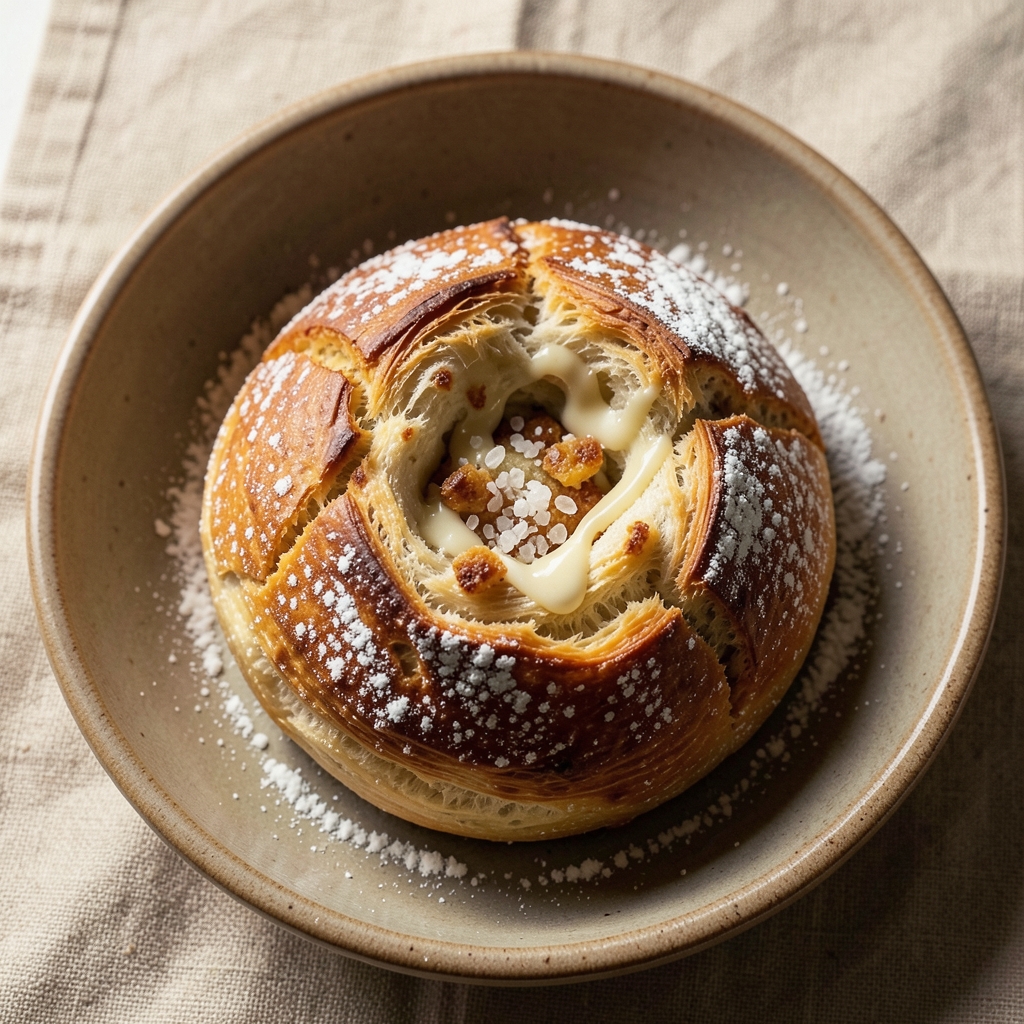
This pocket bread recipe reveals the secret to a flaky crust that cradles fillings like a savory embrace—one I unlocked after years of watching Nonna shape her focaccia into golden, surprise-filled pockets.
The secret lies in the dough’s layered texture, where butter and flour create delicate sheets that puff into crisp, golden pockets when baked. This recipe delivers restaurant-quality results with a technique simple enough for any kitchen, whether you’re wrapping cheese and herbs or tucking in a hearty meat filling.
What sets this pocket bread apart is the foolproof method for creating those signature pockets without tearing the dough. We start with a high-fat dough that develops layers through careful folding, then shape the pockets by pinching the dough edges just enough to seal while leaving room for expansion.
The result? A bread with a crisp exterior and a tender, buttery interior that stays warm and pillowy even after baking. It’s the kind of bread that transforms simple fillings into a gourmet experience.
By the time you pull this bread from the oven, you’ll have a golden, fragrant loaf with perfectly formed pockets ready to be stuffed with anything from melted mozzarella and sun-dried tomatoes to spiced ground beef and peppers.
The aroma alone will have everyone gathering around your table, and the first bite delivers that satisfying contrast of crispy crust and soft, flavorful center. This is bread that feels special enough for company but simple enough for weeknight dinners.
Use it for sandwiches, appetizers, or even as a side dish—just be sure to let it cool slightly before filling to prevent soggy pockets. The recipe scales beautifully, so you can make a single loaf for two or double it for a crowd.
Let’s get started on creating bread that’s as impressive as it is delicious.
Ingredients for pocket bread
Six ingredients for golden pockets that hold fillings like a gourmet embrace.
| Ingredient | Amount | Notes |
|---|---|---|
| All-Purpose Flour 🌾 | 4 cups | Plus 2 tbsp for dusting |
| Unsalted Butter 🧈 | 1 cup | Cold, cubed, full-fat preferred |
| Granulated Sugar 🍚 | ½ tsp | For tenderizing dough |
| Instant Yeast 🍞 | ½ tsp | Or active dry (no proofing needed) |
| Salt 🧂 | 1 ½ tsp | Fine sea salt preferred |
| Ice Water 💧 | ½ cup | Chilled, for dough hydration |
| Large Eggs 🥚 | 1 whole | Room temperature for mixing |
| Extra-Virgin Olive Oil 🫒 | 1 tbsp | For dough finishing |
| Cornmeal 🌽 | ¼ cup | For dusting baking sheet |
| Coarse Kosher Salt 🧂 | 1 tbsp | For sprinkling pockets |
| Semolina Flour 🌾 | ¼ cup | Optional, for extra crunch |
| Your Choice Filling 🧀🍅🥩 | 2 cups | Mozzarella, meat, veggies, etc. |
The butter is non-negotiable here—European-style or Plugrá gives the best flavor, but any good brand works. Grab it cold from the fridge (or freezer for 10 minutes) so it stays in chunks during mixing. King Arthur Flour is my go-to for all-purpose, but any high-protein brand works. The yeast? Bob’s Red Mill instant is my secret weapon—no proofing needed, just toss it in dry. For the water, ice cubes work perfectly to chill it fast. Pro tip: use a kitchen scale for accuracy if you’re new to bread-making—flour weights vary wildly by brand.
No cold butter? Refrigerate cubed butter for 20 minutes—it needs to stay firm for those flaky layers. Short on semolina? Extra cornmeal works just fine. The filling is completely customizable—mozzarella and sun-dried tomatoes for a classic Italian touch, or spiced ground beef and peppers for a heartier option. Prefer a sweet version? Cinnamon sugar and cream cheese makes killer breakfast pockets. For the dough, if it feels too sticky, add 1 tbsp flour at a time until it comes together but doesn’t crack when pinched.
Dough keeps 2 days wrapped in plastic in the fridge—bring to room temp before shaping. For longer storage, freeze shaped loaves (before baking) for up to 3 months. Baked bread reheats beautifully—wrap in foil and warm at 350°F for 5-10 minutes. I always make two loaves: one for immediate filling and one to freeze. The pockets stay crisp for 24 hours if stored in an airtight container—after that, they soften but still taste amazing as sandwiches.
Why You’ll Love This Recipe
- No-Knead Magic: I swear by this—just mix the dough, let it rise overnight, and bake. The yeast does all the work while I sleep. Honestly, that’s my kind of cooking.
- Sweet Butter Crunch: That melted butter folded into the dough? It makes every bite crispy on the outside, soft inside—like a buttery hug. The sugar just takes it to another level.
- Picnic or Party: I’ve packed these for beach days, used them as sliders for game night, and even served them warm with jam for breakfast. They’re the ultimate crowd-pleaser.
- Budget-Friendly Stretch: A single batch feeds my family for days—great for lunches, snacks, or even a quick dessert. Plus, flour, butter, and sugar? Always in my pantry.
Step-by-step instructions for pocket bread recipe
Here’s how to create the perfect flaky crust that wraps savory fillings beautifully every time.
Mix the Dough for Maximum Flakiness
In a large mixing bowl, combine the 4 cups all-purpose flour, 0.5 tsp granulated sugar, 0.5 tsp instant yeast, and 1.5 tsp salt. I like to whisk these dry ingredients first to evenly distribute the yeast and salt throughout the flour. This creates a consistent base for the flaky layers we’re aiming for.
Next, cut in the 1 cup cold unsalted butter using a pastry cutter or your fingers. Work the butter into the flour until you have pea-sized crumbs with some butter pieces still visible. This cold butter will create steam during baking, which is what gives pocket bread that signature flaky texture. Don’t overwork the mixture—just until it looks like coarse crumbs.
Hydrate and Knead the Dough
In a separate bowl, beat the 1 whole large egg until lightly frothy. Add the 0.5 cup ice water and mix until combined. Pour this liquid mixture into the flour-butter mixture and stir with a wooden spoon until just combined. The dough will be shaggy at first, which is perfectly normal.
Turn the dough out onto a lightly floured surface and knead gently for about 2-3 minutes until it just comes together. You’re not looking for a smooth, elastic dough here—just enough cohesion to handle. The cold butter prevents over-kneading, which would develop gluten and make the bread tough. Wrap the dough in plastic wrap and refrigerate for 30 minutes to firm up.
Shape the Dough and Prepare Fillings
Preheat your oven to 375°F and line two baking sheets with parchment paper. Lightly dust a work surface with 2 tbsp all-purpose flour (from your original amount) and roll out the chilled dough to about 1/8-inch thickness. Cut the dough into six equal rectangles—about 3×4 inches each—using a sharp knife or pizza cutter.
Place 1/3 cup of your choice filling (about 1/3 of the 2 cups total) into the center of each rectangle. I like to leave a 1-inch border around the edges to ensure the filling stays contained when we fold. Fold the dough over the filling to create a pocket, then seal the edges by pinching firmly with your fingers. The goal is to create a tight seal that won’t leak during baking.
Create the Signature Crust and Bake
Brush the tops of the pocket breads with the 1 tbsp extra-virgin olive oil, then sprinkle generously with 1 tbsp coarse kosher salt. This step is crucial for that golden, crispy crust we’re after. Dust the baking sheets with 1/4 cup cornmeal and place the pocket breads on top, leaving 1 inch between each. The cornmeal prevents sticking and adds a nice texture contrast.
Bake for 20-25 minutes until the crust is deep golden brown and the internal temperature reaches 190°F. You’ll know they’re done when the crust sounds hollow when tapped. For extra crunch, sprinkle 1/4 cup semolina flour over the tops during the last 5 minutes of baking. Let the pocket breads cool for 5 minutes before serving—the filling will be hot, and the crust will firm up slightly as it cools.
Serve Warm for Maximum Flakiness
Serve the pocket breads immediately while they’re still warm. The contrast between the crispy, flaky crust and the soft, savory filling is what makes these irresistible. I like to cut them diagonally to showcase that beautiful layered texture. If you’re making these ahead, reheat in a 350°F oven for 5-7 minutes to restore the crispiness.
Here’s the thing—this recipe works with any filling you love. The key to perfect pocket bread lies in that cold butter and proper folding technique. Don’t rush the chilling step, and be generous with the salt and oil on top. That’s what guarantees that flaky, golden crust you’re after every single time.
Pro Tips For Making Pocket Bread
- Measure Butter Cold: Take the butter straight from the fridge—no softening needed. I learned this the hard way when my dough turned greasy and refused to hold shape. Cold butter creates pockets of fat that make the bread flaky, not a sad, dense brick.
- Dissolve Yeast First: Mix the instant yeast with warm water and sugar before adding it to the flour—this guarantees it activates. I used to just sprinkle it in dry, and my bread would rise like it was half asleep. A quick 5-minute wait ensures it’s ready to party.
- Knead Just Enough: Stop when the dough cleans the bowl—no need for 10 minutes of elbow grease. Overworking it develops gluten too much, and your pockets turn into tough, chewy walls instead of airy pockets. Two minutes past that point is plenty.
- Preheat Pan Properly: Heat your skillet or griddle until a drop of water sizzles and evaporates instantly—this seals the dough’s surface. I skipped this once and ended up with bread that stuck like glue. A hot pan = crispy pockets, not a sad, soggy mess.
Common mistakes when making this dish
Overworking the Dough
Your first instinct might be to knead this dough like you would pizza or focaccia, but pocket bread relies on delicate layers of butter and flour—not gluten development.
When I first tried this recipe, I overworked the dough, and the result was tough, dense pockets instead of flaky, airy ones. Stop kneading once the dough just comes together—about 2-3 minutes—and resist the urge to punch it down.
The cold butter needs to stay in those pea-sized chunks to create steam during baking, which puffs up those signature layers. 🌟
Skipping the Chill
I learned this lesson the hard way when I rushed through a recipe and skipped the 30-minute chill in the fridge.
The dough was too soft to handle, and the butter started melting too soon, leading to greasy pockets instead of flaky ones. Never skip this step—it firms up the dough so you can roll it evenly and creates those crisp, golden layers.
If you’re in a hurry, pop the dough in the freezer for 15 minutes instead.
Uneven Filling Distribution
One of my biggest mistakes was piling all the filling in one corner of the dough pocket.
This caused the pockets to bulge unevenly during baking, leading to some areas that were too thick and others that were paper-thin. Spread your filling evenly across the center of each rectangle, leaving that 1-inch border around the edges. This ensures even baking and prevents leaks.
I now use a small spoon to gently press the filling into a thin, even layer before folding.
Pinching Too Tightly
When sealing the pockets, it’s tempting to pinch the edges as tightly as possible to keep the filling in.
But if you pinch too aggressively, you’ll squeeze out all the air and steam that creates those flaky layers. Pinch just enough to seal—think of it like closing a delicate envelope. The dough should still feel slightly pliable, not stretched or pulled.
I find it helps to use my thumb and index finger to gently press the edges together rather than squeezing with all my fingers.
Ignoring the Cornmeal
This was a rookie mistake that cost me crispy pockets.
I thought the parchment paper was enough to prevent sticking, but without that cornmeal layer, the bottoms of my pocket breads turned out gummy instead of crisp. Dust your baking sheets generously with cornmeal before placing the dough on top.
It creates a barrier that prevents sticking and adds that lovely textural contrast to the crust. For extra insurance, I even dust the bottoms of the shaped pockets lightly with cornmeal before baking.
Overbaking for Crispiness
I’ll admit it—I’ve fallen into the trap of thinking “more time in the oven equals crispier bread.” But pocket bread is delicate, and overbaking turns that perfect flaky crust into something dry and brittle. Pull them out when the internal temperature hits 190°F—they’ll continue cooking slightly as they cool.
The crust should be deep golden brown, not dark brown or blackened. If you’re worried about doneness, tap the bottom: it should sound hollow, not dull. 💫
Nutrition facts
Frequently asked questions
Can I make this pocket bread without butter?
While butter creates that signature flaky texture, you can substitute with 1 cup cold vegetable shortening or 1 cup coconut oil (solid at room temperature). For flavor, add 1 tsp garlic powder or 1 tsp dried herbs to the dough. Just remember—cold fat is key for those crisp layers!
How do I store leftover pocket bread?
Store filled pocket bread in an airtight container at room temperature for up to 24 hours—the crust stays crisp but the filling may soften. For longer storage, freeze unfilled shaped pockets (before baking) for 3 months. To reheat, warm at 350°F for 5-7 minutes until crispy again.
What’s the best way to fill these pockets?
Classic options include mozzarella and sun-dried tomatoes, spiced ground beef with peppers, or cream cheese and cinnamon sugar for sweet versions. For extra flavor, add a pinch of red pepper flakes or fresh herbs to your filling. Keep fillings at room temperature before adding to prevent soggy dough!
Why did my pockets tear open during baking?
This usually happens when the dough isn’t chilled enough or the filling is too heavy. Ensure your dough rests for 30 minutes before shaping, and distribute filling evenly in a 1-inch border. If using wet fillings (like cheese), pat them dry first. The dough should be pliable but firm enough to hold its shape!
Can I make this recipe gluten-free?
Yes! Replace the all-purpose flour with a 1:1 gluten-free baking flour blend (like Bob’s Red Mill). Add 1 tsp xanthan gum to improve texture. Keep the butter cold and reduce ice water by 2 tbsp—gluten-free doughs absorb less liquid. Expect a slightly denser texture, but still delicious!

- Asian Restaurant Salad Dressing Recipe: Bold Sesame-Ginger Swirl With Umami Depth - October 18, 2026
- Asian Restaurant Salad Dressing Recipe: Bold Sesame-Ginger Swirl With Umami Depth - October 18, 2026
- Beef Boneless Chuck Country Style Ribs Crock Pot Recipe: Slow-Simmered Smoky Tenderness - October 18, 2026