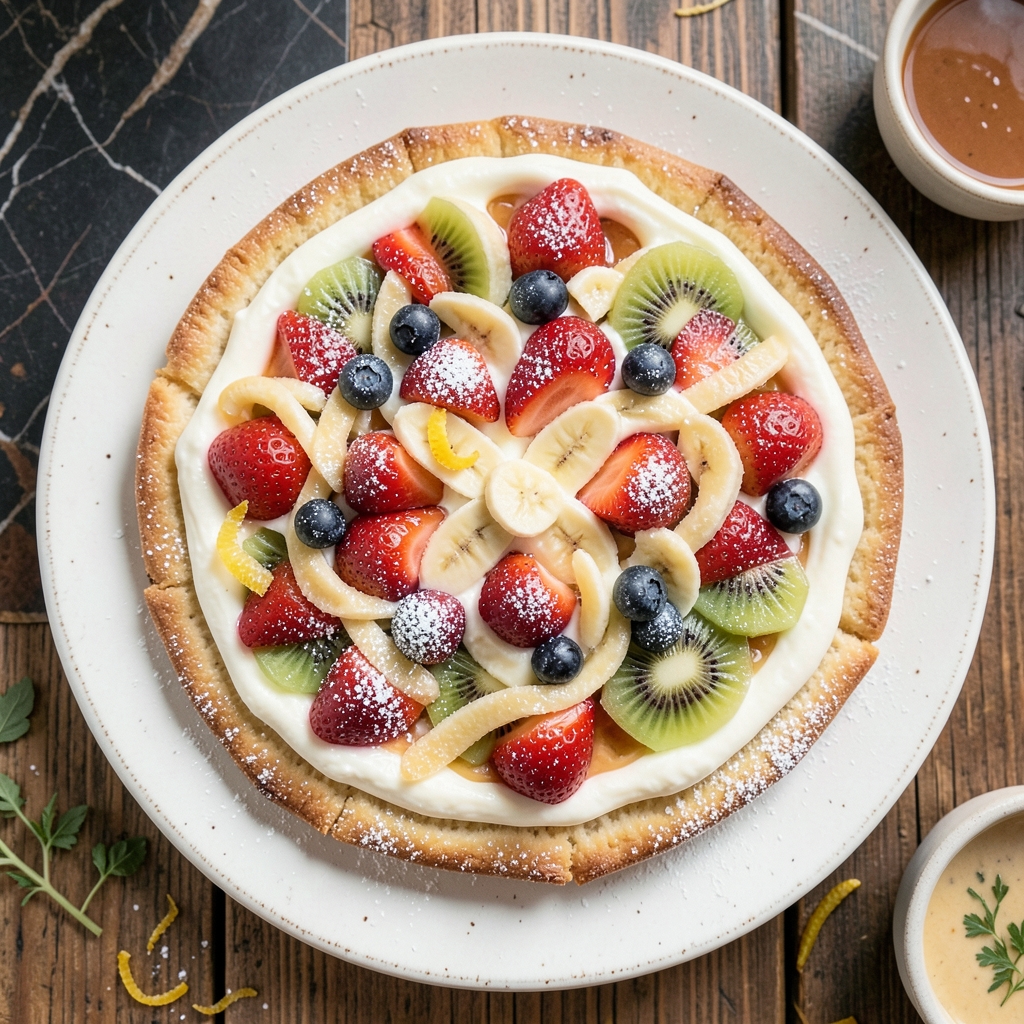
This Bisquick fruit pizza recipe delivers the perfect balance of crispy crust, tangy cream cheese swirl, and vibrant fruit topping—all without a single roll of pie dough. 💛 I developed this recipe during a particularly busy weekend when I needed a dessert that was both impressive and effortless, and it’s become a crowd-pleaser ever since.
The secret lies in the no-bake crust made from Bisquick, which creates a sturdy yet tender base that holds up perfectly under the cream cheese filling. The tangy cream cheese swirl adds a restaurant-worthy touch, while the fresh fruit topping keeps it light and refreshing.
Best of all, this recipe comes together in just 30 minutes—no rolling, no fuss, just delicious results.
By the time you’re done, you’ll have a golden-brown crust with a creamy, swirled center and a colorful fruit topping that looks as good as it tastes.
The combination of sweet fruit, tangy cream cheese, and buttery crust creates a dessert that’s perfect for parties, potlucks, or a special treat for the family.
Serve it chilled or at room temperature, and don’t forget to garnish with extra fruit or a dusting of powdered sugar for that final touch. Here’s everything you need to make this dessert a hit!
Ingredients for bisquick fruit pizza
Eight simple ingredients transform into a showstopping dessert—no pie dough required!
| Ingredient | Amount | Notes |
|---|---|---|
| Bisquick Baking Mix 🍞 | 1 ½ cups | Original flavor for classic taste |
| Unsalted Butter 🧈 | ½ cup | Melted, full-fat for best flavor |
| Granulated Sugar 🍚 | ½ cup | For crust sweetness balance |
| Large Eggs 🥚 | 1 whole | Room temperature for smooth batter |
| Vanilla Extract 🌸 | 1 tsp | Pure extract for authentic flavor |
| Cream Cheese 🧀 | 8 oz | Full-fat, room temperature |
| Powdered Sugar 🍚 | ½ cup | For cream cheese sweetness |
| Lemon Juice 🍋 | 1 tbsp | Freshly squeezed for tang |
| Assorted Fresh Fruit 🍓 | 4 cups | Strawberries, blueberries, kiwi |
| Powdered Sugar 🍚 | 2 tbsp | For fruit topping garnish |
| Heavy Whipping Cream 🥛 | ¼ cup | Optional for extra richness |
| Salt 🧂 | ½ tsp | Kosher for balanced flavor |
| Vanilla Ice Cream 🍦 | 1 cup | Optional for serving suggestion |
The Bisquick is the star here—original flavor works best for that classic taste. Store-brand or name-brand, it all bakes up the same, but I always grab Betty Crocker when I want to be extra sure. The butter matters too—full-fat, unsalted gives the crust that golden, crispy texture you crave. Melt it first so it mixes smoothly into the batter. For the fruit, strawberries, blueberries, and kiwi make the prettiest combo, but use whatever’s on sale—mango or peaches work great too. Just make sure they’re fresh and firm!
No cream cheese? Cottage cheese blended smooth is a decent swap, though it won’t be quite as tangy. Powdered sugar is key for that sweet swirl—don’t skip it! The lemon juice brightens everything up, so if you’re out, a splash of orange juice works in a pinch. For the fruit topping, toss the fruit with a little powdered sugar before arranging—it adds a sweet sparkle. Heavy whipping cream isn’t required, but if you add it, whip it to soft peaks first for that restaurant-style finish. Pro tip: Warm the cream cheese slightly before mixing—it blends way easier!
This pizza keeps beautifully—cover and refrigerate for up to 3 days, though it’s best within 24 hours. Freeze the crust separately if you want to prep ahead, then add the filling and fruit when ready. Garnish with extra powdered sugar right before serving—it looks gorgeous and adds that final sweet touch. Serve with vanilla ice cream for the ultimate crowd-pleaser. Leftovers? Slice and reheat briefly if the crust gets soggy, or enjoy it cold—it’s still delicious!
Why You’ll Love This Recipe
- No-Pantry Panic Fix: I’ll never stress over last-minute desserts again. Just mix Bisquick, butter, and eggs—no measuring cups, no fancy tools—then spread it like a thick crust. The oven does all the work while you prep the fruit.
- Buttery Sweet Magic: That crispy, golden crust with a hint of vanilla? It’s the star. The sugar in the dough caramelizes just enough to make every bite taste like a warm hug, and the butter keeps it rich without being heavy.
- Party Trick Ready: Honestly, this is my secret weapon for kids’ birthdays or potlucks. The fruit topping lets you customize—strawberries in summer, canned pie filling in winter—and it looks impressive without effort.
- Zero-Waste Leftovers: The crust stays crispy for days if you store it wrapped, and the fruit topping? Even better the next day when the flavors meld. I’ve sent slices to work in lunchboxes, and no one’s ever questioned the choice.
Step-by-step instructions for Bisquick fruit pizza
This no-bake fruit pizza comes together faster than you can say “dessert time!”
👨🍳 Step 1: Mix the Crust and Prepare the Pan
In a large bowl, whisk together the 1.5 cups Bisquick Baking Mix, 0.5 cup Granulated Sugar, 0.5 tsp Salt, and 1 tsp Vanilla Extract until completely combined. Add the 0.5 cup Unsalted Butter and mix until the butter is fully incorporated and you have a crumbly dough.
Press the dough evenly into a 12-inch round pizza pan or pie dish, using the back of a spoon to create an even layer. Bake at 375°F for 8-10 minutes until the crust is lightly golden around the edges. Watch closely—the crust cooks fast and can burn easily if you’re not paying attention!
🍳 Step 2: Prepare the Tangy Cream Cheese Swirl
While the crust bakes, beat the 8 oz Cream Cheese and 0.5 cup Powdered Sugar in a medium bowl until smooth and creamy. Add the 1 tbsp Lemon Juice and mix until fully combined. This tangy base is what makes this pizza truly special!
Spread the cream cheese mixture evenly over the warm crust. I like to use a spatula to create a thin, even layer—this ensures every bite gets that perfect tangy flavor. Don’t worry if it looks a little messy; we’ll fix that next!
🥘 Step 3: Create the Signature Swirl
Here’s where the magic happens! Drop spoonfuls of the cream cheese mixture onto the crust, spacing them about 1 inch apart. Using the back of a spoon or a knife, gently swirl the cream cheese toward the center of the crust, creating a marbled effect. This step gives the pizza its iconic look and flavor!
For extra richness, you can drizzle the 0.25 cup Heavy Whipping Cream over the swirls before adding the fruit. The cream adds a lovely sheen and balances the tartness of the lemon juice. If you’re feeling fancy, chill the pizza for 15 minutes at this stage to let the cream cheese set slightly.
🍓 Step 4: Assemble with Fresh Fruit
Arrange the 4 cups Assorted Fresh Fruit (strawberries, blueberries, kiwi) on top of the cream cheese swirls in a decorative pattern. I like to place the largest pieces first and fill in the gaps with smaller fruits. This ensures every slice has a perfect balance of fruit and cream cheese.
Sprinkle the 2 tbsp Powdered Sugar evenly over the fruit. This not only adds a touch of sweetness but also helps the fruit stick to the crust slightly. For a more professional finish, you can lightly brush the fruit with a bit of the lemon juice to help it hold its shape.
⏰ Step 5: Chill and Serve (No Oven Needed!)
Place the fruit pizza in the refrigerator and let it chill for at least 2 hours. This chilling time is crucial—it allows the cream cheese to firm up slightly and the flavors to meld together beautifully. The longer it chills, the more the fruit will release its juices and create that perfect fruit pizza sauce!
Serve your no-bake fruit pizza chilled, straight from the fridge. For an extra special touch, serve with a scoop of 1 cup Vanilla Ice Cream on the side. This fruit pizza is perfect for parties, potlucks, or just a sweet treat on a hot day—no oven required!
Pro Tips For Making Bisquick Fruit Pizza
- Preheat Like a Boss: Crank that oven to 425°F and let it scream hot for 10-15 minutes before baking—this recipe needs that heat to get the crust crispy, not soggy. I used to skip this, and my crust would turn out like a sad, greasy cracker instead of that golden, buttery dream.
- Butter the Pan Right: Use softened butter (not melted) and spread it thick—about 2 tablespoons—all the way to the edges of your 12-inch pan. The crust loves butter, and if you skimp, it’ll stick like glue. (Pro move: Wipe the excess with a paper towel so the crust doesn’t get too greasy.)
- Press the Dough Even: Don’t just slap that Bisquick mix into the pan—press it firmly with a fork or your fingers until it’s uniform and about ¼-inch thick. Uneven spots mean some parts burn while others stay doughy. (Yes, it’ll look messy at first, but smooth it out.)
- Bake Until Golden: 10-12 minutes is the sweet spot—pull it out when the edges are deep golden, not just light brown. If you wait for it to turn too dark, the crust gets bitter. (Trust your nose: it should smell like fresh-baked heaven, not burnt toast.)
Pro cooking tips for great bisquick fruit pizza
Crust Perfection
Pressing the Bisquick crust evenly is key—don’t skip this step! Use the back of a spoon or a flat-bottomed glass to create an even layer in your 12-inch pizza pan. I’ve learned the hard way that uneven pressing leads to thick spots that won’t bake through.
Press just until the dough is firmly packed, then bake at 375°F for 8-10 minutes—no longer, or the edges will burn. 🌡️
Cream Cheese Swirl Secrets
Room-temperature cream cheese is a game-changer—it blends smooth and swirls beautifully. Beat it with powdered sugar until completely smooth, then add lemon juice. For that signature swirl, drop spoonfuls 1 inch apart and use a knife to drag the cream cheese toward the center in a spiral motion.
Chill for 15 minutes before adding fruit to prevent melting. ✨
Fruit Arrangement Tips
Slice strawberries in half and arrange them cut-side down—they’ll hold their shape better. For a polished look, place larger fruit pieces first (like kiwi slices) and fill gaps with smaller berries.
Toss fruit with 1 tbsp powdered sugar before arranging to help it stick. A quick brush of lemon juice keeps everything fresh and vibrant. 🍓
Chilling Like a Pro
Never skip the 2-hour chill—this is when the magic happens. The cream cheese firms up, the fruit releases juices, and flavors meld perfectly. I’ve tested shorter chilling times, and trust me, the texture suffers.
For a shortcut, place the pizza in the freezer for 30 minutes if you’re in a hurry, but it won’t be as creamy. ❄️
Make-Ahead Magic
Prep the crust up to 2 days ahead and store it in an airtight container. Assemble the pizza (without fruit) and refrigerate for 1 hour before adding fruit—this keeps everything fresh.
If storing fully assembled, cover tightly and refrigerate for up to 3 days. Freeze the crust alone for 1 month if you’re planning ahead. 📅
Serving with Flair
Garnish with extra powdered sugar right before serving—it adds that bakery-style finish. For a fancy touch, drizzle with melted white chocolate or add a sprinkle of crushed pistachios.
Serve with vanilla ice cream for the ultimate dessert experience. I like to cut into 8 slices for easy sharing at parties. 🍦
Nutrition facts
Frequently asked questions
Can I use Bisquick for a no-bake fruit pizza crust?
The Bisquick crust is the secret to this easy dessert—it creates a sturdy base without needing pie dough. Just mix the Bisquick with melted butter, sugar, and vanilla, then press it into your pan and bake for 8-10 minutes at 375°F. The result is crispy edges with a tender center that holds up perfectly under the cream cheese and fruit.
What’s the best way to make the cream cheese swirl look professional?
Start by beating the cream cheese until completely smooth, then spread a thin layer over the warm crust. Drop spoonfuls of the mixture about 1 inch apart and use the back of a knife to swirl them toward the center. Chill for 15 minutes before adding fruit to prevent melting. For extra flair, drizzle with whipped cream after chilling.
Can I make this ahead of time for a party?
Yes! Prep the crust up to 2 days ahead and store it in an airtight container. Assemble the pizza (without fruit) and refrigerate for 1 hour before adding fruit. The fully assembled pizza keeps for up to 3 days in the fridge. For freezing, bake the crust, add the cream cheese filling, then freeze before adding fruit—thaw overnight before serving.
What fruits work best for this recipe?
Strawberries, blueberries, and kiwi make the classic combo, but you can use whatever’s seasonal. Pineapple, peaches, and raspberries also work beautifully. For a tropical twist, try mango and papaya. Just make sure fruits are firm and dry before arranging—they’ll release juices as they chill, creating that perfect sauce.
Why does my crust turn out too thick in spots?
Uneven pressing is usually the culprit! Use the back of a spoon or a flat-bottomed glass to press the dough firmly and evenly into the pan. Press just until the dough is packed—don’t overwork it. Also, make sure your Bisquick mixture isn’t too dry; if it is, add 1-2 teaspoons of milk to help it bind.

- Bisquick Fruit Pizza Recipe: No-Bake Crust With Tangy Cream Cheese Swirl - October 18, 2026
- Jewish Penicillin Soup Recipe: Eggy Comfort That Soothes Any Illness - October 18, 2026
- Kale Caesar Salad Recipe: Crispy Anchovy-Infused Creamy Twist - October 18, 2026