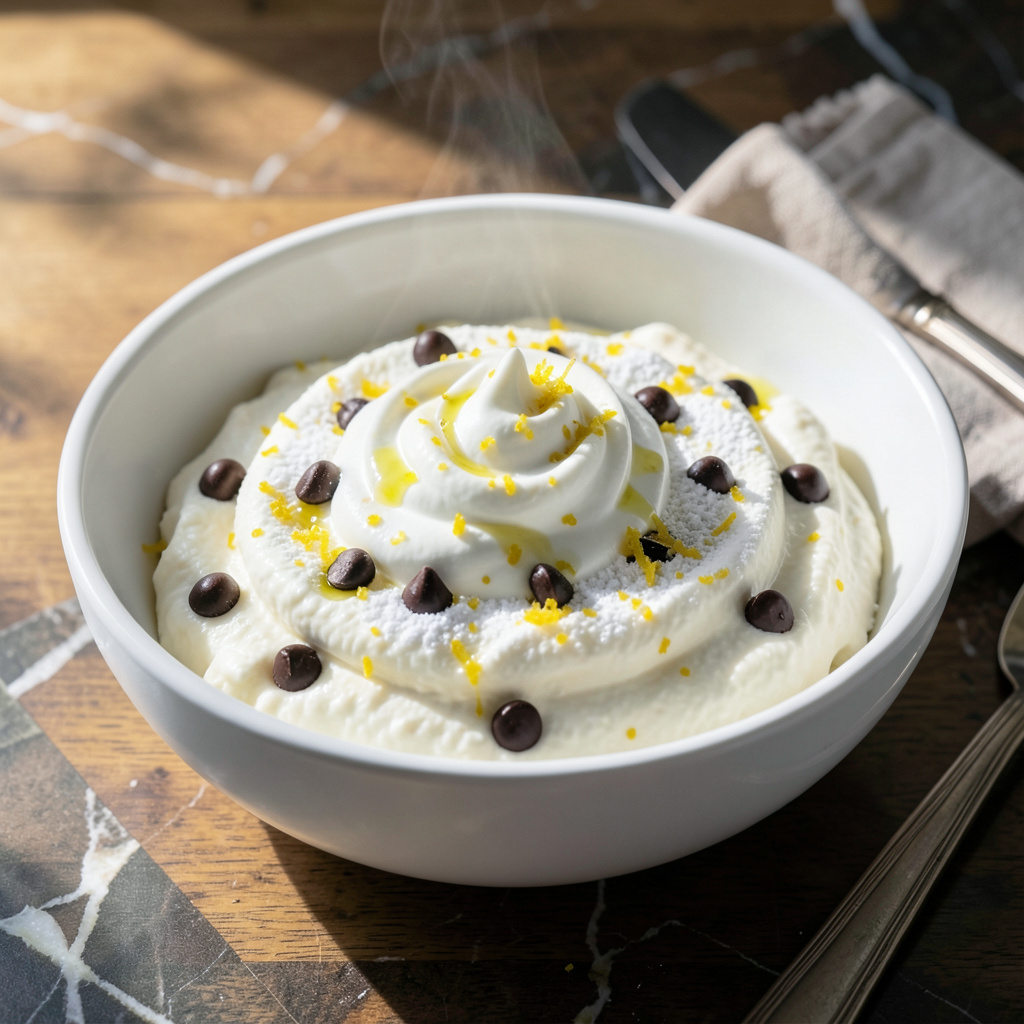
This ricotta filling transforms desserts with its smooth, creamy texture and mild sweetness. I developed this recipe to work in cannoli, cakes, or as a fruit dip.
With just a few pantry staples, you can create a versatile spread that holds its shape while remaining light. The secret is proper draining and gentle mixing.
Ingredients for Ricotta Cheese Filling
Eight ingredients build this smooth, versatile dessert filling for cannoli or cakes.
| Ingredient | Amount | Notes |
|---|---|---|
| Whole Milk Ricotta Cheese 🧀 | 2 cups | Well-drained overnight |
| Powdered Sugar 🍚 | ¾ cup | Sifted for smoothness |
| Vanilla Extract 🌿 | 2 tsp | Pure, not imitation |
| Heavy Cream 🥛 | ¼ cup | Whipped to soft peaks |
| Lemon Zest 🍋 | 1 tsp | From 1 medium lemon |
| Mini Chocolate Chips 🍫 | ½ cup | Optional for cannoli |
| Ground Cinnamon 🌶️ | ¼ tsp | For warm spice note |
| Salt 🧂 | ¼ tsp | Fine sea salt preferred |
[recipeingredientscaler]
The ricotta is everything here. Whole milk only—low-fat makes it grainy. BelGioioso or Calabro are the brands I reach for at Whole Foods or Trader Joe’s. Drain it overnight in a fine-mesh strainer over a bowl (don’t skip this—it’s the difference between watery and luscious). The powdered sugar should be fresh and lump-free, so give it a quick sift even if the bag says it’s pre-sifted.
No whole milk ricotta? Part-skim in a pinch, but texture suffers. Swap chocolate chips for chopped nuts or citrus zest if you want a different vibe. The vanilla can be vanilla bean paste for speckles. Heavy cream not handy? Full-fat Greek yogurt works, but the filling will be denser. Skip the cinnamon if you’re using this for savory applications (it’s weirdly delicious in stuffed shells).
Keeps 3-4 days in the fridge—press plastic wrap right on the surface to prevent a skin. Freezing? Not recommended—ricotta separates. Best made fresh, but you can prep the drained ricotta a day ahead.
Why You’ll Love This Recipe
- 5-Minute Mix: I just dump everything in a bowl—ricotta, powdered sugar, vanilla, cream, zest—and stir. No cooking, no fuss.
- Velvety Dream: The heavy cream makes it so smooth, and that lemon zest? Brightens every bite.
- Fills Anything: I’ve stuffed cannoli, layered lasagna, even topped toast with this. Endless options.
- Keeps Well: Honestly, it tastes even better the next day. I always make extra for leftovers.
Step-by-Step Instructions for Ricotta Cheese Filling
This comes together in minutes with just a bowl and a spoon—no mixer required.
Step 1: Prepare the Base Ingredients
Start by ensuring the 2 cups Whole Milk Ricotta Cheese is well-drained. I like to place it in a fine-mesh strainer lined with cheesecloth and let it sit for 10 minutes to remove any excess liquid. This step is crucial for achieving that smooth, creamy texture without any graininess.
In a large mixing bowl, add the drained ricotta along with the 0.75 cup Powdered Sugar. Using a silicone spatula, fold them together gently until the sugar is fully incorporated and the mixture looks uniform. The powdered sugar dissolves easily, so no need for vigorous mixing.
Step 2: Add Flavor Enhancers
Next, stir in the 2 tsp Vanilla Extract, 1 tsp Lemon Zest, 0.25 tsp Ground Cinnamon, and 0.25 tsp Salt. I always use pure vanilla extract here—it makes a noticeable difference in the depth of flavor.
The lemon zest adds a bright, citrusy note that balances the sweetness, while the cinnamon gives it a warm, cozy undertone. Taste the mixture at this point and adjust the seasoning if needed, though the salt should be just enough to enhance all the flavors without tasting salty.
Step 3: Incorporate the Whipped Cream
In a separate bowl, whip the 0.25 cup Heavy Cream to soft peaks. This means the cream should hold its shape briefly when the whisk is lifted, but the tips should still fold over slightly. Over-whipping here will make the filling too dense, so keep an eye on it.
Gently fold the whipped cream into the ricotta mixture using the spatula. The goal is to keep as much air in the cream as possible, so use a light hand and stop folding as soon as everything is combined. The filling should look light and fluffy, with a smooth, spreadable consistency.
Step 4: Add the Final Touch
Finally, fold in the 0.5 cup Mini Chocolate Chips. These add little bursts of chocolate in every bite, making the filling extra special. If you’re using this for cannoli or a dessert that requires a smoother texture, you can skip the chocolate chips, but I love the extra flavor and texture they bring.
Give everything one last gentle stir to distribute the chocolate chips evenly. The filling is now ready to use. It should be creamy, slightly sweet, and full of balanced flavors that work beautifully in desserts like cannoli, tarts, or even as a dip for fresh fruit.
Pro Tips For Making Ricotta Cheese Filling
- Drain the Ricotta: I learned this the hard way—whole milk ricotta holds a ton of moisture, so let it drain in a fine-mesh strainer for 10-15 minutes before mixing. It’ll thicken the filling and prevent a watery texture.
- Chill Before Whipping: After combining the ricotta, powdered sugar, and cream, refrigerate the mixture for 20 minutes before whipping. Cold ingredients hold air better, giving you a lighter, fluffier filling.
- Skip the Granulated Sugar: Powdered sugar dissolves instantly and avoids that gritty texture granulated sugar leaves behind—especially crucial since ricotta filling is often no-bake.
- Fold In Zest Last: Lemon zest can turn bitter if mixed too early, so fold it in at the very end. This keeps the flavor bright and fresh, not overpowering.
Best Sauces and Condiments for ricotta cheese filling
Fruit Compotes
Pair this filling with a warm berry compote for cannoli or layer in cakes. Simmer 2 cups mixed berries with ¼ cup sugar and 1 tbsp lemon juice for 10 minutes. The tartness cuts through the richness beautifully. 💫
Chocolate Drizzle
Melt ½ cup dark chocolate with 2 tbsp heavy cream for a glossy ganache to drizzle over filled pastries. Use Ghirardelli 60% cacao for best results—it’s my go-to at Stop & Shop. The bittersweet notes elevate the sweet ricotta perfectly.
Honey and Nuts
Drizzle with local Boston honey and sprinkle with toasted pistachios for texture. I love the crunch against the creamy filling. A pinch of flaky sea salt on top makes all the flavors pop.
Citrus Glaze
Whisk 1 cup powdered sugar with 2 tbsp orange juice and 1 tsp zest for a bright glaze. This works especially well for cake fillings. The citrus adds a refreshing contrast.
Caramel Sauce
Store-bought caramel sauce (I like Stonewall Kitchen) adds a buttery depth. Warm it slightly and drizzle over the filling in parfaits or as a dip. The salted versions balance the sweetness.
Spiced Syrup
Simmer 1 cup maple syrup with 1 cinnamon stick and 2 whole cloves for 5 minutes. Strain and cool before using. This New England touch reminds me of Nonna’s kitchen. 🍁
Nutrition Facts
Frequently Asked Questions
Can I use part-skim ricotta instead of whole milk?
You can, but whole milk ricotta gives the creamiest texture. Part-skim may make the filling slightly grainier. For best results, stick with whole milk as specified.
How long can I store this filling?
It keeps well in the fridge for 3-4 days. Press plastic wrap directly on the surface to prevent a skin from forming. Avoid freezing, as ricotta can separate.
What if my filling turns out too thick?
Add a splash of heavy cream or milk, a tablespoon at a time, until you reach the desired consistency. Stir gently to maintain the smooth texture.
Can I make this filling ahead of time?
Yes! Prepare the drained ricotta up to a day in advance. Complete the filling 1-2 hours before use for best texture.

- Asian Restaurant Salad Dressing Recipe: Bold Sesame-Ginger Swirl With Umami Depth - October 18, 2026
- Asian Restaurant Salad Dressing Recipe: Bold Sesame-Ginger Swirl With Umami Depth - October 18, 2026
- Beef Boneless Chuck Country Style Ribs Crock Pot Recipe: Slow-Simmered Smoky Tenderness - October 18, 2026