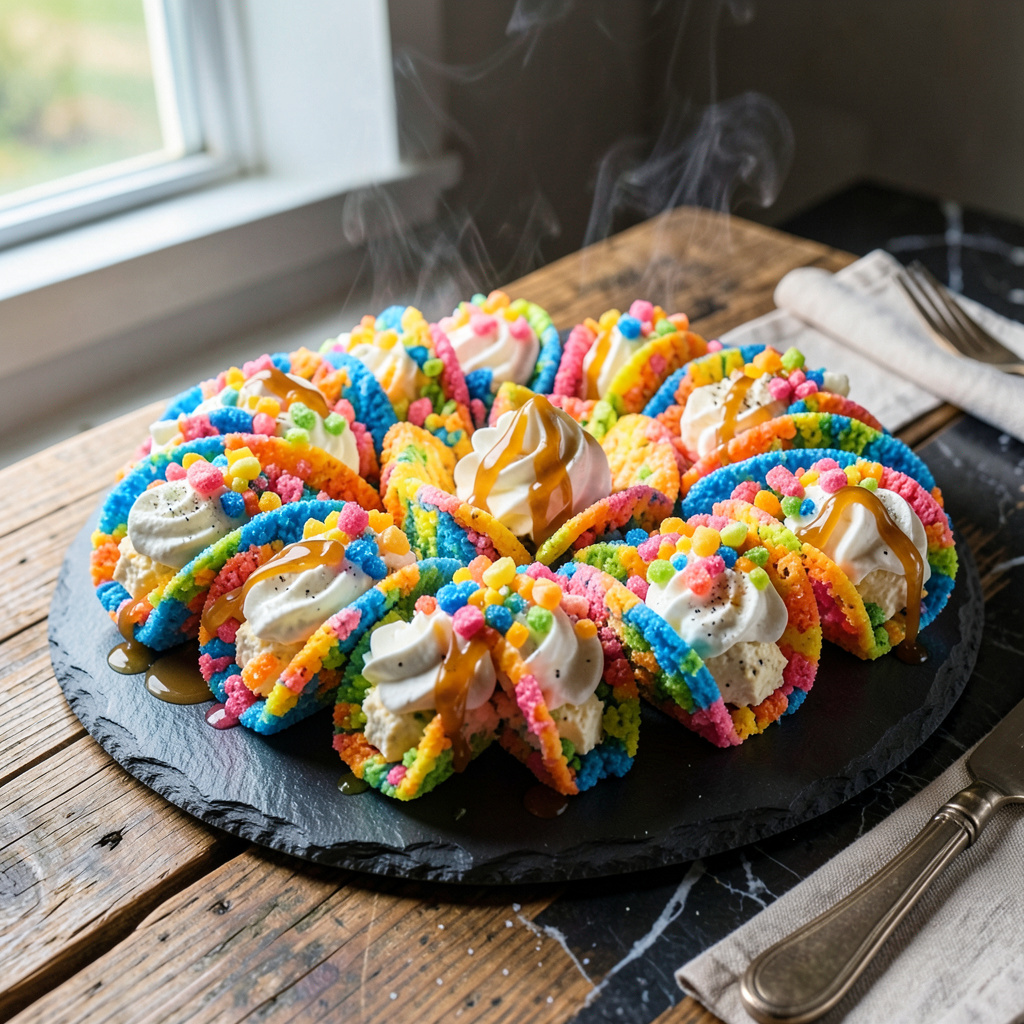
Confession: I never imagined cheesecake could wear a taco shell, but the result is downright addictive. The creamy filling meets a crunchy pebble crust, delivering pure joy.
Between you and me, the assembly is foolproof—just blend, chill for 30 minutes, then wrap. You’ll serve a dessert that feels like a celebration in every bite.
Ingredients for Fruity Pebbles Cheesecake Tacos
Grab these sweet, crunchy components and you’ll have unforgettable cheesecake tacos ready fast.
| Ingredient | Amount | Notes |
|---|---|---|
| cream cheese 🧀 | 16 oz | Full-fat, room temperature |
| granulated sugar 🍬 | ½ cup | Fine for smooth texture |
| vanilla extract 🌿 | 2 tsp | Pure, real vanilla |
| heavy whipping cream 🥛 | ¾ cup | Cold, for airy filling |
| sour cream 🥛 | ¼ cup | Tangy, adds body |
| Fruity Pebbles cereal 🍚 | 2 cups | Crushed, forms taco shells |
| unsalted butter 🧈 | 4 tbsp | Melted, binds crust |
| small corn tortillas 🌮 | 8 pieces | Soft, easy to fold |
| powdered sugar 🍬 | 2 tbsp | Light dusting, optional |
| fresh strawberries 🍓 | ½ cup | Fresh, sliced for topping |
| whipped cream 🍦 | ½ cup | Stiff peaks, airy |
| lime zest 🍋 | 1 tsp | Adds bright flavor |
The crunchy shell starts with Fruity Pebbles. Trader Joe’s carries the freshest batch, but any grocery aisle works—just check the colors are bright, not stale. I like to buy a big box from Costco when I’m planning a party; the volume saves trips. For the dairy, grab a full‑fat Philadelphia cream cheese; the richness makes the filling silky and buttery.
No Fruity Pebbles? rainbow rice krispies give a similar pop, just halve the sugar. If you’re out of corn tortillas, soft flour tortillas work fine—warm them briefly to stay pliable. Want a lighter crust? Swap butter for coconut oil (use the same amount) for a subtle tropical note. For dairy‑free, replace cream cheese with silken tofu blended with a splash of maple syrup.
These tacos keep well—store assembled shells in an airtight container for 3 days. The cheesecake filling stays fresh in the fridge up to 5 days; give it a quick stir before serving. Freeze any leftovers (minus toppings) for 2 months and thaw overnight.
Step-by-Step Instructions for Fruity Pebbles Cheesecake Tacos
Everything you need is laid out, so let’s build these unforgettable sweet‑savory tacos.
Step 1: Create Crispy Pebbles‑Coated Taco Shells
I start by melting the 4 tbsp unsalted butter in a small saucepan over low heat. While it liquefies, I crush the 2 cups Fruity Pebbles cereal in a zip‑top bag until it resembles coarse sand, then stir the butter through until evenly coated.
Next I brush the butter‑Pebbles mixture onto both sides of each of the 8 pieces small corn tortillas. I arrange them on a parchment‑lined sheet pan and slide them into a preheated oven at 350°F for 5‑7 minutes, watching until the edges turn golden brown and crisp.
Step 2: Prepare the Creamy Cheesecake Filling
While the shells bake, I whip the 16 oz cream cheese in a stand mixer on medium speed until silky. I gradually add the 0.5 cup granulated sugar and 2 tsp vanilla extract, scraping the bowl sides until the mixture is smooth and slightly glossy.
I fold in the 0.25 cup sour cream, the 0.75 cup heavy whipping cream, and the 1 tsp lime zest. The batter should become airy, with a texture that spreads like a soft ribbon; I test by lifting the paddle—it should fall back in smoothly.
I transfer the cheesecake filling to a chilled bowl and let it rest in the refrigerator for 10 minutes, allowing it to set just enough to hold its shape when spooned.
Step 3: Assemble the Tacos with Fruit and Whipped Cream
I carefully open each baked tortilla, which now resembles a delicate taco shell. I spoon roughly 2 tablespoons of the chilled filling onto the center, spreading it gently so the edges stay visible for contrast.
I scatter the 0.5 cup fresh strawberries, sliced thin, over the filling, then crown each taco with a dollop of 0.5 cup whipped cream. The whipped cream should hold stiff peaks, providing a lofty, airy finish.
A final flourish of 2 tbsp powdered sugar is sifted across the tops, creating a snow‑kissed appearance that hints at the sweet decadence within.
Step 4: Finish and Serve the Delightful Tacos
I let the assembled tacos stand for 2 minutes, just enough for the flavors to meld without the shells losing crispness. This brief pause also lets the strawberry juices mingle with the lime‑brightened filling.
Serve the tacos immediately on a platter; each bite delivers a creamy cheesecake core against a crunchy Pebbles‑infused shell, punctuated by fresh berry acidity and a whisper of citrus. I promise you’ll savor the surprising harmony of textures.
Common Mistakes When Making This Recipe
Overmixing
I’ve learned that whipping the cream cheese too long creates a grainy texture. Keep the mixer on medium speed just until the mixture is smooth and glossy—about 2 minutes. Overmixing incorporates too much air, and the filling can collapse when the tacos sit. 😅
Shell Softening
If you brush too much butter on the tortillas, the shells become soggy instead of crisp. I recommend using exactly 4 tbsp butter for all eight shells and spreading it thinly. A quick 5‑minute bake at 350°F locks in crunch. 🔥
Filling Temperature
Adding cold cream cheese straight from the fridge can cause lumps. Let the 16 oz cheese sit at room temperature for at least 30 minutes before mixing. Warm cheese blends evenly, giving the filling that silky mouthfeel we love. 💡
Butter Ratio
Some try swapping butter for oil, but the oil won’t bind the Pebbles properly, leading to shells that fall apart. Stick with the 4 tbsp unsalted butter or, if you need a dairy‑free option, use the same amount of coconut oil for a firmer crust.
Topping Timing
Adding strawberries before the shells fully cool can make the fruit release juice, sogging the taco. I wait until the shells are at room temperature, then layer the 0.5 cup sliced strawberries. This keeps the fruit fresh and the crunch intact.
Storage Mistakes
I’ve seen people store the assembled tacos in a sealed bag, which traps steam and softens the shells. Keep shells separate in an airtight container and add the cheesecake filling just before serving. This way the crunch stays perfect even after a few hours.
Nutrition Facts
Frequently Asked Questions
How long should I bake the taco shells?
Bake the tortillas at 350°F for 5‑7 minutes until the edges turn golden brown and crisp. Keep an eye on them; they can go from perfect to burnt in seconds. Let the shells cool on a rack before filling.
Can I make the crust gluten‑free?
Yes! Swap regular corn tortillas for a gluten‑free variety and keep the same butter‑Pebbles coating. The cereal itself is naturally gluten‑free, so the crunch stays intact. Just follow the same 4 tbsp butter ratio and bake as usual.
What’s the best way to keep the shells crunchy after assembling?
To preserve crunch, store the baked shells in an airtight container separate from the filling. Assemble the tacos right before serving, and add strawberries only after the shells reach room temperature. This prevents fruit juice from softening the crust.
How do I avoid a grainy cheesecake filling?
Grainy texture happens when the cream cheese is too cold or over‑mixed. Let the 16 oz cheese sit at room temperature for at least 30 minutes before beating, and mix on medium speed just until smooth.
Is there a dairy‑free version of these tacos?
For a dairy‑free twist, replace cream cheese with an equal amount of silken tofu blended with 2 tbsp maple syrup and a splash of lemon juice. Use coconut oil instead of butter for the crust. The result is a lighter taco that still holds its shape.

- Asian Restaurant Salad Dressing Recipe: Bold Sesame-Ginger Swirl With Umami Depth - October 18, 2026
- Asian Restaurant Salad Dressing Recipe: Bold Sesame-Ginger Swirl With Umami Depth - October 18, 2026
- Beef Boneless Chuck Country Style Ribs Crock Pot Recipe: Slow-Simmered Smoky Tenderness - October 18, 2026