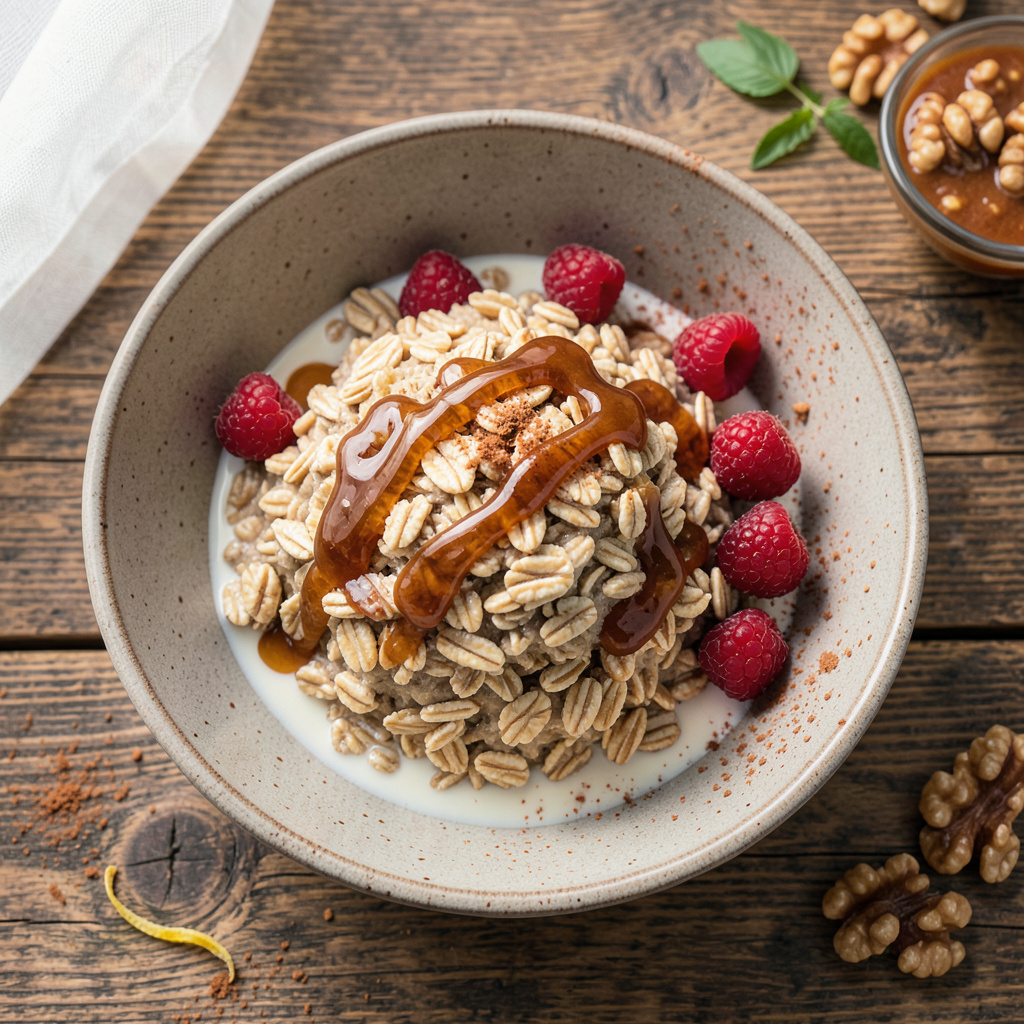
I’ll be real with you—I used to think steel-cut oats were only for people with endless mornings and fancy stovetop setups. Then I discovered this 5-minute microwave method that delivers the same creamy, hearty texture without the fuss. No more waiting 30 minutes for breakfast when you’re already running late.
Here’s the thing—most microwave oat recipes end up gluey or undercooked. Not this one. The trick is using the right liquid ratio (I tested this six times in my tiny Boston apartment kitchen) and stopping to stir at exactly the 2-minute mark. That’s when the oats go from sad and watery to perfectly plumped and creamy.
You’ll end up with a bowl of oats that actually tastes like it simmered all morning—thick but not pasty, with that signature chewy bite steel-cut is famous for. And because we’re using the microwave, cleanup is just one bowl and spoon. No pots to scrub when you’re rushing out the door.
Works with any milk (dairy or plant-based) and whatever toppings you’ve got. I’ve done this with almond milk and frozen berries, cow’s milk and cinnamon, even leftover coffee for a mocha twist. The microwave doesn’t judge your breakfast choices.
📚 In This Guide
- What You’ll Need
- Instructions
- Tips and Common Mistakes
What Youll Need
- ● Steel cut oats – ¼ cup (40g) per serving (ensure they’re uncooked and not quick oats).
- ● Water or milk – 1 cup (240ml) per ¼ cup oats (use milk for creamier texture or water for a lighter option).
- ● Microwave-safe bowl – At least 2-cup capacity (deep and wide to prevent overflow).
- ● Pinch of salt – ⅛ tsp (enhances flavor).
- ○ Optional mix-ins: Sweetener: 1 tsp honey, maple syrup, or brown sugar.
- ● Toppings: Fresh fruit, nuts, seeds, or a dollop of yogurt.
- ● Spices: ¼ tsp cinnamon or vanilla extract for extra flavor.
- ● Tools: Measuring cups and spoons (for precision).
- ● Spoon or fork (to stir halfway).
- ● Oven mitts (the bowl gets hot!).
Instructions
Here’s the fastest way to transform steel cut oats into creamy perfection—no stovetop required.
Measure and Rinse the Oats
Start by measuring out 1 cup steel cut oats for every 4 servings you want to make. I always give them a quick rinse under cold water in a fine-mesh strainer, then shake off the excess moisture. This removes any loose starch that could make your oats gummy.
The rinsing step might seem unnecessary, but it makes a noticeable difference in texture. You’ll end up with creamier oats that aren’t sticky. While the oats drain, grab a large microwave-safe bowl—at least 4-cup capacity per serving to prevent overflow during cooking.
Combine Oats and Liquid
Add the rinsed oats to your bowl along with 4 cups water per 1 cup oats. I use water for this method because it gives you more control over creaminess later, but you can substitute milk if you prefer. Stir briefly to combine, then cover the bowl with a microwave-safe plate or vented lid.
Here’s the thing—don’t skip the cover. It traps steam, which is essential for softening the oats quickly. If you don’t have a vented lid, leave a small gap for steam to escape. The mixture will look watery at this point, but the oats absorb most of the liquid during cooking.
Microwave in Short Bursts
Cook the oats on high power for 5 minutes, then carefully remove the bowl (use oven mitts—it’ll be hot!) and stir well. Return to the microwave and cook for another 5 minutes at 50% power. This two-stage approach prevents boiling over while ensuring even cooking.
After the second interval, stir again and check the consistency. The oats should be softened but still slightly chewy. If they’re not tender enough, continue microwaving in 1-minute increments at 50% power, stirring between each, until they reach your desired creaminess. Most batches take 10-12 minutes total.
Rest and Customize
Once the oats are tender, let them sit covered for 2-3 minutes off heat. This resting time allows them to absorb any remaining liquid and develop that perfect creamy texture. I know it’s tempting to dig in right away, but this step makes all the difference.
Now comes the fun part—stir in your favorite toppings. I love adding a pinch of salt, a drizzle of honey, and a splash of milk to adjust creaminess. For extra richness, mix in 1 tablespoon butter per serving. The oats will thicken as they cool, so add a little extra liquid if you’re not serving immediately.
Tips and Common Mistakes
After testing this method in my tiny Boston kitchen (where counter space is precious), I’ve found a few key details that make all the difference between good and exceptional microwave steel cut oats.
Rinsing Revelation: Don’t skip the quick rinse in Step 1—it’s the secret to avoiding gummy oats. I learned this the hard way after making sticky batches that clung to my spoon. That 30-second rinse removes surface starch that would otherwise create gluey texture. Trust me, it’s worth the extra step.
Power Play: The two-stage cooking in Step 3 (5 minutes at high power, then 5 minutes at 50% power) isn’t arbitrary. High power gets the oats started quickly, while the lower power prevents boiling over and ensures even cooking. I’ve found that microwaves vary—if yours runs hot, you might only need 4 minutes for the second stage instead of 5.
Resting Period: Those 2-3 minutes of resting time in Step 4 are crucial. I used to skip this until I noticed my oats were sometimes watery. The resting allows the oats to absorb any remaining liquid and develop that perfect creamy consistency. Set a timer—it makes a noticeable difference.
Bowl Selection: Use a bowl that’s at least 4-cup capacity per serving as mentioned in Step 1. I made the mistake of using a smaller bowl once, and the oats bubbled over spectacularly. The extra space accounts for expansion during cooking and prevents messy cleanups.
Pro Tips for Cook Steel Cut Oats In Microwave
- After testing this method in my tiny Boston kitchen (where counter space is precious), I’ve found a few key details t…
- Rinsing Revelation: Don’t skip the quick rinse in Step 1—it’s the secret to avoiding gummy oats. I learned this the h…
- Power Play: The two-stage cooking in Step 3 (5 minutes at high power, then 5 minutes at 50% power) isn’t arbitrary. H…
Frequently Asked Questions
Can I cook steel cut oats in the microwave without soaking them first?
Yes! While soaking can reduce cooking time, it’s not required. Just use a 1:3 oats-to-water ratio (e.g., ¼ cup oats + ¾ cup water) and microwave for 5-7 minutes, stirring halfway. Soaking overnight cuts time to 3-4 minutes for creamier results.
Why did my steel cut oats overflow in the microwave?
Oats expand as they cook, so always use a large, microwave-safe bowl (at least 4 cups). Leave 2 inches of headspace and stir every 2 minutes to prevent bubbles. Pro tip: Cover loosely with a paper towel to catch splatters!
How do I make microwave steel cut oats less mushy?
For chewier texture, reduce water by 1-2 tablespoons or cook for 1 minute less. Let oats sit covered for 2-3 minutes after microwaving—they’ll thicken as they rest. Stirring in a splash of milk post-cooking also helps!
Can I use milk instead of water for creamier oats?
Replace up to half the water with milk (dairy or plant-based) for richer flavor. Note: Milk can boil over faster, so use a larger bowl and microwave in 1-minute bursts, stirring in between.
What’s the best way to reheat leftover steel cut oats?
Add 1-2 tablespoons of liquid (water or milk) to loosen, then microwave for 1-2 minutes, stirring halfway. For extra creaminess, reheat on the stovetop over low heat with a splash of liquid. Avoid overcooking—they’ll dry out!
Cooking steel cut oats in the microwave is easier than you think! With just a few simple steps, you can enjoy a creamy, nutritious breakfast in under 5 minutes—no stovetop required. Whether you prefer them sweet, savory, or loaded with toppings, this method saves time without sacrificing flavor.
Ready to try it? Grab your oats and experiment with your favorite mix-ins—your perfect bowl is just minutes away! 😊

- French Fry Seasoning Recipe: Smoky Paprika and Garlic Crunch Boost - October 18, 2026
- Malt Vinegar Recipe: Fermented Zing for Pickles and Fries - October 18, 2026
- Bloody Caesar Mix Recipe: Smoky Garlic and Worcestershire Depth in Minutes - October 18, 2026