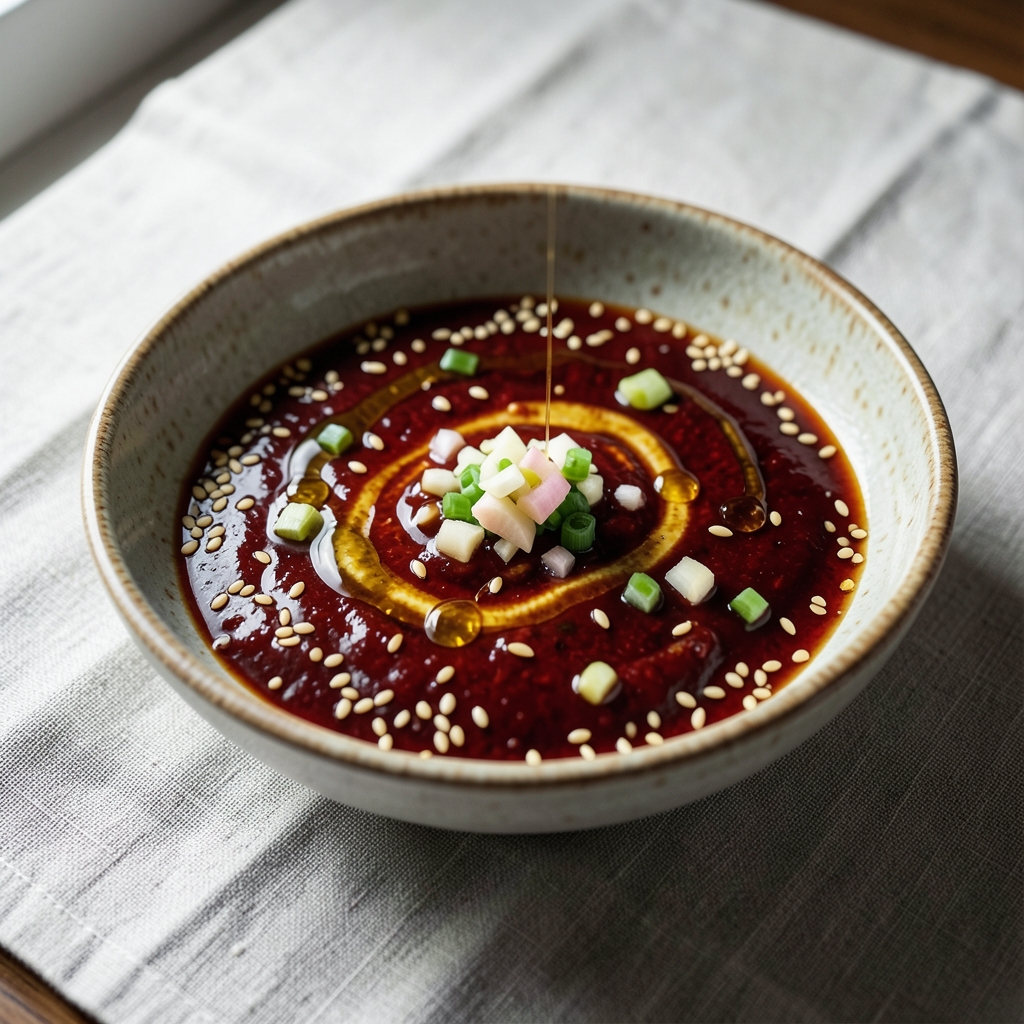
This umami sauce transforms ordinary stir-fries into restaurant-worthy meals with just a drizzle—no fancy ingredients, just deep, savory magic. 💛 I first made this while craving that rich, meaty flavor without actual meat, and it became my secret weapon for adding complexity to everything from noodles to grilled chicken.
The beauty of this sauce lies in its simplicity: just a few pantry staples simmered down into a glossy, glossy glaze that clings to food like a flavor bomb.
No fermenting required—just 20 minutes of hands-off cooking that delivers professional-level depth. It’s the kind of sauce that makes you go back for seconds, even when you’re not hungry.
What you’ll end up with is a versatile glaze that’s perfect for stir-fries, dipping spring rolls, or even marinating proteins. The sauce starts thick and glossy, then thins slightly when tossed with food, creating that perfect balance of stickiness and shine.
Trust me, once you try it, you’ll never reach for store-bought again.
Make a double batch—this sauce keeps for weeks in the fridge and only gets better as flavors meld. Whether you’re feeding a crowd or just treating yourself, this is the one sauce that’ll make every bite taste like a little victory. Let’s get cooking!
Ingredients for umami sauce
Pantry staples that pack a punch—just 10 ingredients for restaurant-worthy umami magic.
| Ingredient | Amount | Notes |
|---|---|---|
| Soy Sauce 🍶 | ½ cup | Light or dark variety preferred |
| Hoisin Sauce 🍶 | ¼ cup | For sweet-savory depth |
| Sesame Oil 🫒 | 1 tbsp | Toasted sesame oil for aroma |
| Rice Vinegar 🍶 | ¼ cup | White or seasoned |
| Garlic Cloves 🧄 | 4 cloves | Minced for aromatic punch |
| Fresh Ginger 🌿 | 1 ½ tbsp | Grated, for zesty kick |
| Honey 🍯 | 1 tbsp | Or maple syrup for vegan |
| Sesame Seeds 🌾 | 1 tbsp | Toasted for garnish |
| Red Chili Flakes 🌶️ | ½ tsp | Adjust for heat preference |
| Salt 🧂 | ½ tsp | Kosher or sea salt |
The soy sauce is your umami anchor—Kikkoman or Lee Kum Kee are my go-tos, but any good-quality light or dark will work. Hoisin sauce adds that sweet, fermented depth, and you’ll find it in the Asian foods aisle at Trader Joe’s or Whole Foods. Fresh ginger and garlic are non-negotiable here; the jarred minced stuff just doesn’t cut it. For ginger, grab a small knob—about 2 inches—and grate it fresh. Toast your sesame seeds in a dry pan for 30 seconds until fragrant—that’s the secret to extra flavor. If you’re short on time, pre-toasted sesame seeds from the bulk bin work too.
No hoisin? Substitute with 1 tbsp soy sauce plus 1 tsp molasses for a quick fix. Swap honey for maple syrup if you’re vegan, or agave for a neutral sweetness. The sesame oil is where the magic happens—Kadoya is my favorite brand, but any toasted sesame oil will do. No toasted oil? Regular sesame oil plus a pinch of smoked paprika mimics the flavor. Chili flakes can be swapped for Sichuan peppercorns (toasted and crushed) for a numbing heat. The sauce thickens as it cools, so if it’s too thin, simmer for 2-3 more minutes—or thin with a splash of water or broth if it’s too thick.
This sauce keeps for 3-4 weeks in the fridge, sealed in a jar. The flavors get even better after a day or two—trust the process. For long-term storage, freeze in ice cube trays and pop out single servings. A drizzle over stir-fries, noodles, or grilled meats transforms everything. Double the batch—you’ll want it on hand. The sesame seeds? Save a few for garnish—they add crunch and visual appeal. Store any leftover seeds in a cool, dark place for up to 6 months.
Why You’ll Love This Recipe
- Pantry Magic: I swear by this sauce because it lives in my fridge permanently—no shopping trips, just soy, hoisin, and a splash of vinegar. The moment I taste those toasted garlic cloves hitting the sesame oil, I’m hooked. Honestly, it’s the kind of thing you’ll make just to drizzle on eggs or noodles because it’s that good.
- Umami Bomb: That deep, savory punch? All the garlic and hoisin working together—it’s like a flavor explosion in your mouth. One taste and you’ll understand why people go nuts for soy sauce, but this version? It’s next-level, with that little sesame oil kick that makes it sing.
- Weeknight Swiss Army: Drizzle it on stir-fries, toss it in ramen, or slather it on grilled chicken—this sauce is my secret weapon for busy nights. Between us, it’s the only thing that makes my kids actually finish their veggies. (Yes, even on a Tuesday night.)
- Lasts Forever: Make a double batch and thank me later—this stuff keeps for weeks in the fridge. I’ve had it sitting there for months, and it’s still ridiculously good. Plus, it’s dirt cheap to make, so you’re basically getting gourmet flavor for pennies.
Step-by-step instructions for umami sauce
This sauce is your flavor powerhouse—simple to make, packed with depth, and ready in minutes.
🍳 Step 1: Sauté Aromatics Until Fragrant
Heat a small saucepan over medium heat. Add the 1 tbsp sesame oil and let it warm for 30 seconds until shimmering but not smoking. Add the 4 cloves minced garlic cloves and 1.5 tbsp grated fresh ginger, stirring constantly for 1-2 minutes until they become golden and fragrant.
Here’s the thing—don’t walk away. Garlic and ginger burn faster than you think. You’ll know it’s ready when the aroma fills your kitchen and the edges just start to turn golden. This step builds the aromatic foundation of your sauce, so take your time.
🥘 Step 2: Combine Wet Ingredients
Reduce heat to low and add the 0.5 cup soy sauce, 0.25 cup hoisin sauce, 0.25 cup rice vinegar, and 1 tbsp honey to the pan. Stir everything together and let it simmer gently for 3-4 minutes until the mixture begins to thicken slightly and the raw vinegar smell dissipates.
I like to taste at this stage—it should be salty, sweet, and tangy with a hint of umami. If it’s too thin, simmer another 30 seconds to let the liquid reduce. This is where all the flavors start to marry, so don’t rush this part.
⏰ Step 3: Season and Finish Cooking
Add the 0.5 tsp salt and 0.5 tsp red chili flakes, stirring well to combine. Let the sauce simmer for another 2 minutes until it reaches your desired consistency—it should coat the back of a spoon but still be pourable. If it thickens too much, add 1-2 tablespoons of water to loosen it.
Real talk: this sauce tastes even better after it cools slightly and all the flavors have time to meld. The chili flakes add just a hint of heat without overpowering the umami depth. Taste again and adjust seasoning if needed—sometimes you need a touch more soy sauce for saltiness or a splash more vinegar for brightness.
👨🍳 Step 4: Garnish and Store
Remove the sauce from heat and stir in the 1 tbsp sesame seeds. Let it sit for 1 minute so the seeds toast slightly in the residual heat. This adds a beautiful nutty crunch and visual contrast to the smooth sauce.
Transfer the sauce to a clean jar or container and let it cool completely. It’ll thicken even more as it cools, which is perfect for dipping or glazing. Store in the refrigerator for up to 2 weeks—it actually improves with age as the flavors deepen. When ready to use, give it a quick stir and warm gently if needed.
Pro Tips For Making Umami Sauce
- Toast the Garlic: Smash those garlic cloves flat first, then sear them in a dry pan for 30 seconds until golden—not brown. This caramelization adds depth that raw garlic can’t match, and it prevents that bitter aftertaste that ruins the sauce. (Yes, even if you’re impatient like me.)
- Simmer Slow and Low: After combining your sauce, reduce heat to a gentle simmer and let it bubble for 5 minutes. This isn’t the time to rush—it lets flavors meld instead of separating or burning. I learned this the hard way when my sauce split into oily layers.
- Balance the Vinegar: Add rice vinegar last and taste as you go—even a teaspoon too much can make the sauce taste sharp. If it’s too tangy, a pinch of sugar or a splash of hoisin will smooth it out. (Your future self will thank you.)
- Swap Sesame Oil Late: Stir in sesame oil off the heat or at the very end—it burns fast and turns bitter. A single teaspoon is enough; more will overpower. I was skeptical until I tried it—now I never add it early.
Essential equipment for umami sauce
Small Saucepan
I reach for my 3-quart stainless steel saucepan—it’s the perfect size for this sauce. The flat bottom ensures even heat distribution, preventing hot spots that could burn your aromatics.
I love the All-Clad Stainless Steel Saucepan for its durability and heat control, but any 3-quart pan with a lid will work. Just make sure it’s not nonstick, as those can react with acidic ingredients like vinegar over time. 🍳
Fine-Mesh Strainer
A fine-mesh strainer is essential if you’re using jarred minced garlic or ginger. I keep one from OXO Good Grips in my kitchen for this exact purpose—it removes any unwanted pulp while letting the flavorful juices through.
This step ensures your sauce stays silky smooth, especially if you’re serving it as a dipping sauce. Trust me, the difference is noticeable! 🌿
Wooden Spoon
My nonna’s wooden spoon is my go-to for stirring this sauce. Wood is gentle on the pan and won’t scratch the stainless steel like metal utensils can. Plus, it’s heat-resistant, so you can leave it in the pan while simmering without worrying about melting handles.
If you don’t have a wooden spoon, a heatproof silicone spatula works too—just avoid plastic, which can melt or leach chemicals when exposed to high heat. 🥄
Small Mixing Bowl
For grating fresh ginger and mincing garlic, I use a small glass mixing bowl—it’s stable and easy to clean. If you’re prepping ahead, this is where I’ll toss the grated ginger and minced garlic before adding them to the pan.
A sharp chef’s knife and microplane are must-haves here; I swear by the Mercer Culinary Genesis for its precision. No food processor, please—the texture matters for that authentic umami punch. 🧄
Measuring Spoons
Precision is key with this sauce, so I rely on stainless steel measuring spoons for the sesame oil, honey, and chili flakes. I keep a set from Weston in my kitchen—they’re durable and accurate. For the sesame seeds, I use the 1-tablespoon scoop to ensure even distribution.
Don’t skimp on this step; the balance of flavors depends on it. A pinch too much salt or oil can throw off the entire dish. 🥄
Glass Storage Jar
Once the sauce is ready, I transfer it to a glass jar with a tight-sealing lid—I use Le Parfait jars for their airtight seal. Glass preserves the flavor better than plastic and won’t absorb odors from the fridge.
Label it with the date so you can keep track of its freshness. Pro tip: Store it in the back of the fridge where it’s coolest, and give it a stir before each use to redistribute the sesame seeds. 💛
Nutrition facts
Frequently asked questions
Can I make this umami sauce without hoisin?
Yes! Hoisin adds sweet depth, but you can substitute with 1 tbsp soy sauce + 1 tsp molasses for a quick fix. For a more complex flavor, try 1 tbsp mushroom powder + 1 tsp brown sugar. The sauce will still deliver that rich umami punch—just with slightly different notes.
How do I adjust the heat level?
Start with the 0.5 tsp red chili flakes as written for a mild kick. For medium heat, add 1 tsp and for spicy, go up to 1.5 tsp. If you prefer numbing heat, swap chili flakes for 1/4 tsp toasted Sichuan peppercorns (crushed)—they add complexity without burning. Always taste first!
Can I use this sauce as a marinade?
This sauce works beautifully as a marinade for chicken, shrimp, or tofu. Let proteins marinate for 30-60 minutes (longer for tougher cuts like beef). For extra tenderness, add 1 tbsp cornstarch to thicken it before marinating. The umami flavors will penetrate perfectly, creating restaurant-quality dishes.
Why does my sauce look too thin?
Sauces naturally thicken as they cool, but if it’s still too thin after simmering, reduce it by 1-2 minutes longer on low heat. For immediate thickening, mix 1 tsp cornstarch with 1 tbsp cold water, stir into the sauce, and simmer for 30 seconds until glossy. Avoid adding flour—it can make the sauce cloudy.
What’s the best way to reheat leftover sauce?
Gently warm in a small saucepan over low heat for 1-2 minutes, stirring constantly. Never microwave—it can make the sauce watery. For best results, reheat just until warmed through, then stir in a pinch of sesame seeds** to restore freshness. The flavors stay vibrant this way!

- Teriyaki Dry Rub Recipe: Umami-Packed Flavor Without the Mess - November 9, 2026
- Calamari in Tomato Sauce Recipe: Crispy Squid with Bright, Acid-Balanced Flavors - November 9, 2026
- Restaurant Style Home Fries Recipe: Crispy Potato Wedges With Herb-Infused Oil - November 9, 2026