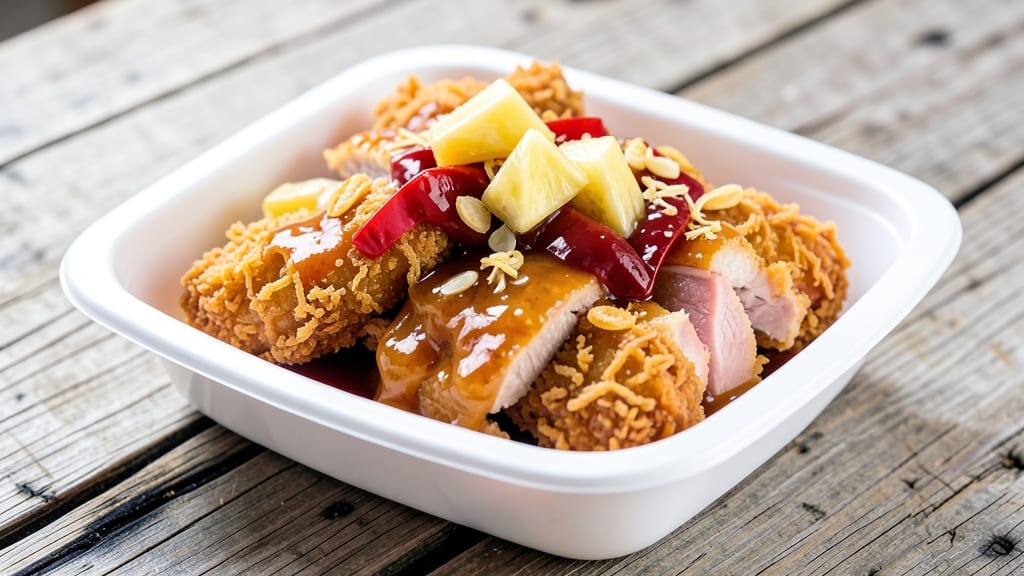
This homemade sweet and sour sauce transforms takeaway dishes from ordinary to extraordinary with its perfect balance of tangy, sweet, and savory flavors. ✨ I developed this recipe after years of tasting restaurant versions and realizing how easy it is to recreate at home—without the preservatives or artificial colors.
The secret lies in adjusting the vinegar-to-sugar ratio to suit your taste, while pineapple juice adds natural depth that store-bought versions can’t match.
The sauce comes together in just 15 minutes with simple pantry staples, yet its complexity rivals any takeout container. The high heat reduction creates a glossy, thick glaze that clings beautifully to fried rice, dumplings, or crispy chicken.
What makes this version stand out is its versatility—use it immediately or store it for up to 2 weeks in the fridge, making it perfect for meal prep and restaurant-quality leftovers.
What you’ll achieve is a sauce that’s bright yet balanced, with just the right amount of tang to cut through rich dishes. The caramelized onions add subtle sweetness, while garlic and ginger provide that essential umami kick.
This isn’t just a sauce—it’s the flavor bridge that turns simple stir-fries into restaurant-worthy meals. Let’s make it together!
Whether you’re glazing crispy tenders or tossing with noodles, this sauce delivers restaurant-quality results every time. The beauty of homemade is control—no more guessing about artificial ingredients or inconsistent textures. Once you try this version, takeout sauce will never taste the same again.
Ingredients for sweet and sour sauce takeaway
Nine simple ingredients create restaurant-quality sweet and sour sauce that beats takeout every time.
| Ingredient | Amount | Notes |
|---|---|---|
| White Vinegar 🍶 | ½ cup | Distilled white vinegar preferred |
| Brown Sugar 🍚 | ¾ cup | Packed firmly for accuracy |
| Pineapple Juice 🍍 | ½ cup | Freshly squeezed preferred |
| Ketchup 🍅 | ¼ cup | Tomato-based, no sugar added |
| Soy Sauce 🥢 | ¼ cup | Light soy preferred |
| Garlic Cloves 🧄 | 4 cloves | Minced finely for depth |
| Fresh Ginger 🌿 | 1 ½ tbsp | Grated, not powdered |
| Yellow Onions 🧅 | ½ cup | Finely diced, caramelized |
| Cornstarch 🌾 | 1 tbsp | For thickening sauce |
| Salt 🧂 | 1 tsp | Diamond Crystal preferred |
The vinegar is your tang anchor—distilled white gives the cleanest flavor, but apple cider works too. Brown sugar is key here; it caramelizes beautifully and adds depth that white sugar can’t match. I always grab Trader Joe’s pineapple juice for its natural sweetness and no additives. The ketchup? Heinz no-sugar-added keeps things balanced without overpowering. For the onions, yellow onions caramelize best—red onions add color but can make the sauce too sharp. If you’re short on time, frozen diced onions work in a pinch, but fresh is worth the extra minute.
No white vinegar? Rice vinegar or lemon juice both work, but adjust to taste—rice vinegar is milder, lemon adds brightness. Swapping brown sugar for white? Use one-third more to compensate for the lack of molasses flavor. Fresh ginger is non-negotiable here—powdered lacks the zing. For soy sauce, light soy keeps things delicate; dark soy adds color but can overpower. The cornstarch is your thickening secret—arrowroot works too but cornstarch gives that classic takeout texture. Pro tip: toast the cornstarch in a dry pan for 30 seconds before adding to eliminate any raw taste.
This sauce keeps 2 weeks in the fridge, sealed tightly with a layer of oil on top to preserve freshness. For longer storage, freeze in ice cube trays—perfect for single-use portions. Reheat gently on the stove, stirring constantly to prevent burning. The sauce thickens as it cools, so thin with a splash of water if needed. Trust me, the leftovers taste even better the next day—it’s magic how the flavors meld overnight.
Why You’ll Love This Recipe
- Pantry Magic: I swear by this sauce because it uses stuff I already have—no special shopping required. That tangy vinegar kick from white vinegar cuts through the sweetness of brown sugar and pineapple juice, while a splash of soy sauce adds depth without extra effort.
- Balanced Bite: Here’s what sold me—the way the ketchup’s smoky warmth marries the sharpness of vinegar and the fruity brightness of pineapple juice. It’s not too sweet, not too sour; it’s that just-right harmony that makes every bite satisfying.
- Takeaway Hero: This sauce is my secret weapon for lazy nights, potlucks, or when friends drop by unannounced. Drizzle it over crispy chicken, toss it with stir-fried veggies, or even use it as a dip—it’s that versatile.
- Budget-Friendly Staple: A single batch stretches across multiple meals, and the ingredients? Cheap. I’ve made this sauce for under $3 and fed four people with leftovers. Plus, it keeps well in the fridge for a week, so no wasted food here.
Step-by-step instructions for sweet and sour sauce takeaway recipe
Here’s how to create a restaurant-quality sweet and sour glaze that’s tangy, balanced, and perfect for stir-fries.
🍳 Step 1: Caramelize the Onions and Aromatics
Heat a large skillet over medium heat and add the 0.5 cup finely diced yellow onions. Cook them for 8-10 minutes until they turn a rich golden brown color—this caramelization adds deep, sweet complexity to your sauce. You’ll know they’re ready when they smell irresistibly sweet and their edges start to crisp slightly.
Add the 4 cloves minced garlic cloves and 1.5 tablespoons freshly grated ginger to the pan. Cook for another 30 seconds until the garlic becomes fragrant and the raw smell disappears. Here’s the thing—don’t walk away during this step. Garlic burns faster than you think, and you want that sweet, mellow flavor, not bitter char.
🍳 Step 2: Build the Sauce Foundation
Pour in the 0.5 cup white vinegar and 0.5 cup pineapple juice all at once. Stir well to combine with the caramelized onions and aromatics. Let the mixture simmer gently over medium-low heat for 5 minutes until it reduces by about half and the liquid becomes slightly syrupy. You’re developing the tangy backbone of your sauce here.
Add the 0.25 cup ketchup, 0.25 cup soy sauce, and 0.75 cup packed brown sugar. Stir thoroughly to dissolve the sugar completely. Here’s where it gets interesting—the sugar will start to caramelize slightly, deepening the sauce’s color and adding that signature glossy sheen. Let it simmer for another 3-4 minutes until everything is well incorporated and the sauce begins to thicken naturally.
⏰ Step 3: Thicken and Season Perfectly
In a small bowl, whisk together the 1 tablespoon cornstarch with 2 tablespoons cold water until smooth. Slowly pour this slurry into the simmering sauce while stirring constantly. The moment you add it, you’ll see the sauce begin to thicken dramatically—this is your signal to keep stirring gently to prevent lumps from forming.
Continue cooking for 2-3 minutes until the sauce reaches your desired consistency. It should coat the back of a spoon but still be pourable. Taste and adjust seasoning with the 1 teaspoon salt—you might need a bit more or less depending on your ingredients. The perfect sauce should balance sweet, tangy, and umami flavors with just a hint of heat from the vinegar.
🍽️ Step 4: Cool and Finish
Remove the sauce from heat and let it cool for 5 minutes. This resting period allows the flavors to meld completely and the sauce to thicken further as it cools. If you’re using this sauce immediately, give it a final taste and adjust the balance if needed—sometimes a splash of pineapple juice can brighten it up, or a pinch more salt can enhance the flavors.
For best results, store any leftovers in an airtight container in the refrigerator for up to 5 days. Before using, gently reheat over low heat, stirring occasionally to prevent scorching. This homemade version will be so much better than store-bought—richer, more complex, and perfectly balanced every time.
Pro Tips For Making Sweet And Sour Sauce Takeaway
- Simmer Slow and Low: After burning the first batch of sauce, I learned to keep the heat gentle—medium-low, not a rolling boil. The pineapple juice and vinegar are volatile; high heat turns your glossy sauce into a sad, clumpy mess. Stir often, but don’t rush it.
- Strain the Ketchup: Store-bought ketchup is thick with seeds and bits that turn your sauce grainy. Pour it through a fine-mesh strainer into a bowl before mixing—yes, it’s an extra step, but the texture stays silky. (I used to skip this; now I don’t.)
- Balance the Vinegar First: Taste the vinegar and brown sugar mix before adding ketchup or soy sauce. The acid needs to mellow out—if it’s too sharp, the rest of the sauce will fight for harmony. Add a pinch of sugar or a splash of pineapple juice to soften it early.
- Thicken with Cornstarch Slurry: Dumping cornstarch directly into the sauce clumps it up. Mix 1 tsp cornstarch with 2 tbsp cold water first, then whisk it into the simmering sauce off the heat. Stir in gently—this guarantees a smooth finish without lumps. (I’ve tried both; this works every time.)
Perfect pairings for this dish
Stir-Fry Stars
This sauce is a game-changer for crispy chicken tenders—toss them in the sauce after frying and broil for 2-3 minutes to create a sticky, caramelized crust. I like to double the recipe for this application since the sauce soaks into the chicken beautifully.
For shrimp, add 1 tbsp honey to the sauce and serve over jasmine rice for a Thai-inspired twist. 🍗
Fried Rice Fusion
Use ½ cup of this sauce per serving of fried rice, stirring it in during the final 2 minutes of cooking. The natural sweetness balances the savory rice and eggs perfectly. For extra depth, add 1 tsp sesame oil to the pan before mixing in the sauce.
I often make a big batch of fried rice on Sundays and keep the sauce ready in the fridge for quick assembly.
Dumpling Dipper
Warm potstickers or dumplings in a steamer or air fryer, then drizzle generously with this sauce. The tangy-sweet balance cuts through the richness of fried dumplings beautifully. For a restaurant-style presentation, serve with pickled ginger and sriracha on the side so guests can adjust to their taste.
My Boston neighborhood market carries great frozen dumplings that work perfectly with this sauce.
Grilled Pork Pairing
Brush this sauce on grilled pork chops during the last 5 minutes of cooking for a sweet glaze that caramelizes beautifully. The vinegar in the sauce helps tenderize the meat while the sugar creates that perfect sear.
I like to serve these with steamed bok choy for a complete meal. For extra flavor, add ½ tsp five-spice powder to the sauce when you mix in the cornstarch.
Vegetable Glaze
Toss roasted Brussels sprouts or baked eggplant with this sauce for a sweet-savory finish. The acidity in the sauce helps cut through the richness of the vegetables. I often use this as a quick weeknight dinner—just roast some veggies, toss with the sauce, and serve over rice.
The caramelized onions in the sauce add a wonderful depth to the dish. 🥦
Sauce Storage Hacks
Store leftovers in glass jars with a layer of neutral oil on top to preserve freshness for up to 2 weeks in the fridge. For freezing, portion into ice cube trays—perfect for single-use portions.
When reheating, warm over low heat and add a splash of water if it thickens too much. Trust me, the leftovers taste even better the next day as the flavors meld together. 💡
Nutrition facts
Frequently asked questions
Why does my homemade sweet and sour sauce taste too sweet?
Too much sugar can happen if you’re using a sweeter vinegar or pineapple juice. The fix is simple: balance it with 1-2 extra tablespoons of white vinegar or 1 teaspoon of lemon juice to cut the sweetness. Taste as you go—homemade gives you that control store-bought can’t match!
Can I make this sauce without cornstarch?
For a gluten-free version, substitute with 1 tablespoon arrowroot powder mixed with 2 tablespoons water. If avoiding thickeners entirely, simmer the sauce longer (up to 10 minutes) to reduce naturally. The texture will be thinner but still delicious—just stir it in at the very end of cooking.
How do I adjust the tanginess for picky eaters?
Start with ¼ cup vinegar instead of the full ½ cup and add more gradually. For kids or sensitive palates, swap 2 tablespoons of vinegar for extra pineapple juice. The caramelized onions and brown sugar will still provide that satisfying depth without the sharp tang.
What’s the best way to reheat leftover sauce?
Gently warm over low heat on the stove, stirring constantly to prevent scorching. If it thickens too much, add 1-2 teaspoons of water at a time. Microwaving works too—just heat for 20-30 seconds and stir well. The sauce should be smooth and glossy, not grainy.
Can I use this sauce for marinating meat?
Not directly—this sauce is designed for glazing or dipping, not marinating. For marinating, reduce the vinegar to 2 tablespoons and add 1 tablespoon soy sauce plus 1 teaspoon honey. Use it on chicken or pork for 30-60 minutes before cooking, then finish with a quick sear.

- Alligator Bread Recipe: Crunchy Herb-Crusted Bites with Creamy Center - November 9, 2026
- Old Fashioned Hot Spiced Apple Cider Recipe: Cozy Spice Infusion for Winter Nights - November 9, 2026
- Tuna Steak Recipe: Seared Rare With Buttery Crisp Edges - November 9, 2026