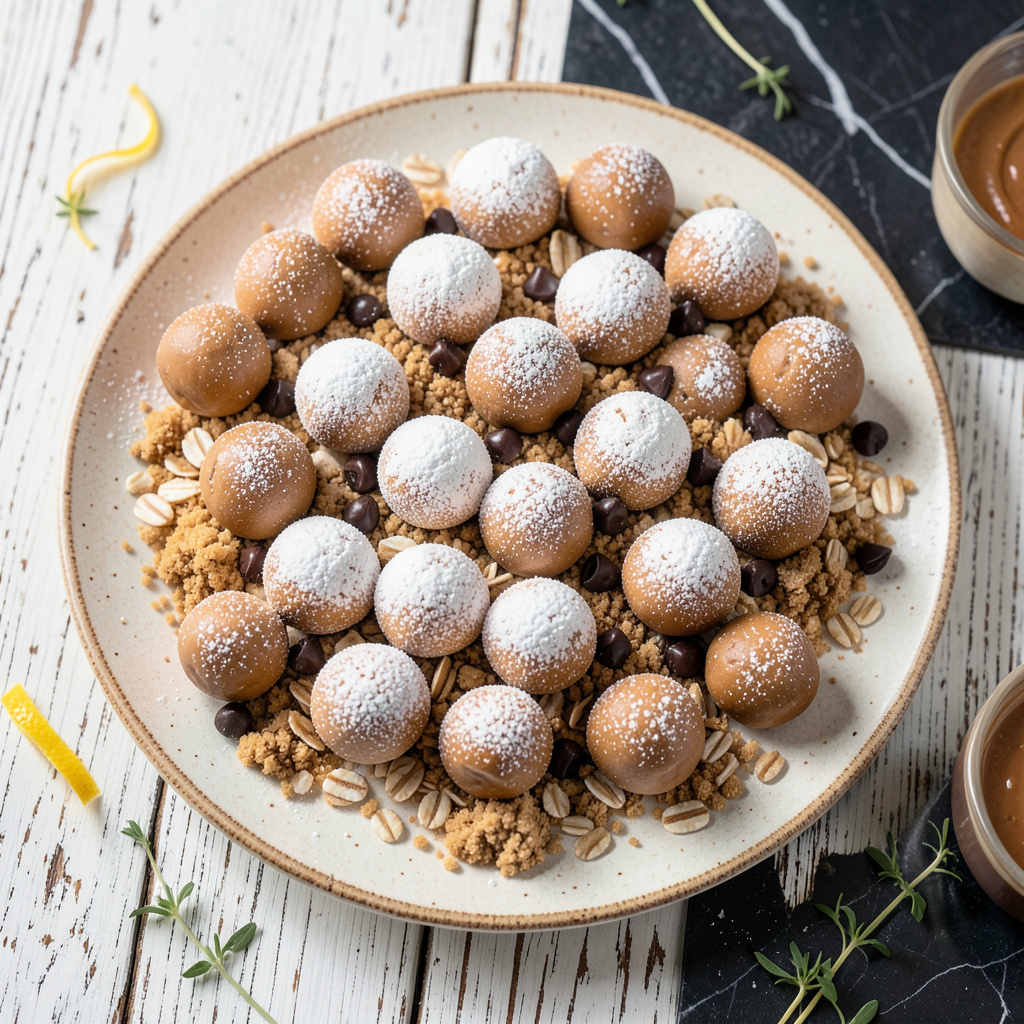
These no-bake treats combine creamy peanut butter and rich chocolate for an irresistible bite-sized dessert. I perfected this method after years of holiday baking, ensuring every batch turns out consistently delicious.
With no oven required, this recipe delivers restaurant-quality results in under 30 minutes. The secret is chilling the peanut butter mixture before dipping for perfectly smooth chocolate coatings.
Ingredients for Skippy Peanut Butter Balls
Nine simple ingredients transform into these restaurant-quality bite-sized no-bake delights.
| Ingredient | Amount | Notes |
|---|---|---|
| Creamy Peanut Butter 🥜 | 1 ½ cups | Skippy brand preferred for texture |
| Unsalted Butter 🧈 | ½ cup | Softened to room temperature |
| Powdered Sugar 🍚 | 2 ½ cups | Sifted for smooth mixture |
| Vanilla Extract 🌿 | 1 tsp | Pure vanilla for best flavor |
| Salt 🧂 | ¼ tsp | Fine grain for even distribution |
| Semi-Sweet Chocolate Chips 🍫 | 12 oz | High-quality for smooth melting |
| Paraffin Wax 🕯️ | ½ oz | Optional for firmer coating |
| Graham Cracker Crumbs 🍪 | ½ cup | Finely crushed for texture |
| Honey 🍯 | 2 tbsp | For natural sweetness |
| Rolled Oats 🌾 | ½ cup | Old-fashioned for chewiness |
The peanut butter is non-negotiable here—Skippy creamy delivers the perfect texture and sweetness balance every time. Most grocery stores carry it, but Costco offers the best bulk pricing. For the chocolate, Ghirardelli or Guittard semi-sweet chips melt smoothly without seizing. Avoid chocolate bars unless you’re tempering; they’re harder to work with for dipping.
No Skippy on hand? Jif creamy works in a pinch (though it’s slightly sweeter). For a firmer ball, chill the mixture 15 extra minutes. If avoiding paraffin wax, coconut oil at 1 tbsp per 12 oz chocolate helps set the coating. Rolled oats can be swapped for quick oats, but texture will be slightly less distinct.
Store in an airtight container between layers of parchment paper. Keeps at room temperature for 5 days, in the fridge for 2 weeks, or frozen for 3 months. Perfect for gifting—just pack in cute boxes with wax paper separators.
Why You’ll Love This Recipe
- 5-Minute Mix: No baking, no waiting—just stir, roll, and chill. Honestly, it’s harder to not eat the batter.
- Party Pleaser: Potlucks, cookie swaps, or just Tuesday—these disappear faster than I can set them out.
Step-by-Step Instructions for Skippy Peanut Butter Balls
This no-bake method ensures smooth centers and perfectly set chocolate coatings every time.
Step 1: Combine Dry and Wet Ingredients
In a large mixing bowl, combine the 2.5 cups Powdered Sugar, 0.5 cup Graham Cracker Crumbs, 0.5 cup Rolled Oats, and 0.25 tsp Salt. Whisk thoroughly to eliminate any lumps and ensure even distribution of the dry components.
Add the 1.5 cups Creamy Peanut Butter, 0.5 cup Unsalted Butter, 2 tbsp Honey, and 1 tsp Vanilla Extract to the dry mixture. Using a wooden spoon or silicone spatula, fold everything together until fully incorporated. The mixture should hold together when pressed but remain slightly crumbly.
Step 2: Shape and Chill the Centers
Scoop the peanut butter mixture into 1-inch balls using a small cookie scoop or tablespoon. Roll each portion between your palms to create smooth, uniform spheres. If the mixture feels too soft to handle, chill it for 15-20 minutes to firm slightly.
Place the shaped balls on a parchment-lined baking sheet, spacing them about 1 inch apart. Refrigerate uncovered for 30 minutes to set completely. This chilling step prevents the centers from collapsing when dipped in chocolate later.
Step 3: Prepare the Chocolate Coating
In a microwave-safe bowl, combine the 12 oz Semi-Sweet Chocolate Chips and 0.5 oz Paraffin Wax. Microwave in 30-second intervals, stirring between each, until 80% melted. Residual heat will melt the remaining chocolate as you stir.
Continue stirring until the mixture is completely smooth and glossy. The paraffin wax ensures the chocolate sets with a firm snap and glossy finish. If the chocolate seizes or looks dull, it may have overheated—start over with fresh chocolate.
Step 4: Dip and Set the Finished Treats
Working one at a time, use a fork to lower each chilled peanut butter ball into the melted chocolate. Roll it gently to coat completely, then lift and let excess chocolate drip off. Place the coated ball back on the parchment-lined sheet.
Repeat with all remaining centers, then refrigerate the tray for 15-20 minutes until the chocolate is fully set. The coating should be firm to the touch with a glossy sheen. Store in an airtight container in the refrigerator for up to 2 weeks.
Pro Tips For Making Skippy Peanut Butter Balls
- Chill Before Rolling: Pop the mixture in the fridge for 20-30 minutes before shaping—Skippy’s creamy texture holds better when cold, and you’ll avoid sticky, melting messes on your hands.
- Use Room-Temp Butter: Soften the unsalted butter to room temperature first; I learned this the hard way after ending up with greasy, uneven balls when it was too cold.
- Skip the Salt: Skippy peanut butter is already salted, so adding extra can make them too salty—taste the mix before adjusting, especially if you’re sensitive to salt.
- Double-Dip in Powder: Roll the balls in powdered sugar twice: once right after shaping, then again after 10 minutes to get that thick, snowy coating that actually sticks.
Storing and Reheating This Recipe
Room Temperature Storage
These treats keep beautifully at room temperature for 5 days in an airtight container. I line mine with parchment paper between layers to prevent sticking. The chocolate coating stays firm, and the centers remain creamy. ❄️
Refrigerator Storage
For longer storage, place them in the fridge for up to 2 weeks. Use a container with a tight seal—I prefer glass to avoid absorbing odors. Let them sit at room temperature for 10 minutes before serving to soften slightly.
Freezer Storage
These freeze wonderfully for up to 3 months without losing texture. Wrap individual balls in wax paper, then place in a freezer bag. Thaw overnight in the fridge or at room temperature for 30 minutes before enjoying.
Reheating Not Needed
Since these are no-bake, there’s no need to reheat. If stored in the fridge or freezer, simply let them warm naturally. The chocolate may develop a slight bloom if exposed to temperature changes, but it doesn’t affect taste.
Gifting Tips
Pack in single layers in cute boxes with wax paper separators. They’re perfect for holiday treats or care packages. I’ve shipped them across the country with ice packs in summer—arrived perfectly intact. 💛
Nutrition Facts
Frequently Asked Questions
Can I use crunchy peanut butter instead?
Yes, but the texture will be different. Crunchy adds a pleasant nutty crunch, while creamy creates the classic smooth center. For best results, stick with Skippy creamy as specified.
Why do I need to chill the centers first?
Chilling firms the peanut butter mixture so it holds its shape when dipped. Without this 30-minute step, the balls may crumble or melt into the chocolate.
Can I skip the paraffin wax?
Replace it with 1 tablespoon coconut oil per 12 oz chocolate. The coating won’t be quite as firm but will still set nicely.
How do I fix chocolate that seized?
Overheated chocolate often seizes. The fix: stir in 1 teaspoon vegetable oil or butter per 6 oz chocolate until smooth. Avoid water at all costs.

- Alton Brown’s Shortbread Cookies Recipe: Buttery Crunch With Vanilla Infusion - October 8, 2026
- Chili’s Blackberry Iced Tea Recipe: Bold Southern Sweetness in Minutes - October 8, 2026
- Ginger Soy BBQ Marinade Recipe: Bold Umami Kick for Grilled Meats - October 8, 2026