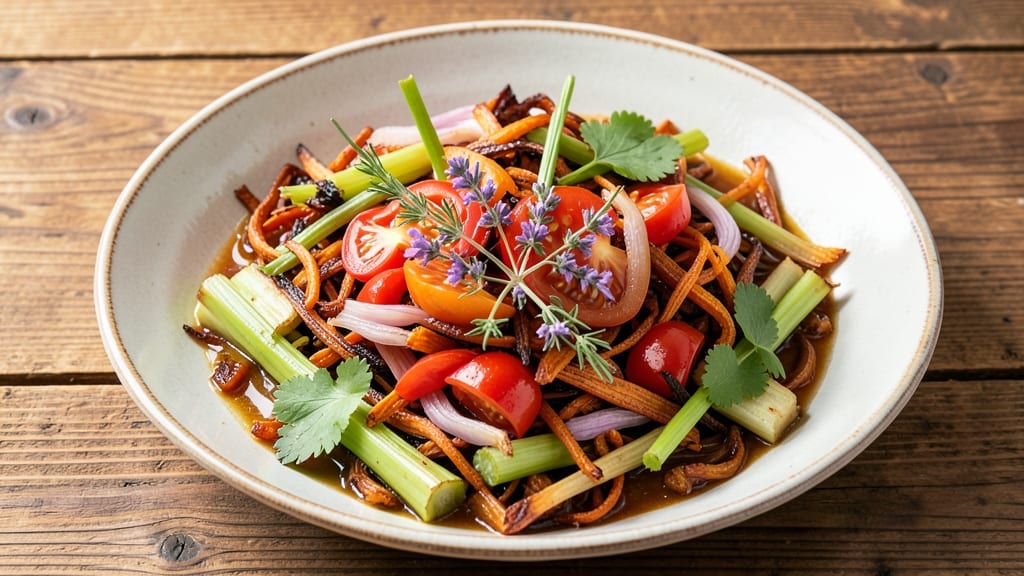
This roasted vegetable stock recipe transforms garden scraps and vegetable peels into a rich, umami-packed liquid gold that elevates every dish it touches.
I developed it after realizing how much flavor gets wasted in my kitchen—those carrot tops, celery ends, and onion skins hold incredible depth when roasted and simmered properly. The process is simple but yields professional-quality stock that freezes beautifully for months.
The secret lies in caramelizing the vegetables at high heat before simmering, which intensifies their natural sweetness and umami flavors. You’ll work with common pantry vegetables like carrots, celery, onions, and garlic, plus aromatic herbs that infuse the stock with complexity.
This method creates 4 cups of deeply flavorful stock that’s perfect for soups, risottos, or braising liquids.
What makes this stock special is its ability to transform simple dishes into something extraordinary. The roasting step develops caramelized notes that store-bought broth can’t match, while the simmering process extracts maximum flavor from every vegetable scrap.
It’s a game-changer for anyone who wants restaurant-quality depth in their cooking without the expense.
Use it as a base for sauces, a flavor enhancer for grains, or the foundation for hearty soups. The possibilities are endless, and the best part? You’ll never look at vegetable scraps the same way again. Let’s create this versatile stock that turns leftovers into liquid treasure.
Ingredients for roasted vegetable stock
Turn kitchen scraps into liquid gold with these 12 powerhouse ingredients.
| Ingredient | Amount | Notes |
|---|---|---|
| Carrot Tops and Peels 🥕 | 2 cups | Freshly trimmed, chopped |
| Celery Stems and Leaves 🧅 | 2 cups | Chopped, leafy parts included |
| Onion Skins and Peels 🧅 | 1 cup | Red or yellow, chopped |
| Garlic Cloves 🧄 | 4 whole | Peeled, smashed slightly |
| Fresh Tomato Scraps 🍅 | 1 cup | Cores, ends, chopped |
| Fresh Parsley Stems 🌿 | ½ cup | Chopped, leafy parts removed |
| Fresh Thyme Sprigs 🌿 | 2 whole | Stems only, chopped |
| Extra-Virgin Olive Oil 🫒 | ¼ cup | High quality, fruity |
| Apple Cider Vinegar 🍎 | 1 tbsp | For brightness, optional |
| Filtered Water 💧 | 4 cups | For simmering |
| Sea Salt 🧂 | 1 tsp | Diamond Crystal preferred |
| Black Peppercorns 🌶️ | ½ tsp | Crushed lightly |
The vegetable scraps are the heart of this stock, so don’t skimp on quantity. Whole Foods or local farmers markets often sell affordable bulk vegetable scraps if you’re not using your own. Look for bright green celery leaves and fresh, crisp carrot tops—these hold the most flavor. Onion skins should be vibrant, not dried out. The garlic and herbs? Fresh is non-negotiable—dried versions lack the depth this stock needs. I always double-check my scraps for any mold or slimy spots before using them, and I rinse everything quickly under cold water to remove any dirt. The extra-virgin olive oil you choose matters too—pick one with a robust peppery finish for that restaurant-quality depth.
No carrot tops? Substitute with extra celery leaves or kale stems—they bring a similar earthy sweetness. Short on thyme? Fresh rosemary or bay leaves work beautifully, though you’ll need to adjust the amount since they’re stronger. The apple cider vinegar is optional but adds a bright, tangy note that cuts through the richness. If you’re avoiding vinegar, a splash of lemon juice works too. The water should be filtered if possible—tap water with strong chlorine can overpower the delicate flavors. For a deeper umami punch, add a half-teaspoon of soy sauce or miso paste to the simmering stock. And if you’re using store-bought scraps, Trader Joe’s often has pre-washed veggie scraps in the produce section—convenient and fresh!
This stock freezes like a dream—4-6 months in a sealed container with room to expand. I like to portion it into ice cube trays first, then transfer to freezer bags for easy use. Thaw overnight in the fridge or add frozen cubes directly to hot dishes. For best results, simmer the stock for 2-3 hours to extract maximum flavor, but it keeps developing flavor over time. The longer it simmers, the deeper the color and richness. Store in the fridge for up to 5 days—it actually tastes better after a day or two as the flavors meld. Label your containers with the date to keep track, and trust me, you’ll want to make this regularly!
Why You’ll Love This Recipe
- Zero-Waste Magic: I swear by this trick—turning carrot tops and celery leaves into liquid gold instead of trash. The onion skins alone give it that deep, caramelized richness you’d pay extra for in store-bought versions.
- Roast, Not Boil: Honestly, the difference between this and a simmered stock is night and day. Roasting the veggie scraps first concentrates their flavors—think nutty carrot tops, smoky onion skins, and that crispy garlic crust. It’s like a flavor bomb waiting to happen.
- Stockpile Savings: Freeze it in ice cube trays for soups, sauces, or even braising liquids later. I make a big batch every few weeks, and it’s my go-to for when I’m low on cash but still want restaurant-quality depth in my cooking.
- Pantry Rescue: Between us, we’ve all got a drawer full of wilted celery and sad garlic cloves. This recipe turns them into something useful before they go bad. Plus, the tomato scraps add a bright, tangy kick that cuts through the earthiness of the other veggies.
Step-by-step instructions for roasted vegetable stock
Transform humble scraps into a rich, umami-packed stock that rivals store-bought—with just 30 minutes of active time and deep flavor development.
Prep and Roast the Vegetable Scraps
Preheat your oven to 425°F and line a large baking sheet with parchment paper. In a large bowl, combine all 2 cups carrot tops and peels, 2 cups celery stems and leaves, 1 cup onion skins and peels, 1 cup fresh tomato scraps, 0.5 cup fresh parsley stems, and 2 whole fresh thyme sprigs. Drizzle with 0.25 cup extra-virgin olive oil and toss vigorously until every scrap is evenly coated—this ensures maximum caramelization.
Spread the vegetables in a single layer on the prepared baking sheet, leaving space between pieces. Roast for 25-30 minutes, stirring once halfway through, until the edges are deeply browned and you can smell that intoxicating roasted aroma. The garlic cloves, peeled and smashed slightly, should be added to the pan during the last 10 minutes of roasting to infuse their sweet, aromatic oils into the vegetables. This roasting step is non-negotiable—it develops the deep, complex flavors that separate good stock from extraordinary stock.
Deglaze and Simmer the Roasted Scraps
While the vegetables roast, transfer them to a large stockpot. Add 4 cups filtered water, scraping up every last bit of caramelized fond from the baking sheet—those browned bits are packed with concentrated flavor. Bring the mixture to a rolling boil over high heat, then immediately reduce to a gentle simmer. Stir in 1 tbsp apple cider vinegar and 1 tsp sea salt, along with 0.5 tsp crushed black peppercorns. The vinegar brightens the flavors while the salt and pepper enhance the umami depth.
Simmer uncovered for 30 minutes, skimming any foam that rises to the surface with a fine-mesh spoon. This skimming ensures a crystal-clear stock without bitterness. The liquid should reduce slightly, intensifying the flavor. Here’s the thing—don’t walk away. The aroma alone will tell you when it’s ready: a rich, earthy perfume that makes your mouth water. If you’re in a hurry, you can reduce the simmering time to 20 minutes, but I promise you’ll taste the difference with the full 30 minutes.
Strain and Finish the Stock
Line a fine-mesh strainer with cheesecloth or a coffee filter to catch any fine particles, then strain the stock into a clean pot or bowl. Press down gently on the solids with a wooden spoon to extract every last drop of flavor—this is where the magic happens. The strained stock should yield about 4 cups of deeply colored, aromatic liquid. Real talk: if you’re using this for soups or sauces, you can use it immediately, but for maximum flavor, let it cool to room temperature and refrigerate overnight. The fat will solidify on top, making it easy to skim off for a perfectly clear stock.
For an extra layer of depth, you can reduce the stock by one-third over medium-low heat to create a concentrated vegetable stock that’s perfect for sauces or braising liquids. If you’re not reducing, simply store the stock in airtight containers in the refrigerator for up to 5 days or freeze it for up to 3 months. This stock is so versatile—use it in place of water for cooking grains, as a base for soups, or to deglaze pans. Every sip will remind you that the most flavorful ingredients are often the ones we overlook.
Pro Tips For Making Roasted Vegetable Stock
- CHAR THE ONION SKINS: Toss those onion skins in a dry pan over medium-high heat for 2-3 minutes first—they’ll crisp up and deepen the stock’s umami flavor. I used to skip this, and the stock always tasted flat until I realized how much difference a little color makes.
- BLANCH THE CARROT TOPS: Drop carrot tops into boiling water for 30 seconds before roasting to soften their bitterness. Sounds weird, but it works: the stock stays sweet and vibrant instead of grassy. (Yes, even if you’re impatient like me.)
- SKIP THE CROWDED PAN: Spread celery stems and tomato scraps in a single layer on the baking sheet—no overlapping. I learned this the hard way after burning a batch because the center stayed raw while the edges charred. Even heat = even flavor.
- ADD GARLIC LATE: Toss in whole garlic cloves with the veggies, but pull them out after 20 minutes of roasting—they’ll mellow instead of burning. Over-roasted garlic turns bitter, and nobody wants that in stock. (Your future self will thank you.)
Essential equipment for this dish
Roasting Pan Essentials
Start with a rimmed baking sheet at least 12×17 inches—I use a USA Pan Heavy Duty because it handles high heat without warping. Line it with parchment paper to prevent sticking, but leave the edges bare for easy cleanup.
A 425°F oven is ideal for caramelization, so preheat thoroughly. I swear by my Oster digital thermometer to confirm accuracy—nothing worse than under-roasted veggies. 🔥
Stockpot Must-Haves
Your stockpot needs to be large (8-10 quarts) to accommodate the scraps and water without boiling over. I love my All-Clad stainless steel pot—it heats evenly and resists browning. For simmering, keep heat at medium-low to prevent skimming every 5 minutes.
A fine-mesh strainer with a cheesecloth liner is non-negotiable for ultra-clear stock. I also keep a wooden spoon handy to press out every last drop of flavor.
Skimming Tools
Foam rises during simmering, and a fine-mesh spoon or slotted spoon is perfect for removing it. I use a OXO Good Grips model because the angled head makes it easy to reach deep.
Skim frequently to avoid bitterness—this is where patience pays off. For extra clarity, I sometimes strain through a coffee filter after the initial cheesecloth step. The difference is noticeable in soups and sauces.
Storage Containers
For fridge storage, glass Pyrex containers with tight lids are my go-to—they’re microwave-safe and won’t absorb odors. For freezing, I portion into quart-sized freezer bags (like Stasher bags) to save space and thaw easily.
Label everything with dates—this stock tastes best within 3 months frozen. A vacuum sealer isn’t necessary but extends shelf life to 6 months if you’re serious about stockpiling.
Optional Upgrades
Want to take it pro? A mandoline slicer makes prep faster for uniform scraps, and a blender lets you strain through a nut milk bag for ultra-smooth stock. I also keep Trader Joe’s liquid aminos on hand to boost umami if needed.
For large batches, a slow cooker on low works—just simmer for 4-6 hours instead. The key is consistency in technique, not fancy gadgets.
Nutrition facts
Frequently asked questions
Can I use frozen vegetable scraps instead of fresh?
Fresh scraps yield the best flavor, but frozen will work in a pinch! Just thaw them completely first and pat dry to prevent excess water from diluting your stock. The roasting step will still caramelize them, though you might need 5-10 extra minutes at 425°F to crisp them properly.
How do I make this stock more flavorful if my scraps are bland?
Boost umami by adding a 1/2 teaspoon of soy sauce or 1/4 teaspoon of miso paste during simmering, or stir in 1 tablespoon of tomato paste with the vinegar. A pinch of smoked paprika also adds depth. The key is caramelization—roast scraps until deeply browned for maximum flavor extraction.
Can I make this stock without an oven?
Use a stovetop method: Sauté all scraps in 2 tablespoons of olive oil over medium-high heat for 10-12 minutes, stirring often, until deeply browned. Then proceed with the simmering step. The stovetop version won’t be as caramelized but still delivers great flavor.
What’s the best way to use this stock if I don’t like cloudy liquid?
For crystal-clear stock, strain through a coffee filter after the cheesecloth step. For extra clarity, chill the stock overnight—the fat will solidify on top and can be skimmed off easily. If you prefer richer texture, skip the final coffee filter step and just use cheesecloth.
How can I tell when my stock is ready?
Your stock is ready when it smells deeply aromatic with caramelized, earthy notes. The liquid should reduce slightly to about 4 cups and have a rich golden color. Taste it—it should be savory, not bitter. If it’s too mild, simmer 10 more minutes to concentrate the flavors.

- Authentic Beef Goulash Recipe: Paprika-Kissed Richness Simmered Slowly - November 8, 2026
- Devil’s Food Pound Cake Recipe: Ultra-Moist Layers With Fudgy Centers - November 8, 2026
- Ninja Cooker Recipe: Sizzling Peppers and Onions in 15 Minutes - November 8, 2026