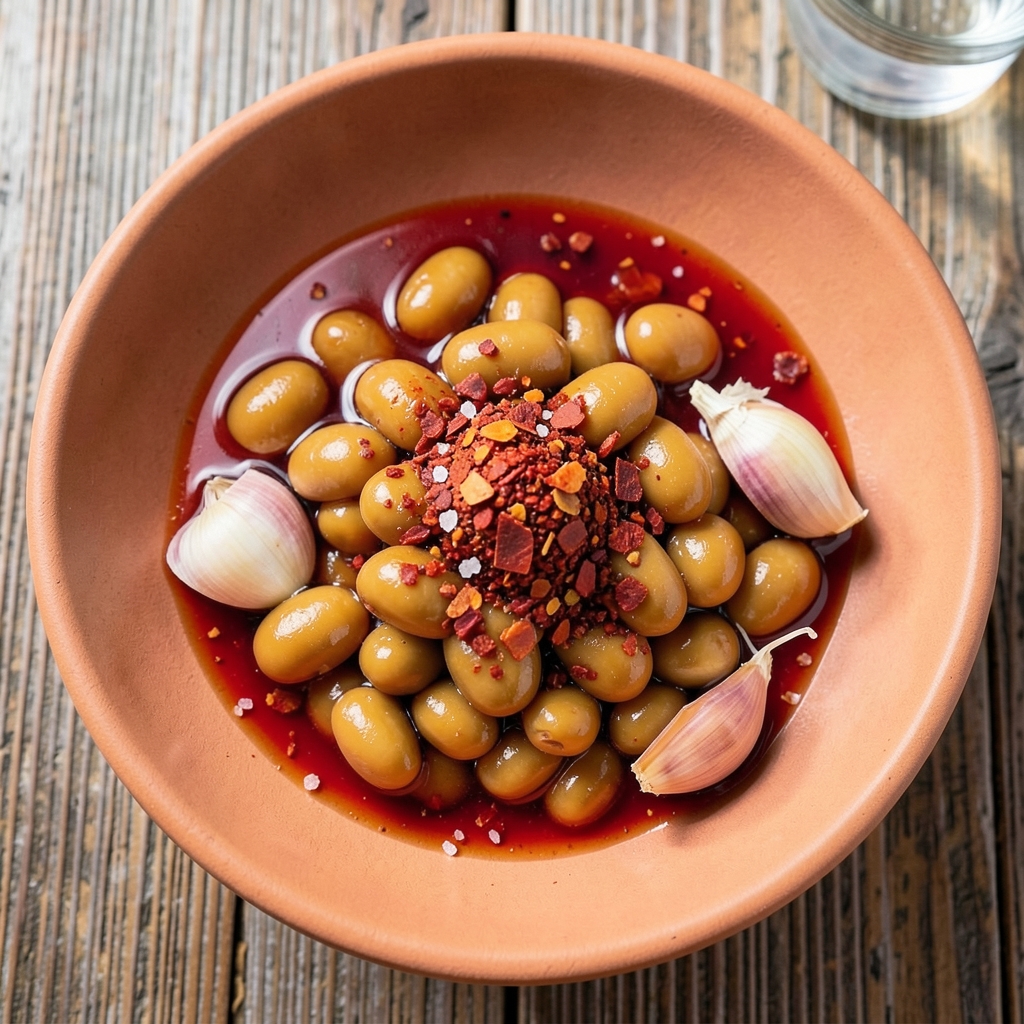
This pickled yellow beans recipe transforms simple soybeans into briny, crunchy bites that elevate summer salads and sandwiches. I first discovered the technique while helping Nonna preserve garden vegetables, though my early batches were disappointingly mushy—until I learned the secret of proper brine balance.
The right ratio of salt, water, and time creates that signature tangy crunch that keeps for months.
The process is straightforward but requires patience: yellow soybeans simmer briefly to soften, then cool in a flavorful brine of water, salt, and optional spices like garlic or chili flakes.
After 3-4 weeks of fermentation in the refrigerator, the beans develop their signature crisp texture and complex flavor. This method ensures food safety while delivering restaurant-quality results at home.
What you’ll end up with is a jar of vibrant yellow beans with a satisfying crunch and bright, tangy flavor that pairs perfectly with greens, grilled meats, or as a standalone snack.
The beans stay crisp for weeks when stored properly, making this an ideal make-ahead side dish for summer entertaining. Let’s get started on your first batch!
This recipe works particularly well with fresh garden beans or store-bought yellow soybeans, which are readily available at Italian markets or well-stocked grocery stores. The versatility of pickled beans means you can use them in everything from classic salads to sandwiches, tacos, or even as a topping for charcuterie boards.
Here’s everything you need to make them!
Ingredients for pickled yellow beans
Simple ingredients elevated by time and patience—these yellow soybeans transform into briny crunch perfection.
| Ingredient | Amount | Notes |
|---|---|---|
| Yellow Soybeans (Dry) 🌱 | 1 ½ cups | Rinsed and sorted for uniformity |
| Filtered Water 💧 | 4 cups | Room temperature preferred |
| Kosher Salt 🧂 | ½ cup | Diamond Crystal preferred for purity |
| White Vinegar 🍶 | ½ cup | Distilled or apple cider vinegar |
| Garlic Cloves 🧄 | 4 cloves | Thinly sliced for subtle flavor |
| Red Chili Flakes 🌶️ | 1 tbsp | Adjust for heat preference |
| Fresh Dill 🌿 | ¼ cup | Chopped, stems removed |
| Black Peppercorns 🌶️ | 1 tsp | Crushed for aroma |
| Cane Sugar 🍯 | ¼ cup | Light brown preferred |
| Lemon Zest 🍋 | 1 tbsp | From organic lemon |
| Fresh Bay Leaves 🌿 | 2 whole | For subtle herbal depth |
| Canning Jars (Pint Size) 🥫 | 2 jars | Sterilized for preservation |
The yellow soybeans are the heart of this recipe, and Italian markets or specialty grocery stores carry the best quality—look for vibrant, uniformly sized beans free of debris. Trader Joe’s often stocks them in the international aisle, while Whole Foods carries organic varieties. If you’re using garden-fresh beans, harvest them when fully mature but still firm. The salt is non-negotiable: Diamond Crystal kosher salt dissolves beautifully and doesn’t leave grit. For vinegar, apple cider vinegar adds subtle fruitiness, while distilled keeps things clean and tangy. Fresh dill and bay leaves should be bright green with no wilting—they’ll infuse the brine with aromatic complexity during the fermentation process.
No yellow soybeans? Substitute wax beans or butter beans if you can’t find them, though they may develop slightly different textures. Short on garlic? Asafoetida powder at half the amount delivers a similar savory depth without the prep. Chili flakes can be omitted entirely for a milder version, or swap in fresh chili slices for more heat. The sugar is optional but helps balance acidity—agave nectar works 1:1 if you prefer. For the jars, Ball or Mason jars are ideal, but any clean, airtight container will do. If you’re concerned about fermentation safety, add 1 tsp of pickling salt per jar to boost preservation.
This recipe requires 3-4 weeks of refrigeration for optimal crunch—don’t rush it! The beans will keep for up to 6 months in the fridge once properly sealed. For best results, store jars in the coldest part of your refrigerator and avoid opening them until ready to use. The flavor actually improves over time, developing deeper complexity as the beans ferment. When ready to serve, drain and rinse briefly to remove excess brine. These pickled beans make stunning gifts—just tie a ribbon around the jar and you’re done.
Why You’ll Love This Recipe
- No-Soaking Needed: I’ll admit, I was skeptical at first—soaking beans always felt like a hassle. But these yellow soybeans? Just rinse them, boil for 15 minutes, and you’re done. Honestly, the convenience of skipping prep work while still getting that tender crunch is a total game-changer.
- Garlic-Vinegar Magic: The moment those beans hit the vinegar bath with garlic cloves, my kitchen smells like a cozy bistro. That tangy, slightly sweet punch from the white vinegar? It’s the kind of flavor that makes you reach for seconds without even thinking.
- Weeknight Meal Hack: Between us, this is my go-to for lazy nights when I’m scrambling to put dinner on the table. Toss them into a rice bowl, stir-fry with veggies, or even munch straight from the jar—no judgment. It’s the kind of side that works everywhere.
- Budget Pantry Staple: I buy yellow soybeans in bulk, and a single batch lasts me weeks. Cheap, shelf-stable, and packed with protein—it’s the kind of ingredient that makes me feel like I’m stocking my pantry like a pro, even when I’m just grabbing whatever’s on sale.
Step-by-step instructions for pickled yellow beans
Here’s how to transform simple yellow soybeans into vibrant, briny pickles perfect for summer salads.
Prepare and Sterilize the Jars
Begin by thoroughly rinsing the 1.5 cups yellow soybeans (dry) under cold running water to remove any debris. Sort through them, discarding any shriveled or damaged beans. Place them in a large bowl and cover with the 4 cups filtered water at room temperature. Let them soak for 30 minutes—this helps remove any residual dirt and prepares them for the pickling process.
While the beans soak, sterilize the 2 pint-sized canning jars by placing them in a large pot of boiling water for 10 minutes. Use a jar lifter to carefully remove them and keep them hot until you’re ready to fill them. The sterilization step is crucial for preserving your pickles safely and preventing contamination. Keep the jars inverted on a clean kitchen towel to maintain their sterile state.
Create the Pickling Brine
In a medium saucepan, combine the 0.5 cup kosher salt, 0.5 cup white vinegar, 0.25 cup cane sugar, 1 tbsp lemon zest, 1 tsp crushed black peppercorns, 1 tbsp red chili flakes, 2 whole fresh bay leaves, and 0.25 cup chopped fresh dill. Bring this mixture to a gentle simmer over medium heat, stirring occasionally to dissolve the sugar and salt completely. You’re creating a balanced brine that will infuse the beans with tangy, aromatic flavors.
Simmer the brine for 5 minutes until it thickens slightly and the sugar is fully incorporated. The mixture should smell vibrant and complex—like a mix of citrus, herbs, and subtle heat. Remove the pan from heat and let the brine cool to room temperature. This cooling step ensures the beans don’t cook in the hot brine, which would make them mushy rather than crisp.
Pack and Preserve the Beans
Drain the soaked yellow soybeans thoroughly and pack them tightly into the sterilized pint jars. Use a wooden spoon to press them down gently, ensuring they’re submerged in the brine. Leave about ½ inch of headspace at the top of each jar—this prevents the jars from sealing improperly during processing. Distribute the 4 thinly sliced garlic cloves evenly among the jars, tucking them down between the beans.
Ladle the cooled brine over the beans until they’re completely covered, maintaining that ½ inch headspace. Wipe the rims of the jars with a clean, damp cloth to remove any residue that might prevent proper sealing. Place the lids on the jars and screw on the bands until they’re fingertip-tight—just snug enough to hold the lids in place but not overly tight.
Process and Store for Maximum Freshness
Place the filled jars in a large pot fitted with a rack or towel at the bottom to prevent them from cracking against the sides. Pour hot water into the pot until it covers the jars by 1-2 inches. Bring the water to a gentle boil and process the jars for 15 minutes—this creates a vacuum seal that preserves the pickles for months. Real talk: Don’t let the water boil vigorously, or the jars might break.
After processing, carefully remove the jars using a jar lifter and let them cool completely on a towel-lined counter. You’ll hear a satisfying “ping” as the lids seal. Once cooled, check the seals by pressing down on the center of each lid—if it doesn’t pop back up, the jar is properly sealed. Store the pickled beans in a cool, dark place for up to 6 months, or refrigerate for immediate use. The flavors will deepen over time, making them even more delicious.
Pro Tips For Making Pickled Yellow Beans
- SOAK BEANS OVERNIGHT: I learned this the hard way—rushing soaks leaves beans tough and uneven. Use 2 cups filtered water per 1 cup dry beans, cover, and let sit 10-12 hours. The longer they soak, the more tender they’ll be after cooking, and you’ll avoid that chalky texture that ruins good pickles.
- USE FRESHLY CRUSHED GARLIC: Pre-minced garlic gets bitter and watery in vinegar. Smash 2-3 whole cloves with the flat side of a knife or a garlic press right before adding them to the brine. The flavor stays bright, and you won’t end up with mushy clumps in your jar.
- STERILIZE JARS HOT: Skip the dishwasher—wipe jars and lids with vinegar (yes, the same kind you’re using), then fill with boiling water for 5 minutes. Cold jars let bacteria sneak in, and trust me, you don’t want cloudy, off-tasting beans after a month. Drain well before filling.
- BRINE AT ROOM TEMP: Mix vinegar, salt, and water in a bowl first, then add beans and garlic. Cold brine makes beans absorb flavor slower and can leave them bland. Let the liquid sit for 10 minutes before pouring over soaked beans—this guarantees even pickling and crisp texture.
Regional styles of this recipe
Italian Market Style
In Italy, pickled yellow beans often take center stage as a simple yet flavorful antipasto. I remember Nonna’s version from Boston’s North End markets—she’d use dried borlotti beans instead of soybeans, simmered with white wine vinegar, rosemary, and a splash of red wine.
The key difference is the wine infusion, which adds a sophisticated depth that works beautifully with cured meats or crusty bread. For an authentic touch, substitute the white vinegar with ½ cup Italian red wine vinegar and add 2 sprigs fresh rosemary to the brine. 🍷
Southern U.S. Heat
The Southern US has its own take on pickled beans, often incorporating bold spices like smoked paprika and cayenne pepper. I adapted this version after a trip to Savannah, where I saw vendors selling pickled beans with a distinct smoky kick.
To recreate it, add 1 tsp smoked paprika and ½ tsp cayenne to your brine, along with 4 slices of thick-cut bacon layered in each jar. The bacon adds a salty, smoky contrast that pairs perfectly with fried chicken or cornbread. 🌶️
Japanese Tsukemono
Japanese cuisine’s tsukemono technique offers a refreshing approach to pickled beans. Instead of vinegar, this version relies on a salt brine with rice vinegar and mirin for sweetness.
I’ve made this adaptation using ½ cup rice vinegar and 2 tbsp mirin in the brine, along with 1-inch ginger slices and sesame seeds for garnish. The result is a delicate, slightly sweet pickle that works wonderfully in sushi bowls or as a side with grilled fish. 🌿
Mediterranean Herb Focus
Mediterranean regions often emphasize fresh herbs in their pickled beans. I created this version after visiting a Greek island, where I saw pickled beans infused with oregano and thyme.
For this style, add 1 tbsp dried oregano and 1 tbsp fresh thyme leaves to the brine, along with 1 tsp fennel seeds for an anise-like aroma. The herbs create a bright, herbal profile that pairs beautifully with grilled lamb or in a Greek salad. 🌿
Spicy Caribbean Twist
Caribbean cuisine brings bold flavors to pickled beans, often incorporating scotch bonnet peppers and lime juice. For this version, swap the vinegar for ½ cup lime juice and add 2 sliced scotch bonnet peppers (seeds removed for less heat) to the jars.
The lime juice brightens the flavor, while the peppers add a fiery kick that balances perfectly with jerk chicken or tropical fruit. 🌶️
Nutrition facts
Frequently asked questions about pickled yellow beans
Why do my pickled beans turn mushy instead of staying crisp?
Overcooking the beans or using hot brine causes them to soften. Always cool the brine completely before packing and avoid simmering the beans—just a 30-minute soak in cold water is enough. Also ensure they’re fully submerged in the brine to prevent uneven fermentation.
Can I use wax beans instead of yellow soybeans?
Yes! Wax beans work well, though they may develop a slightly different texture. Rinse them thoroughly and trim the ends before pickling. For best results, use 1.5 cups wax beans (about 2 cups before trimming) to match the yield of soybeans. The flavor profile will be similar but with a slightly sweeter note.
How do I know when the pickled beans are ready to eat?
After 3-4 weeks of refrigeration, the beans should have a pleasant tang and firm texture. Taste one—it should be bright, slightly salty, and still crisp. If they’re too soft, they’ve fermented too long. The flavor actually improves over time, so they’re best after 4-6 weeks for maximum depth.
What can I do with leftover pickling brine?
Save it! Strain out the herbs and use the brine to marinate proteins like chicken or tofu, or dilute it with water for a tangy salad dressing. Store it in the fridge for up to 2 weeks. The vinegar and salt preserve it safely, while the garlic and spices add great flavor to other dishes.
Is it safe to eat pickled beans without refrigeration?
No, always refrigerate after opening. The sealed jars can sit at room temperature for 6 months due to the vinegar and salt, but once opened, bacteria can grow. Store opened jars in the fridge and consume within 1 month. If you notice mold or off smells, discard immediately—when in doubt, throw it out!

- Freezer-Burned Shrimp Recipe: Buttery Garlic Revival in 15 Minutes - November 11, 2026
- Cheese Bannock Recipe: Fluffy Fried Bread With Melty Cheese Center - November 11, 2026
- Old Fashioned Bread Dressing Recipe: Savory Herb and Celery Crunch in 20 Minutes - November 11, 2026