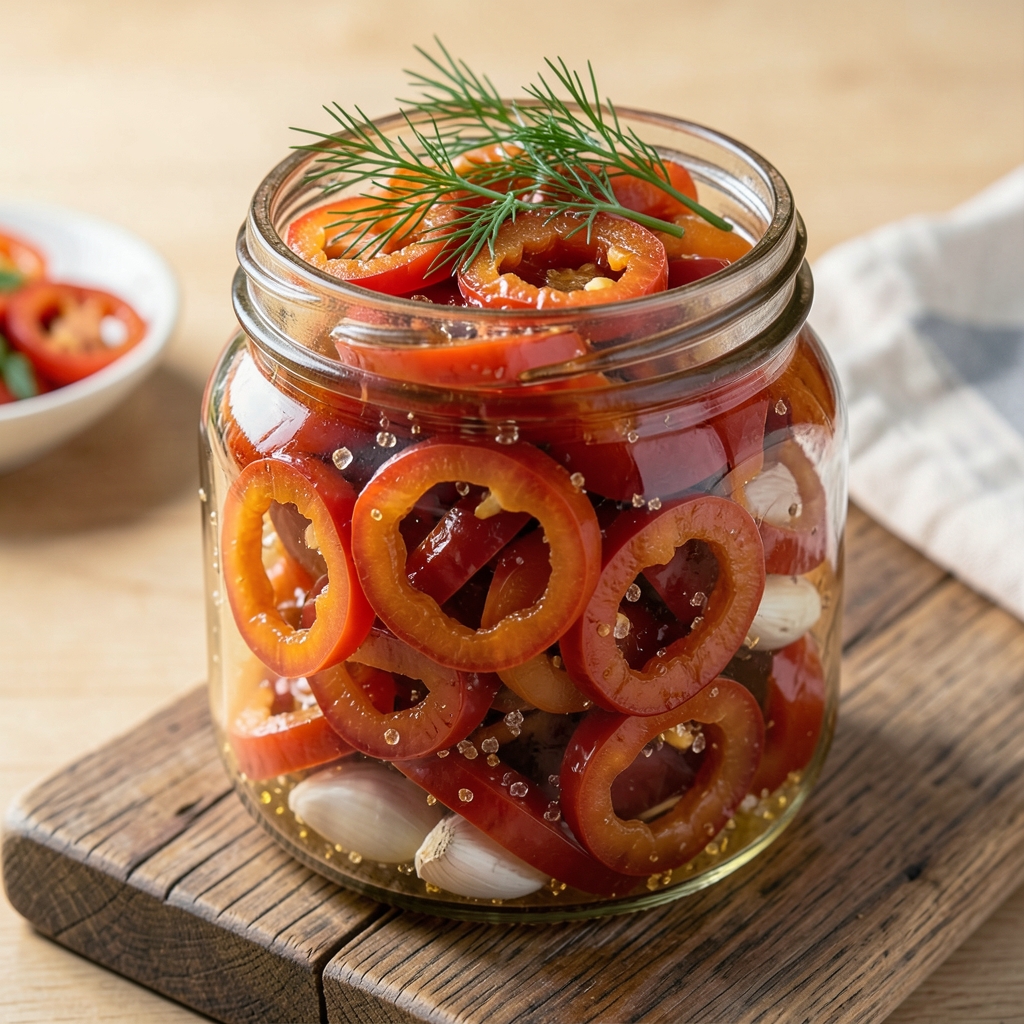
This pickled sweet banana pepper rings recipe transforms mild peppers into vibrant, tangy bites that add a sophisticated crunch to everything from cocktails to charcuterie boards.
The secret lies in a precise balance of vinegar, sugar, and spices that preserves their natural sweetness while adding just enough heat to keep things interesting. I developed this recipe after years of testing pickling methods, and it never fails to elevate any dish it touches.
What makes these pepper rings truly special is their versatility—crisp yet tender, with a bright acidity that cuts through rich flavors. The process is straightforward: slice the peppers, combine them with a carefully measured brine of vinegar, water, sugar, and spices, then let them cure for at least 48 hours.
No fancy equipment needed, just patience and a few simple ingredients from your pantry.
The result is a jar of golden, glossy pepper rings that stay crisp for days, perfect for garnishing drinks, topping sandwiches, or adding a pop of color to cheese boards.
The flavor profile is bright, slightly sweet, and just spicy enough to intrigue without overwhelming. Once you try these, you’ll wonder how you ever lived without them.
Store them in the refrigerator for up to 3 months, and don’t be afraid to experiment—try them on pizza, in salads, or even as a crunchy topping for tacos. This recipe is a game-changer for anyone who loves bold, tangy flavors with a touch of heat.
Ingredients for pickled sweet banana pepper rings
Six simple ingredients transform mild peppers into tangy, crunchy rings perfect for any dish.
| Ingredient | Amount | Notes |
|---|---|---|
| Sweet Banana Peppers 🍅 | 12 whole | Fresh, unblemished, medium size |
| White Vinegar 💧 | 2 cups | Distilled white preferred |
| Water 💧 | 2 cups | Filtered or bottled |
| Granulated Sugar 🍚 | 1 cup | White or raw cane sugar |
| Salt 🧂 | 1 ½ tbsp | Kosher or sea salt |
| Garlic Cloves 🧄 | 2 cloves | Fresh, thinly sliced |
| Black Peppercorns 🌶️ | 1 tsp | Crushed lightly |
| Mustard Seeds 🌿 | ½ tsp | Yellow or brown |
| Red Pepper Flakes 🔥 | ½ tsp | Adjust for heat preference |
The peppers are the star—pick firm, bright yellow ones from the produce section (avoid the sad, limp ones). Trader Joe’s and Whole Foods usually have the freshest, but any grocery store works. Skip the pre-sliced jars—you want whole peppers for those perfect rings. For the vinegar, distilled white is best (no weird flavors), but apple cider vinegar adds a nice twist if you’re feeling adventurous. The sugar needs to dissolve completely, so use granulated—no powdered sugar here. And the salt? Kosher or sea salt dissolves better than table salt—trust me, your peppers will thank you.
No mustard seeds? Skip them entirely—they’re just for that subtle kick. Running low on red pepper flakes? Cayenne pepper at half the amount works in a pinch. The garlic can be minced if you’re lazy, but thin slices look prettier in the jar. Want extra crunch? Add 1/4 cup sliced almonds to the jar after pickling. And if you’re feeling fancy, swap the white vinegar for rice vinegar + 1 tbsp honey for a sweeter profile. Just don’t rush the curing time—48 hours minimum is non-negotiable for that perfect texture.
These keep beautifully—3 months in the fridge if stored properly. Use clean, sterilized jars (run them through hot water first) and seal tightly. The peppers stay crisp for 2-3 weeks after opening, but the flavor only gets better over time. Make a double batch—you’ll want these on every pizza, sandwich, and charcuterie board from now on. Freezing isn’t recommended (they get mushy), but the brine makes great cocktail garnishes if you strain it carefully.
Why You’ll Love This Recipe
- Five-Ingredient Magic: I swear by this recipe—just peppers, vinegar, sugar, salt, and water. That’s it. No fancy jars, no complicated ratios, just slice, simmer, and let the acid do its thing.
- Sweet Heat Balance: Between us, I’ve tried spicy pickles, but these sweet banana pepper rings? They’re the perfect bite—bright, tangy, with just enough natural sweetness to keep things interesting. The sugar caramelizes slightly, giving them that addictive crunch.
- Party Snack Hero: Honestly, these disappear at gatherings. Serve them with charcuterie, toss them in tacos, or just eat them straight from the jar—no one judges. They’re my go-to for game days, potlucks, or when I need a quick, impressive side.
- Months of Flavor: I make a big batch and keep it in the fridge for weeks. The vinegar keeps them fresh, and the sugar prevents them from getting rubbery. Plus, they’re cheap to make—you’ll have enough to gift jars to friends. Efficiency at its best.
Step-by-step instructions for pickled sweet banana pepper rings
Here’s how to make perfectly balanced pickled peppers with crisp rings and bold flavor.
Prep and Slice the Sweet Banana Peppers
Start by washing the 12 whole sweet banana peppers thoroughly under cold water to remove any dirt or wax. Pat them completely dry with paper towels—moisture on the peppers can make your brine cloudy. Using a sharp chef’s knife, carefully slice each pepper crosswise into ¼-inch thick rings. You should end up with about 24-30 rings total.
Arrange the pepper rings on a clean kitchen towel or paper towel-lined plate. This keeps them from sticking together while you prepare the brine. I like to spread them out in a single layer so they don’t overlap—this ensures even pickling and prevents soggy centers.
Prepare the Brine Ingredients
In a medium saucepan, combine the 2 cups white vinegar, 2 cups water, 1 cup granulated sugar, and 1.5 tablespoons salt. Bring this mixture to a gentle boil over medium heat, stirring constantly until the sugar and salt completely dissolve. This usually takes about 3-5 minutes—you’ll know it’s ready when the liquid becomes clear and the sugar crystals disappear.
While the brine heats, lightly crush the 1 teaspoon black peppercorns and 0.5 teaspoon mustard seeds in a mortar and pestle or with the flat side of a knife. Add these to the saucepan along with the 2 thinly sliced garlic cloves and 0.5 teaspoon red pepper flakes. Give everything a quick stir to distribute the spices evenly. The mixture should smell aromatic and slightly spicy—this is where all the flavor develops.
Pack the Peppers and Pour the Brine
Sterilize your pickling jars by washing them with hot, soapy water and then rinsing thoroughly. Pack the pepper rings tightly into the jars, leaving about ½ inch of headspace at the top. Use a wooden spoon or clean fingers to press the rings down gently—this helps them stay submerged in the brine and prevents floating.
Once packed, carefully ladle the hot brine over the peppers, making sure each ring is completely covered. The liquid should come up to within ½ inch of the jar rim. Tap the jars gently on the counter to remove any air bubbles trapped between the peppers. Seal the jars with their lids, leaving them slightly loose at first.
Process and Store for Perfect Flavor
Place the sealed jars in a large pot or canner and cover them with water, ensuring they’re completely submerged. Bring the water to a rolling boil over high heat and process the jars for 10 minutes. This sterilization step ensures your pickled peppers stay fresh and safe to eat for months. After processing, remove the jars using tongs and let them cool completely on a towel-lined countertop.
Once cooled, check that the lids have sealed properly by pressing down on the center—they shouldn’t pop up. Store the jars in a cool, dark place for at least 1 week before using to allow the flavors to fully develop. The peppers will keep in the refrigerator for up to 6 months, getting more flavorful with time. The rings should be crisp, tangy, and perfectly balanced between sweet and spicy.
Pro Tips For Making Pickled Sweet Banana Pepper Rings
- STERILIZE JARS AND LIDS: I learned this the hard way—skipping sterilization leads to moldy peppers that ruin the whole batch. Run jars and lids through a hot dishwasher cycle or boil them for 10 minutes in water, then keep them hot until you fill them. Cold jars let bacteria sneak in, and nobody wants cloudy vinegar after a week.
- SLICE PEPPERS EVENLY: Uneven rings make for messy jars and inconsistent pickling. Use a sharp knife and cut the peppers into ¼-inch slices—thicker pieces stay crunchy too long, while thinner ones turn mushy faster. A mandoline helps if you’re doing a big batch, but a steady hand works too.
- DISSOLVE SUGAR FIRST: Stirring sugar into cold vinegar means you’ll end up with gritty sediment at the bottom. Heat the vinegar and water to 160°F (just until it shimmers), then whisk in the sugar until fully dissolved before adding salt. This ensures a smooth, flavorful brine every time.
- PACK PEPPERS TIGHTLY: Loose peppers in the jar leave air pockets where mold loves to hide. Use a spoon or tongs to press them down firmly, then pour the hot brine over them. If you’re worried about crushing, pack them in layers—it’s worth the extra 30 seconds to avoid spoiled peppers later.
Pro cooking tips for great pickled sweet banana pepper rings
Brine Temperature Matters
Never pour cold brine over your peppers—always use hot brine straight from the stove. The heat helps set the texture immediately, keeping those rings crisp rather than soggy. I learned this the hard way when my first batch turned mushy after just a few days.
Bring your brine to a full boil, then let it cool for 5 minutes before pouring—this gives the sugar time to fully dissolve without scorching the peppers. 🌡️
Peppers Must Stay Submerged
Use a clean chopstick or skewer to press down any floating pepper rings before sealing the jar. If peppers peek above the brine, they’ll ferment unevenly and lose their crispness. I like to pack mine tightly into the jar first, then pour the brine slowly to minimize air pockets.
For extra insurance, add a ¼-inch thick slice of lemon to the jar—it helps weigh down the peppers while adding brightness.
Sterilize Like a Pro
Don’t just rinse your jars—sterilize them properly to prevent mold. I run my jars through the dishwasher’s sanitize cycle or boil them in water for 10 minutes before packing.
For lids, use the water bath method: boil them in a separate pot for 5 minutes and keep them hot until ready to seal. This extra step ensures your pickled peppers stay fresh for 6 months in the fridge.
Adjust Heat to Taste
Start with the ½ teaspoon red pepper flakes recipe calls for, but taste the brine before pouring. If you want more heat, add another ¼ teaspoon—but remember, the peppers will absorb flavor over time.
For a milder kick, reduce it to ¼ teaspoon or swap in ½ teaspoon smoked paprika for depth without heat. I often make two jars: one spicy for tacos and one mild for garnishes.
Crisp Test Before Serving
After 48 hours, test one pepper ring for doneness by biting into it—it should snap crisply with a slight resistance. If it feels soft, leave the jar sealed for another 12-24 hours.
Over-pickling (beyond 1 week) can make them rubbery, so monitor closely. Store them in the fridge after opening, submerged in their brine, to maintain texture. 💡
Repurpose the Brine
Strain the leftover brine after removing the peppers and store it in a separate jar. This tangy liquid is perfect for marinades, salad dressings, or even a quick cocktail mixer.
I use it to baste grilled chicken or drizzle over roasted vegetables. Just remember, it’s strongest immediately after pickling—flavor fades slightly over time, so use it within 2 weeks.
Nutrition facts
Frequently asked questions
Can I use apple cider vinegar instead of white vinegar?
Yes, apple cider vinegar works beautifully and adds a subtle fruity depth to the flavor. Just reduce the sugar by 1 tablespoon since apple cider vinegar is slightly sweeter. The peppers will develop a more complex taste, perfect for charcuterie boards or autumn-themed dishes.
How do I know when the pickled peppers are ready to eat?
Test for doneness after 48 hours by biting into a pepper ring—it should be crisp with a slight snap. If it feels soft, wait another 12-24 hours. The flavor improves over time, so let them sit for at least 1 week before using for maximum tang and crunch.
What can I do with the leftover brine?
Strain and store the used brine in a clean jar—it’s a fantastic marinade or salad dressing base! Use it within 2 weeks for best flavor. I love drizzling it over grilled meats or mixing it with olive oil for a quick vinaigrette.
Can I make these without red pepper flakes?
Skip them for a milder pepper, or substitute ½ teaspoon smoked paprika for depth without heat. For a different kick, try ¼ teaspoon cayenne instead. The sweet banana peppers will still shine through with just the vinegar’s natural tang.
Why did my peppers turn rubbery?
This usually happens from over-pickling (beyond 1 week) or not keeping them submerged. Always use hot brine and press peppers down firmly. For extra crispness, store them in the fridge after opening and change the brine every 2 weeks.

- Ashley Mac’s Pimento Cheese Recipe: Smoky, Spiced Creaminess With Crunchy Texture - November 16, 2026
- Baguette Recipe: Crusty Golden Crunch With Airy Interior - November 16, 2026
- Texas Roadhouse Bread Recipe: Buttery, Pull-Apart Softness With Every Tear - November 16, 2026