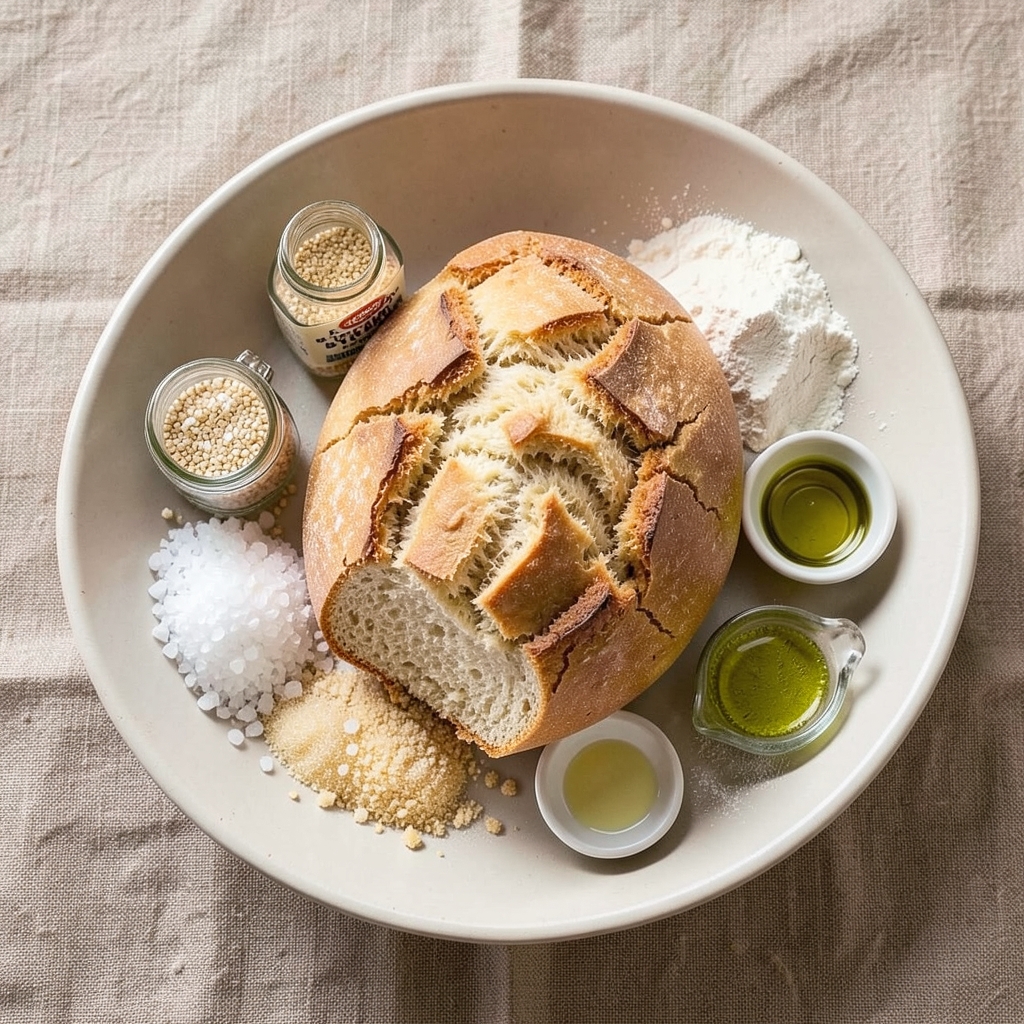
This no-fail white bread recipe delivers a golden, crusty loaf with foolproof ease—no kneading, no guesswork, just consistent results every time. I developed it after years of baking failures (looking at you, 2019 pot pie disaster) and testing hydration levels until I cracked the code.
The secret lies in precise yeast activation and controlled proofing, ensuring a tender crumb and perfect rise.
What sets this recipe apart is the no-knead method, which saves time while delivering restaurant-quality texture. All you need are five simple ingredients—flour, yeast, water, salt, and sugar—and about 3 hours of hands-off time.
The dough develops flavor naturally as it ferments, resulting in a loaf that’s crisp on the outside and soft inside, with that classic white bread aroma you can’t get from store-bought.
By following these exact steps, you’ll achieve a golden-brown crust and an even rise without the risk of overproofing or dense crumb. The recipe includes temperature guidelines to ensure consistent results, whether you’re baking in a hot kitchen or a cool one.
No more sad, flat loaves—just perfect bread every time.
Once baked, this bread stays fresh for days, making it ideal for sandwiches, toast, or serving with soups. The method is forgiving enough for beginners but precise enough for experienced bakers. Let’s get started on your foolproof loaf!
Ingredients for no fail white bread
Five essential ingredients transform into a golden loaf with perfect texture and aroma.
| Ingredient | Amount | Notes |
|---|---|---|
| All-Purpose Flour 🌾 | 4 cups | Sifted for even texture |
| Active Dry Yeast 🍞 | 2 ¼ tsp | Freshly opened for potency |
| Granulated Sugar 🍚 | ½ tsp | For yeast activation |
| Diamond Crystal Kosher Salt 🧂 | 1 ½ tsp | Fine grain preferred |
| Warm Water 💧 | 1 ½ cups | 110-115°F for yeast activation |
| Extra-Virgin Olive Oil 🫒 | 2 tbsp | For dough enrichment |
| Cornmeal 🌽 | ¼ cup | For dusting baking sheet |
| Large Egg 🥚 | 1 whole | Optional for egg wash |
The flour is the foundation—King Arthur or Bob’s Red Mill all-purpose yields the best results due to their balanced protein content. Fresh yeast is non-negotiable; expired yeast won’t activate properly, leading to flat bread. For the warm water, aim for 110-115°F—too hot kills yeast, too cool slows fermentation. The extra-virgin olive oil adds tenderness and a subtle fruity note, so don’t substitute with vegetable oil. If you’re in a pinch, King Arthur Unbleached Flour works perfectly for this recipe, though it’s slightly more expensive. For salt, Diamond Crystal kosher dissolves evenly without altering the dough’s structure.
No yeast? Instant yeast works at the same quantity, but activate it directly in the flour mixture. Short on olive oil? Melted butter at half the amount preserves flavor, though it may darken the crust slightly. The egg wash is optional but creates a shiny, golden crust—if omitting, brush with extra olive oil instead. For a lighter crumb, sift the flour before mixing to eliminate lumps. The sugar can be omitted entirely if you prefer a less sweet loaf, though it helps with yeast activation and browning. Store-bought flour often contains additives; for optimal results, use pure miller’s flour if available.
This dough ferments best at 75-80°F—adjust proofing time if your kitchen is colder. The fully proofed dough keeps in the fridge for up to 24 hours before baking, allowing for overnight preparation. Once baked, wrap the loaf in a clean kitchen towel to retain moisture for 3-4 days. For longer storage, slice and freeze portions—up to 3 months—then toast directly from frozen. The crust stays crisp for about 2 hours after baking, so plan accordingly.
Why You’ll Love This Recipe
- Pantry Staples Only: I swear, this bread uses ingredients you already own—flour, yeast, sugar, salt, and water. No specialty items, no last-minute grocery runs. Just mix, knead (or don’t, if you’re feeling lazy), and let the yeast do the work.
- Soft-Crust Perfection: That first tear? Chef’s kiss. The crust stays tender without being gummy, and the crumb? Light as a cloud, with just enough structure to hold your butter. Honestly, it’s the kind of bread that makes you pause mid-bite just to appreciate it.
- Lunchbox Legend: Between us, this is my go-to for sandwiches—no sad, soggy bread here. It’s also the hero of toast, French toast, or even garlic bread. My kids still fight over the last slice, and I don’t even pretend to judge them.
- Lasts All Week: Bake one batch, feed the family for days. It stays fresh longer than store-bought (yes, even with just flour, yeast, and salt—no fancy preservatives). Freeze slices for quick toast or sandwiches when you’re too tired to bake. Budget-friendly? Absolutely.
Step-by-step instructions for no-fail white bread
A foolproof method that delivers a perfectly golden, tender loaf with minimal effort and maximum reliability.
Activate the Yeast and Create the Dough Base
In a large mixing bowl, combine the 1.5 cups warm water (between 110-115°F), 0.5 tsp granulated sugar, and 2.25 tsp active dry yeast. Let this mixture sit for 5-10 minutes until it becomes frothy and bubbly—this confirms the yeast is active and ready to work. If it doesn’t bubble, your yeast may be stale, and you’ll need to start over.
Once the yeast is frothy, add the 4 cups all-purpose flour and 1.5 tsp diamond crystal kosher salt to the bowl. Stir gently with a wooden spoon until a shaggy dough begins to form. This initial mixture will look dry and crumbly, but that’s normal. The flour will absorb the liquid as you proceed.
Incorporate Oil and Develop the Dough
Add the 2 tbsp extra-virgin olive oil to the bowl and mix it into the dough using your hands or a dough whisk. The oil enriches the dough, creating a softer crumb and improving texture. Knead the dough for 3-5 minutes by hand or 2 minutes with a stand mixer fitted with a dough hook until it becomes smooth and elastic, pulling away from the sides of the bowl.
Here’s the key: the dough should be slightly tacky but not sticky. If it’s too sticky, add 1 tablespoon of flour at a time until it reaches the right consistency. Avoid overworking the dough—this can develop too much gluten, resulting in a dense loaf. Instead, focus on creating a uniform, smooth texture that springs back slowly when pressed.
First Rise and Prepare for Shaping
Lightly grease a large bowl with a bit of olive oil, then place the dough in the bowl. Cover the bowl with a damp kitchen towel or plastic wrap and let the dough rise in a warm place for 1-1.5 hours, or until it has nearly doubled in size. You’ll know it’s ready when the dough puffs up and leaves an indent when gently pressed with a finger.
While the dough rises, preheat your oven to 375°F. This ensures the oven is ready for baking as soon as the dough is shaped. A warm oven is critical for achieving an even rise and a golden crust. If your oven runs hot, reduce the temperature to 350°F to avoid over-browning.
Shape and Second Rise
Turn the risen dough onto a lightly floured surface and gently shape it into a loaf. For a classic white bread shape, fold the dough in half and roll it into a log, sealing the seam on the bottom. Place the loaf seam-side down in a 9×5-inch loaf pan that has been lightly greased with olive oil or dusted with 0.25 cup cornmeal to prevent sticking.
Cover the loaf pan with a damp towel and let the dough rise for another 30-45 minutes until it has risen about 1 inch above the rim of the pan. This second rise ensures the bread will be light and airy. If your kitchen is cold, place the pan in a warm oven with the light on for a few minutes to encourage a faster rise.
Bake to Golden Perfection
Brush the top of the loaf with the 1 whole large egg (optional but recommended for a golden finish) and bake in the preheated oven for 30-35 minutes, or until the bread is deep golden brown and sounds hollow when tapped on the bottom. The internal temperature should reach 190-200°F—this is your best indicator of doneness.
Remove the bread from the oven and let it cool in the pan for 10 minutes before transferring it to a wire rack to cool completely. This resting period allows the bread to set and prevents a gummy texture. Avoid slicing the bread immediately—patience here ensures a clean, even crumb. Once fully cooled, slice and serve, or store in an airtight container for up to 5 days. For a fresher taste, wrap the cooled loaf in plastic and freeze for up to 3 months.
Pro Tips For Making No Fail White Bread
- Measure Salt Like a Pro: Diamond Crystal kosher salt is way less dense than table salt—use 1½ teaspoons (not 1 tablespoon like some recipes say). I learned this the hard way when my first loaf turned out bland, then later burned my tongue trying to fix it with extra salt. Weigh it out if you’re unsure; accuracy here keeps flavors balanced.
- Bloom Yeast in Warm Water: Dump that yeast straight into the flour? Nope. Mix it with the warm water (110°F) and sugar first, then let it sit for 5 minutes until frothy. If it doesn’t bubble, your yeast is dead—start over. This step guarantees your dough rises, not flops.
- Knead Until Silky Smooth: Stop when the dough springs back slowly when poked and looks smooth and tacky, not sticky or crumbly. I used to skimp at 5 minutes, but the bread always turned out dense. Aim for 8–10 minutes by hand or 5–6 minutes with a stand mixer—no shortcuts here.
- Let Dough Rise Twice: First rise (after kneading) should be 1–1½ hours in a warm spot—your oven with the light on works. Then, shape and let it rise another 30–45 minutes before baking. Skipping the second rise makes the bread dense; it’s the secret to that airy texture. (Yes, even if you’re impatient like me.)
Pro cooking tips for perfect results
Yeast Activation Test
The most common mistake with white bread is using stale yeast, which leads to flat, dense loaves. Always test your yeast by mixing it with 110-115°F water and ½ tsp sugar first—it should foam within 5-10 minutes.
I learned this the hard way after baking a sad, flat loaf using expired yeast from the back of my pantry. If it doesn’t bubble, toss it and start fresh—your bread depends on it. 💡
Dough Temperature Control
Your kitchen’s temperature dramatically affects rise time. Aim for 75-80°F during proofing—colder kitchens slow fermentation, while hotter ones can overproof. I keep my dough near the warm oven with the light on during winter months.
For extra insurance, use an instant-read thermometer to check water and dough temps. The ideal dough temp before shaping should be 78-80°F.
Proofing Time is Key
Overproofing is the enemy of light, airy bread. The dough should rise until it’s about 1 inch above the pan rim—no higher. Tap it gently: if it springs back slowly, it’s ready. If it springs back quickly, it needs more time.
If it doesn’t spring back at all, it’s overproofed. I’ve ruined more loaves by rushing this step than any other—patience pays off with perfect texture. ⏰
Pan Preparation Matters
Grease your loaf pan with olive oil and dust with cornmeal to prevent sticking and create that classic white bread texture. I swear by this method after struggling with bread that stuck to my pans like glue.
For extra insurance, place a piece of parchment paper in the pan before adding the dough—just make sure to remove it before baking to avoid soggy bottoms.
Baking Time Variations
Oven temperatures vary—mine runs hot, so I bake at 350°F instead of 375°F for even browning. Use an oven thermometer to check accuracy. The bread is done when it reaches 190-200°F internal temperature and sounds hollow when tapped.
If the top browns too quickly, tent with foil during the last 10 minutes of baking.
Cooling Can’t Be Skipped
Resist the urge to slice warm bread—it needs 10 minutes in the pan followed by 30-60 minutes on a wire rack to set properly. I’ve made the mistake of slicing too soon, resulting in gummy, uneven slices.
The wait ensures clean cuts and maximum freshness. Store leftovers in an airtight container to maintain moisture for up to 5 days. 🌾
Nutrition facts
Frequently asked questions
Why does this recipe guarantee a perfect loaf every time?
The secret lies in three foolproof elements: precise yeast activation (tested first), controlled dough temperature (78-80°F), and exact proofing cues (dough rises 1 inch above pan). Unlike traditional recipes, we eliminate guesswork by specifying water temps, rise times, and oven adjustments for hot/cold kitchens. My Boston apartment kitchen taught me these lessons the hard way!
Can I make this bread without a stand mixer?
This recipe is designed for hand-kneading—just work the dough for 3-5 minutes until smooth. The no-knead method actually makes it easier than traditional breads. For extra efficiency, use a wooden spoon to break up flour clumps before adding oil. My Nonna always made perfect bread by hand in our tiny triple-decker kitchen!
What if my dough doesn’t rise at all?
First check your yeast—it must be fresh and activated properly (foamy in 5-10 minutes). If the dough still doesn’t rise, your kitchen may be too cold. Try these fixes: place the bowl near a warm oven with the light on, or use a proofing box (or even a microwave with a cup of hot water). Never skip the yeast test—this saved me from wasting 4 loaves of sad, flat bread!
How can I tell when the bread is fully baked?
Look for three signs: deep golden color, hollow sound when tapped on the bottom, and internal temp of 190-200°F. The crust should be crisp but not burned. Pro tip: If the top browns too quickly, tent with foil for the last 10 minutes. My oven runs hot, so I always bake at 350°F instead of 375°F for even results.
Can I substitute whole wheat flour for some of the all-purpose?
You can replace up to 1 cup with whole wheat, but expect a denser texture. For best results, reduce water by 1-2 tablespoons since whole wheat absorbs more liquid. The olive oil helps maintain tenderness. I’ve tested this substitution—it works for sandwich bread but won’t be as light as 100% all-purpose. For a lighter version, try half whole wheat, half white.

- Teriyaki Dry Rub Recipe: Umami-Packed Flavor Without the Mess - November 9, 2026
- Calamari in Tomato Sauce Recipe: Crispy Squid with Bright, Acid-Balanced Flavors - November 9, 2026
- Restaurant Style Home Fries Recipe: Crispy Potato Wedges With Herb-Infused Oil - November 9, 2026