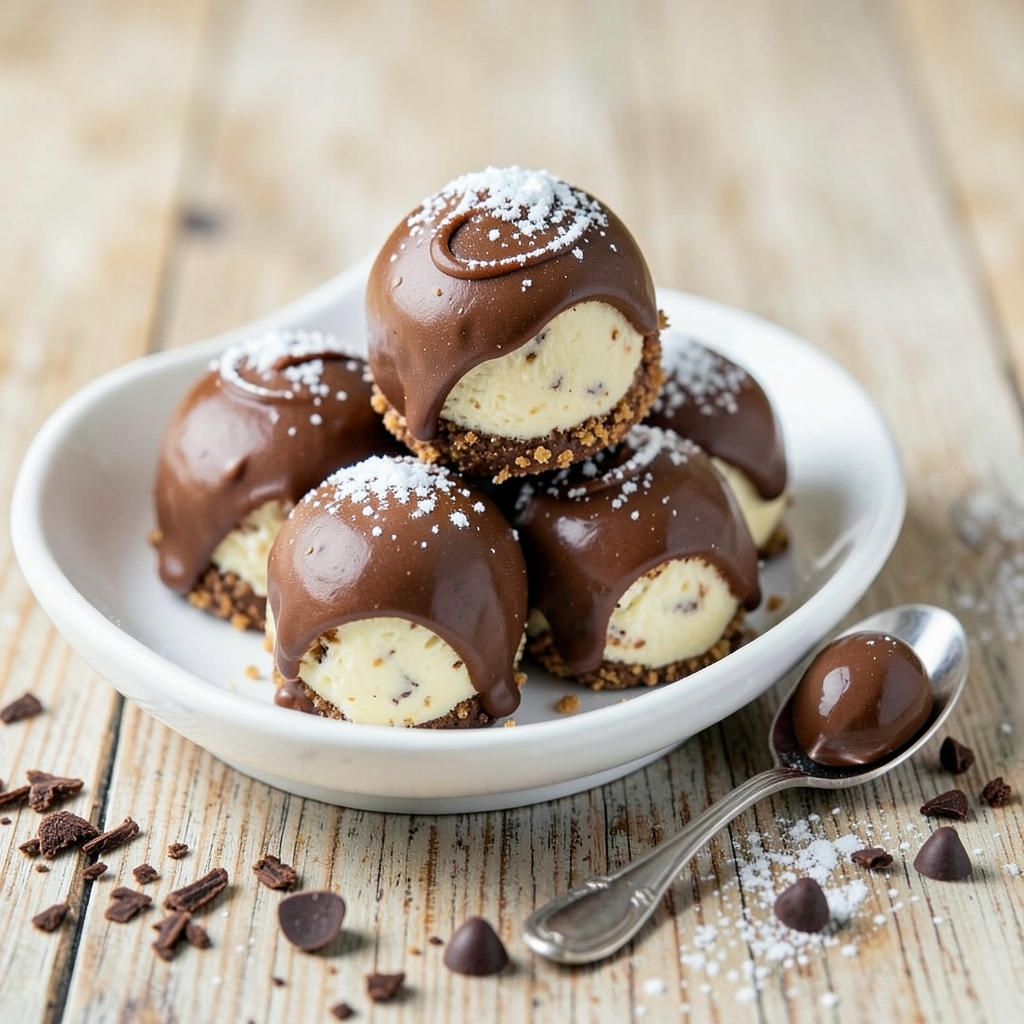
This no-bake cheesecake truffles recipe delivers all the creamy richness of classic cheesecake—without a single minute in the oven. 🌟 After years of testing dessert shortcuts (including that disastrous 2019 pot pie), I finally cracked the code for truffles that stay perfectly firm, with velvety cream cheese centers and a glossy chocolate shell.
The secret lies in precise ingredient ratios and proper chilling time—no guesswork, just reliable results every time. You’ll mix cream cheese, powdered sugar, and vanilla until silky smooth, then roll into balls and coat in melted chocolate.
The process is simple but requires patience to let flavors meld during the 24-hour resting period.
What you’ll end up with is a batch of decadent truffles that look like they came from a patisserie—golden chocolate shells that crack just slightly when bitten, revealing a luscious cream cheese center. These are perfect for holidays, potlucks, or when you crave dessert without the effort of baking.
Pro tip: Double the batch and store extras in the fridge for up to two weeks. Garnish with crushed nuts or sprinkles if you’re feeling fancy. Let’s get rolling!
Ingredients for no bake cheesecake truffles
Nine ingredients, one decadent dessert. No oven, no stress—just creamy truffles that taste like a patisserie secret.
| Ingredient | Amount | Notes |
|---|---|---|
| Full-Fat Cream Cheese 🧀 | 16 oz | Room temperature for smooth mixing |
| Powdered Sugar 🍚 | 2 cups | Sifted for smooth texture |
| Pure Vanilla Extract 🌿 | 1 tbsp | High-quality for rich flavor |
| Unsalted Butter 🧈 | 4 oz | Room temperature, cubed |
| Dark Chocolate Chips 🍫 | 12 oz | 70% cocoa for rich coating |
| Heavy Whipping Cream 🥛 | ¼ cup | Cold for firm truffles |
| Granulated Sugar 🍚 | 2 tbsp | For chocolate coating |
| Cocoa Powder 🍫 | 2 tbsp | Natural for chocolate flavor |
| Pinch 🧂 | 1 pinch | Salt to balance sweetness |
| Powdered Milk 🥛 | 1 tbsp | For extra creaminess |
| Almond Extract 🌰 | ½ tsp | Optional for depth (omit if nut-free) |
The cream cheese is your MVP here. Philadelphia brand is my go-to because it’s consistently smooth, but any full-fat variety works. Room temperature is key—cold lumps ruin the texture. Grab the largest tub you can find (16 oz), and let it sit out for 30 minutes before mixing. The butter? Same rule applies—cold from the fridge makes it hard to blend, so take it out while you prep. For chocolate, Ghirardelli or Lindt chips melt beautifully. If you’re using bars, chop them finely so they melt evenly.
No vanilla extract? Vanilla bean paste works just as well, or even a scraped vanilla bean if you’re feeling fancy. Short on cocoa powder? Melted chocolate chips plus extra powdered sugar mimics the effect. The almond extract is optional but adds a sophisticated note—skip it if you’re avoiding nuts or just want to keep it simple. For the chocolate coating, I like to use half dark, half milk chocolate chips for a marbled look. If you can’t find powdered milk, dry milk powder from the baking aisle works too. Pro tip: Line your work surface with parchment paper—truffles roll off easily and stay clean.
These keep beautifully. Store finished truffles in an airtight container in the fridge for up to 2 weeks. The longer they rest, the more the flavors meld—24 hours minimum for best results. Freeze extras for 3 months by rolling them in parchment paper first. For a fancy touch, roll truffles in crushed nuts, sprinkles, or cocoa powder right before serving. Double the batch—trust me, you’ll want seconds.
Why You’ll Love This Recipe
- No Mixing Needed: I swear by this recipe because it’s literally three ingredients mashed together—no beating, no baking, just a spoon and a bowl. The cream cheese and butter soften in minutes, and the vanilla ties it all into that classic cheesecake flavor without a single bowl to wash.
- Rich Without Guilt: Between us, full-fat cream cheese and dark chocolate chips make these dangerously indulgent, but the powdered sugar keeps it from being too heavy. It’s like dessert got a free pass—creamy, slightly sweet, and packed with that melty chocolate bite that disappears too fast.
- Party in a Jar: These truffles are my go-to for last-minute gatherings because they roll into perfect bite-sized balls. Roll them in crushed nuts or cocoa powder for extra flair, and they’ll disappear at book clubs, potlucks, or even as a “I forgot to bake” gift. No one will guess they took 15 minutes.
- Zero-Waste Leftovers: Make a double batch, stash them in the fridge, and pull them out whenever cravings hit. They keep for weeks—no freezer burn, no weird textures. Honestly, I’ve had them cold, at room temp, or even tossed in a lunchbox. That’s the magic of no-bake: no stress, just flavor.
Step-by-step instructions for no-bake cheesecake truffles
Here’s how to create these velvety cheesecake truffles—no oven required, just simple mixing and rolling.
👨🍳 Step 1: Whip the Cream Cheese Base
In a large mixing bowl, combine the 16 oz full-fat cream cheese (softened to room temperature), 2 cups powdered sugar, 1 tbsp pure vanilla extract, 1 tbsp powdered milk, and 0.5 tsp almond extract (if using). Use a hand mixer or stand mixer on medium speed until completely smooth, about 3-4 minutes.
Here’s the thing—you want this mixture to be completely lump-free. If you see any streaks of cream cheese, keep mixing. The texture should be thick and spreadable, like frosting. This is your cheesecake filling, so the smoother it is, the better each truffle will taste.
🍳 Step 2: Incorporate the Butter and Cream
Add the 4 oz unsalted butter (also softened) and 0.25 cup heavy whipping cream (cold) to the cheesecake mixture. Mix on low speed until fully combined, about 1-2 minutes. You’re looking for a smooth, creamy consistency that holds its shape when rolled between your fingers.
Don’t overmix here—just until everything is evenly incorporated. The cold cream will help keep the mixture firm enough to roll into perfect truffles. If it feels too soft, chill the bowl in the refrigerator for 10 minutes while you prepare the chocolate coating.
🥘 Step 3: Roll the Truffles
Using a 1 tablespoon scoop (or a melon baller), portion out the cheesecake mixture into 24 equal balls. Roll each ball between your palms to create smooth, round truffles. Place them on a parchment-lined baking sheet and refrigerate for 1 hour to firm up.
Here’s a pro tip: keep your hands slightly dusted with powdered sugar while rolling to prevent sticking. The truffles should be firm enough to hold their shape but still soft enough to roll smoothly. If they feel too sticky, chill for another 15 minutes before continuing.
🍫 Step 4: Prepare the Chocolate Coating
In a microwave-safe bowl, combine the 12 oz dark chocolate chips, 2 tbsp granulated sugar, 2 tbsp cocoa powder, and 1 pinch salt. Microwave in 30-second intervals, stirring between each, until completely melted and smooth. Let it cool slightly (about 2 minutes) until it’s thick enough to coat a spoon but still pourable.
This is where the magic happens—the chocolate should be thick enough to cling to the truffles but still flow smoothly. If it’s too thick, warm it gently in the microwave for 5-10 seconds. The coating should be glossy and ready to dip.
⏰ Step 5: Coat and Set the Truffles
Using a fork or toothpicks, gently roll each chilled truffle in the chocolate coating, making sure to cover it completely. Place the coated truffles back on the parchment-lined baking sheet and refrigerate for at least 2 hours (or up to 24 hours) to set.
For the best results, let them set undisturbed in the fridge. The longer they chill, the firmer and more stable they’ll be. Once set, they’ll have that perfect snap when you bite in—creamy cheesecake center with a rich, velvety chocolate exterior. Store in an airtight container in the fridge for up to 1 week.
Pro Tips For Making No Bake Cheesecake Truffles
- Soften Cream Cheese Properly: Stick it in the fridge for 10–15 minutes before mixing—room temperature takes too long and risks melting. I learned this the hard way when my first batch turned into a sad, greasy puddle instead of smooth dough.
- Measure Butter Precisely: Use a kitchen scale for the butter—1 tablespoon packed equals 14 grams, not 16. I used to eyeball it, and my truffles were either too dry or too greasy. Precision here makes a real difference.
- Roll Chilled Dough Only: Chill the dough for 30 minutes before rolling—it’s the only way to avoid sticky messes. I know, I know, but trust the process. Warm dough stretches and tears like overworked dough.
- Dip Quickly in Chocolate: Work fast when dipping in melted chocolate—lingering turns truffles into soggy blobs. A wire rack over a bowl catches drips and keeps your workspace clean. (Yes, even if you’re impatient like me.)
Regional styles of this no bake cheesecake truffles
Classic New England Style
In my Boston neighborhood, we take these cheesecake truffles to the next level by adding a touch of maple syrup to the cream cheese mixture—just 1 teaspoon swirled in at the end. The subtle caramel notes remind me of my Nonna’s pancakes, and it pairs beautifully with the chocolate coating.
For presentation, I roll the finished truffles in crushed pecans from the local market, giving them that New England fall vibe. 🌰
Italian-Inspired Variations
My Italian side comes out when I swap the chocolate coating for a dark cherry compote—simmer ½ cup frozen cherries, 1 tbsp balsamic glaze, and 1 tsp orange zest until thickened. Roll the chilled truffles in this jammy mixture, then dust with powdered sugar.
It’s like a bite of tiramisu in truffle form. For extra flair, add espresso powder to the cream cheese base for a mocha twist.
Southern Comfort Twist
Down South, they love their sweet treats with a Southern kick. I’ve seen food bloggers add ½ teaspoon of cinnamon and ¼ teaspoon of cayenne pepper to the cream cheese mixture—just enough heat to wake up your taste buds.
For the coating, melt white chocolate chips with 1 tablespoon of peanut butter for a creamy, nutty shell. Garnish with crushed graham crackers for that classic Southern dessert texture. 🌶️
French Patisserie Elegance
For a truly patisserie-worthy version, I’ve experimented with a double chocolate coating—melt 6 oz dark chocolate and 6 oz white chocolate separately, then swirl them together before dipping. After chilling, I roll the truffles in edible gold leaf for a luxurious finish.
Serve on a marble slab with fresh raspberries for a Parisian-inspired dessert table. The contrast of the dark and white chocolate adds depth that’s simply irresistible.
Holiday Special Edition
During the holidays, I double the recipe and add 1 teaspoon of eggnog extract to the cream cheese base for a festive twist. For the coating, I mix chocolate chips with crushed candy canes and a sprinkle of red and green sprinkles.
These truffles become instant crowd-pleasers at holiday parties. Store them in an airtight container with a ribbon—because presentation matters just as much as taste. 🎄
Vegan Adaptation
For my plant-based friends, I’ve found a way to keep the no-bake magic alive. Replace the cream cheese with 16 oz vegan cream cheese (like Kite Hill brand), and use coconut oil instead of butter.
For the chocolate coating, melt vegan chocolate chips with 1 tablespoon of coconut milk for a smooth, creamy finish. The texture is slightly different but still delivers that rich, velvety experience. 🌱
Nutrition facts
Frequently asked questions
Why do I need to chill the truffles before coating?
Chilling for 1 hour before coating prevents the chocolate from melting the soft truffle centers. This ensures clean rolls and a proper snap when bitten. The longer they chill (24 hours is ideal), the more stable they become for transport or gifting.
Can I make these without a mixer?
Use a sturdy spoon or whisk to beat the cream cheese and powdered sugar by hand until completely smooth. It takes more elbow grease (5-7 minutes), but the texture will still be creamy. Just be patient and scrape the bowl often.
What if my chocolate coating is too thick or too thin?
Too thick? Warm for 5-10 seconds in the microwave. Too thin? Refrigerate for 10 minutes to thicken. The perfect consistency should coat a spoon like honey—glossy but still pourable. Pro tip: Add 1 tbsp more cocoa powder if it’s too runny.
How do I store these for maximum freshness?
Keep in an airtight container in the fridge for up to 2 weeks. For longer storage, freeze uncoated truffles for 3 months—coat them fresh after thawing. The chocolate coating stays firm even after freezing if you wrap them individually in parchment.
Can I use cream cheese substitutes?
For a lighter version, try ricotta cheese mixed with 1 tbsp sour cream—it’s less rich but still creamy. For a vegan option, use 16 oz vegan cream cheese (like Kite Hill) with 2 tbsp coconut oil instead of butter. The texture will be slightly softer but still delicious.

- Restaurant Style Home Fries Recipe: Crispy Potato Wedges With Herb-Infused Oil - November 9, 2026
- Alligator Bread Recipe: Crunchy Herb-Crusted Bites with Creamy Center - November 9, 2026
- Old Fashioned Hot Spiced Apple Cider Recipe: Cozy Spice Infusion for Winter Nights - November 9, 2026