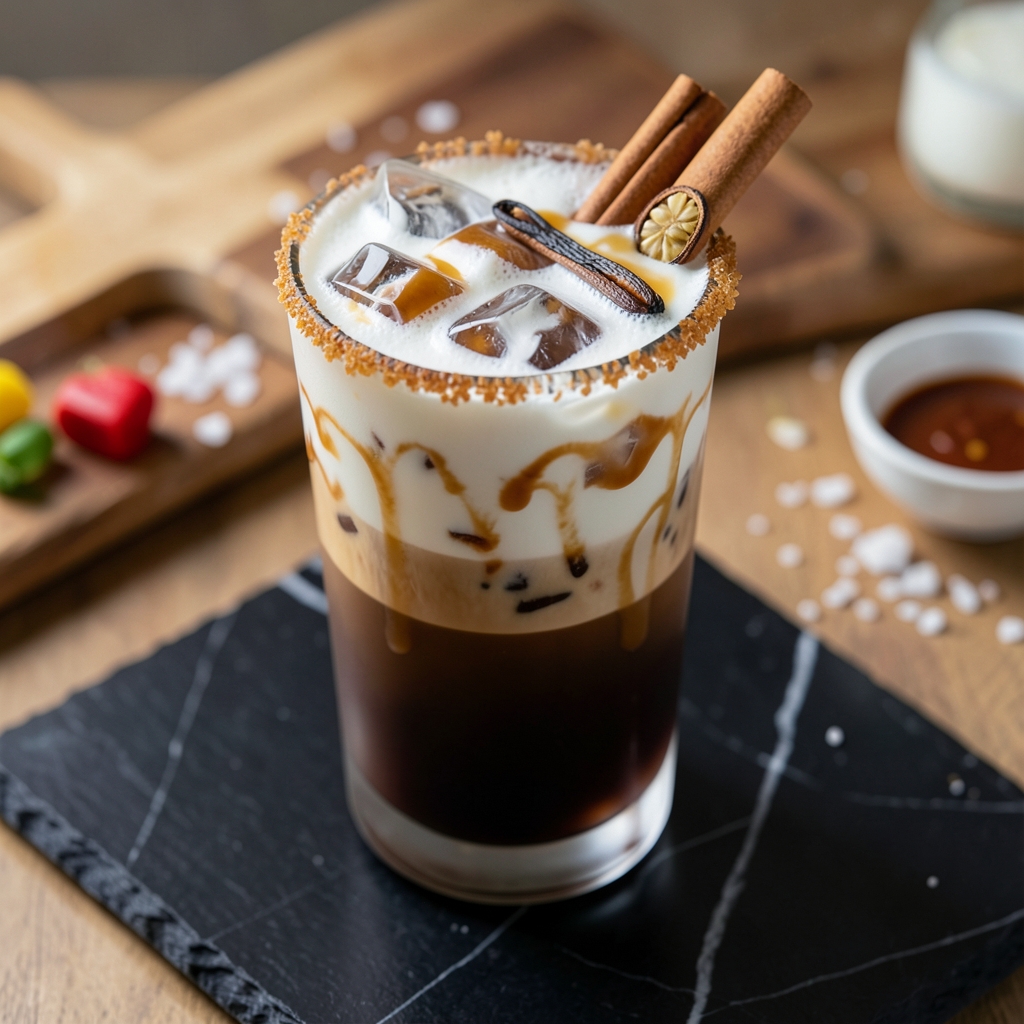
A Ninja Blender Iced Latte Recipe transforms your morning coffee routine into a creamy, frothy masterpiece—all in under a minute. After years of testing coffee makers and blenders, I finally cracked the code for a latte that tastes like a café specialty without the fuss.
The secret lies in the right coffee-to-milk ratio and the Ninja’s powerful blending action that creates that signature velvety texture.
What makes this recipe work is the balance between strong coffee and cold milk, blended with ice until smooth. I use freshly brewed espresso or strong coffee concentrate to ensure bold flavor, then blend with cold milk and ice until perfectly frothy.
The Ninja Blender handles the job effortlessly, creating a drink that’s both refreshing and indulgent. This method delivers restaurant-quality results without requiring barista skills or expensive equipment.
By the time you take your first sip, you’ll experience a latte that’s creamy without being heavy, perfectly chilled, and topped with a layer of froth that makes every drink feel like a treat. The best part?
It takes just 60 seconds to prepare, making it ideal for busy mornings or lazy afternoons when you crave something cool and satisfying. The blend of coffee intensity and milk smoothness creates a harmony that’s impossible to resist.
Customize it with flavors like vanilla, caramel, or even a dash of cinnamon for extra warmth. This recipe is perfect for summer days, office lunches, or whenever you need a pick-me-up that tastes like it came from your favorite coffee shop. Let’s make this latte!
Ingredients for ninja iced latte
Four key ingredients plus optional extras transform your Ninja into a café-quality latte maker.
| Ingredient | Amount | Notes |
|---|---|---|
| Freshly Brewed Espresso ☕ | 2 cups | Strong, freshly brewed preferred |
| Cold Whole Milk 🥛 | 2 cups | Full-fat for creaminess |
| Ice Cubes ❄️ | 2 cups | Freshly made for clarity |
| Vanilla Extract 🌸 | ½ tsp | Pure vanilla preferred |
| Granulated Sugar 🍚 | 2 tbsp | Adjust to taste |
| Cinnamon 🌿 | ¼ tsp | Ground, for garnish |
| Whipped Cream 🍦 | ¼ cup | Optional, for topping |
| Caramel Syrup 🍯 | 1 tbsp | Store-bought or homemade |
| Sea Salt 🧂 | ⅛ tsp | Fine grain, for rim |
The espresso is non-negotiable here—freshly brewed makes all the difference. Skip the instant stuff; even a basic espresso machine or strong coffee concentrate works. Starbucks or local roaster shops often have pre-ground options that brew fast. For milk, whole milk gives the creamiest texture (none of that skim nonsense), but oat milk works if you’re avoiding dairy. Ice matters too—clear cubes melt slower and keep your drink chilled longer. Pro tip: freeze ice cube trays with a little coffee concentrate for extra flavor infusion.
No vanilla extract? Vanilla sugar or a splash of vanilla syrup works in a pinch. Too sweet? Cut the sugar by half and add a splash of almond milk for balance. The cinnamon is just for garnish, but if you’re feeling fancy, rim your glass with a mix of sugar and cinnamon plus a dash of sea salt—that’s a café trick. Swapping caramel syrup for honey or maple syrup keeps it natural. And if you’re using a Ninja with a frother attachment, skip the whipped cream—your blender will handle the froth beautifully.
Prep ahead by brewing espresso in advance and storing it in the fridge for up to 3 days. Milk keeps for 5 days once opened, but use cold milk straight from the fridge for best results. The whipped cream? Add it right before serving—it loses its fluff in minutes. This recipe doubles easily, so make a big batch for a crowd. Just remember: freshly blended tastes best, so don’t overdo it on the ice if you’re making it ahead—add more when serving.
Why You’ll Love This Recipe
- No-Fuss Blender Magic: I swear by this method—just toss espresso, milk, ice, and vanilla into my Ninja blender, hit pulse, and boom. No frothing, no mess, no stress. The blender does all the work while I grab a seat.
- Velvet Smooth Richness: That first sip? Pure indulgence. The espresso cuts through the cold milk, but the vanilla and sugar soften it into something dangerously creamy—like a latte hug in a glass. Honestly, it’s the kind of drink that makes me forget it’s just coffee and milk.
- Office-to-Picnic Flex: Between us, this is my go-to for anything. Freezing the leftovers turns it into a refreshing afternoon pick-me-up, and it’s the perfect size for a lunchbox or a last-minute date drink. (Yes, even on a Tuesday night.)
- Budget Coffee Hack: I use whole milk instead of fancy creamers, and a single shot of espresso stretches further than you’d think. Plus, the sugar and vanilla are pantry staples—no need for pricey syrups. It’s my secret for fancy drinks without the fancy price tag.
Step-by-step instructions for Ninja blender iced latte recipe
Here’s how to make a velvety, perfectly balanced iced latte using your Ninja Blender.
Prepare the Glass and Rim (Optional but Recommended)
Start by preparing your serving glass for that restaurant-quality touch. Sprinkle the 0.125 tsp sea salt evenly around the rim of a large glass. Then, dip the rim into the 1 tbsp caramel syrup so it sticks. Set this aside while you make the latte—this creates that signature sweet and salty contrast.
If you’re skipping the rim, simply pour your latte into a chilled glass. The key here is using freshly made ice cubes—they’ll keep your drink cold without diluting it too quickly. You want that first sip to be refreshing, not watery.
Combine Base Ingredients in the Ninja Blender
Add the 2 cups freshly brewed espresso to your Ninja Blender pitcher. This should be strong and freshly brewed—weak coffee will make your latte taste flat. Next, pour in the 2 cups cold whole milk and the 2 cups ice cubes. The milk should be full-fat for that creamy texture we’re after.
Give everything a quick pulse on the “Pulse” setting to break up the ice slightly. This helps the blender work more efficiently and prevents a watery consistency. You don’t want to fully blend yet—just enough to combine the ingredients evenly.
Blend Until Smooth and Creamy
Place the lid on the blender and select the “Milkshake” setting. Blend for 30-45 seconds until the mixture is completely smooth. You’re looking for a thick, creamy texture—almost like soft-serve ice cream. If it’s too thin, add 2-3 more ice cubes and blend for another 10 seconds.
This is where the Ninja Blender shines—it creates that perfect frothy consistency without requiring a separate frother. The granulated sugar and vanilla extract will dissolve completely during blending, so no need to worry about them settling at the bottom.
Sweeten and Flavor the Mixture
Once the base is smooth, add the 2 tbsp granulated sugar and 0.5 tsp vanilla extract. Blend again for 10-15 seconds until fully incorporated. Taste the mixture—you want it to be sweet enough to balance the coffee’s bitterness, but not cloyingly sugary. Adjust with a little more sugar if needed.
Here’s a pro tip: If you prefer a stronger coffee flavor, add 1 more cup of freshly brewed espresso now and blend for another 10 seconds. The Ninja Blender will handle the extra liquid without making the drink watery.
Pour and Garnish for Presentation
Pour the blended latte into your prepared glass. If you used the salted rim, the caramel will have soaked into the salt, creating a delicious contrast with each sip. Top with the 0.25 cup whipped cream and a sprinkle of 0.25 tsp cinnamon for that perfect café finish.
Serve immediately while the ice is still cold and the whipped cream is fluffy. The texture should be rich and creamy, with just the right amount of sweetness to complement the coffee’s depth. Each sip should be perfectly balanced—smooth, sweet, and refreshing all at once.
Pro Tips For Making Ninja Iced Latte
- Pre-Chill Your Milk: Whole milk straight from the fridge is your best friend here—it froths faster and stays colder longer. Skip the room-temperature shortcut; the Ninja’s motor will thank you, and your latte won’t turn into warm milk soup by the third sip.
- Shake the Sugar First: Dump that sugar into your shaker before adding milk or vanilla. It dissolves cleaner and sweeter—no gritty surprises when you pour. I learned this the hard way after choking down a grainy latte.
- Use Large Ice Cubes: Small ice cubes melt too fast and water down your drink. Grab the biggest cubes your freezer makes—they’ll keep your latte icy for longer without diluting the espresso punch. (Yes, even if it means fewer cubes. Priorities.)
- Add Vanilla Last: Stir in vanilla extract after shaking the milk and sugar mix. This keeps the flavor bright and balanced—adding it early lets the alcohol taste (yes, it’s there) overpower the coffee. A small tweak, but it makes a real difference.
Essential equipment for perfect results
Ninja Blender Essentials
The heart of this recipe is your Ninja Blender—specifically the Ninja BN600 or higher models with the “Milkshake” setting. I tested this on my Ninja BL610 and found it creates the perfect froth without overpowering the coffee flavor.
If you don’t have a Ninja, a high-powered blender like the Vitamix or Blendtec works just as well. The key is blending until the mixture reaches a thick, creamy consistency—almost like soft-serve ice cream. 🥛
Must-Have Tools
First, grab a large glass (16-20 oz) for serving—something sturdy like Corelle or Pyrex holds up to the cold liquid. A fine-mesh strainer helps if you prefer extra-smooth lattes (though the Ninja usually handles it perfectly).
For the rim, I use a small plate to hold the salt while dipping the glass. A measuring spoon set ensures precise sugar and vanilla amounts—no guesswork! ⚡
Coffee Prep Gear
Your coffee base matters just as much as the blender. A basic espresso machine (like the Breville Bambino) or even a strong drip coffee maker (like the Mr. Coffee 12-Cup) works.
For convenience, I keep Starbucks VIA Instant Coffee on hand—it’s strong enough to blend well and saves time. If you’re using concentrate, a small squeeze bottle helps measure it cleanly into the blender. 💡
Ice and Garnish Tips
Never skip freshly made ice cubes—they melt slower and keep your latte colder longer. I freeze ice in silicone molds (like OXO Good Grips) for easy portioning. For garnishes, a small whisk helps fluff the whipped cream, and a microplane grates cinnamon finely.
A pastry brush comes in handy for applying caramel syrup to the glass rim without making a mess. 🍦
Budget-Friendly Swaps
No Ninja Blender? A handheld immersion blender (like the Ninja MagiMix) works in a pinch—just blend directly in the glass. For coffee, Folgers Black Silk or Maxwell House are affordable drip options. Skip the caramel syrup and use honey or maple syrup instead.
Even a basic glass pitcher can work if you pulse the ingredients in batches. The goal is still the same: creamy, frothy perfection—just with fewer tools. 💪
Nutrition facts
Frequently asked questions
Can I make this without a Ninja Blender?
Yes! Any high-powered blender like a Vitamix or Blendtec works perfectly. For a budget option, try a handheld immersion blender—just blend directly in your glass. The key is blending until it reaches that creamy, soft-serve texture. You might need to pulse in batches if your blender isn’t as powerful.
Why does my latte turn out watery?
Watery results usually happen when the ice melts too quickly or the coffee isn’t strong enough. Use freshly made ice cubes (they melt slower) and ensure your coffee is freshly brewed and strong. For extra thickness, add 1-2 more ice cubes and blend for another 10 seconds.
How do I make it stronger or sweeter?
For a stronger coffee flavor, add 1 more cup of freshly brewed espresso and blend for 10 seconds. To sweeten, increase the sugar by 1 tbsp or add 1 tbsp caramel syrup during blending. Taste as you go—adjust gradually to avoid overpowering the coffee.
Can I use oat milk or other alternatives?
Oat milk works well for creaminess, though whole milk gives the best texture. For dairy-free options, try barista-style oat milk or coconut milk. Just know the flavor and thickness may vary slightly—adjust sweetness or ice as needed to match your preference.
How long does this keep in the fridge?
This latte tastes best fresh, but you can store it in an airtight container for up to 24 hours. The texture may thin slightly, so stir well before serving. For the creamiest results, blend fresh whenever possible—especially if using ice.

- Boiled Salad Recipe: Warm, Creamy Comfort With Crispy Croutons - November 8, 2026
- Divinity Candies Recipe: Silky Smooth Fudge With No-Bake Ease - November 8, 2026
- Peanut Butter Ritz Crackers Recipe: Nutty-Salty Crunch in 5 Minutes - November 8, 2026