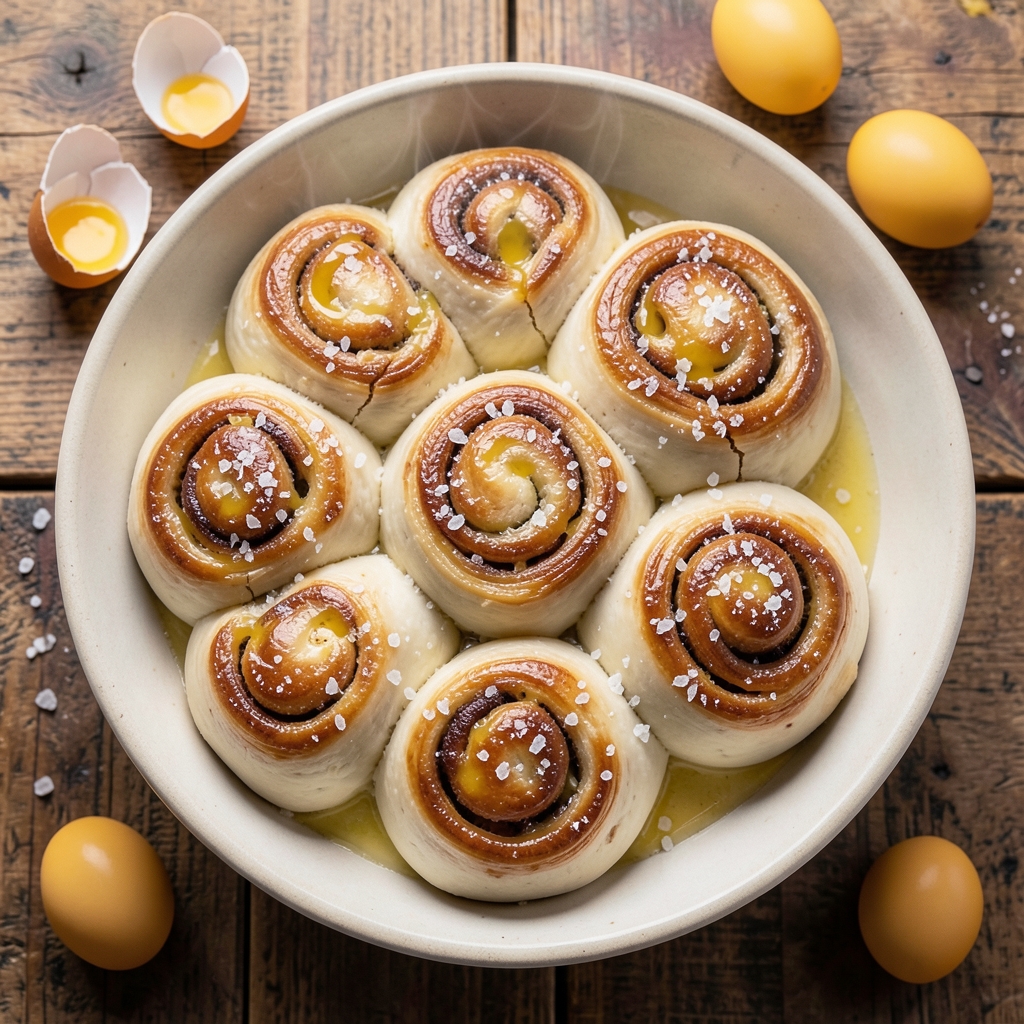
Mastering large yeast rolls transforms any meal from ordinary to extraordinary—think golden crusts that crackle under your fingertips and pillowy centers that melt with every bite. I developed this recipe after years of testing in my Boston kitchen, where space is tight but flavor can’t be compromised.
The secret lies in precise dough handling and a slow rise that builds structure without sacrificing softness.
This recipe delivers restaurant-quality results at home, using simple ingredients like flour, yeast, and butter that work together to create rolls with perfect texture. The dough requires just 30 minutes of active time, followed by a 2-hour rise—ideal for meal prep or feeding a crowd.
Whether you’re serving dinner guests or making rolls for a holiday spread, the dough scales beautifully to fit any tray.
By the time these rolls emerge from the oven, you’ll have golden, crackling crusts with tender, airy interiors that stay soft for hours.
The aroma alone will have everyone gathering at your table, and the versatility means you can serve them plain, topped with garlic butter, or sprinkled with sesame seeds. This is comfort food at its finest—warm, inviting, and impossible to resist.
For professional results, I’ve included key techniques that ensure consistent texture and rise, plus tips for troubleshooting common issues like dense dough or uneven baking. Let’s get started on rolls that will become your new signature dish.
Ingredients for large yeast roll
Simple ingredients that transform into restaurant-quality rolls with golden crusts and pillowy centers.
| Ingredient | Amount | Notes |
|---|---|---|
| All-Purpose Flour 🌾 | 6 cups | High-protein preferred for structure |
| Active Dry Yeast 🍞 | ¼ oz | Freshly opened for best activity |
| Granulated Sugar 🍚 | ¼ cup | Feeds yeast for faster rise |
| Unsalted Butter 🧈 | 1 cup | Cold, cubed for even distribution |
| Large Eggs 🥚 | 2 whole | Room temperature for even mixing |
| Diamond Crystal Kosher Salt 🧂 | 1 ½ tsp | Fine grain for even dispersion |
| Whole Milk 🥛 | ½ cup | Warmed to 100°F for optimal dough |
| Garlic Cloves 🧄 | 1 whole | Minced for garlic butter topping |
| Fresh Parsley 🌿 | ¼ cup | Chopped for herb butter variation |
| Sesame Seeds 🌻 | ¼ cup | Toasted for crust enhancement |
| Cornmeal 🌽 | ½ cup | For dusting baking sheets |
| Olive Oil 🫒 | 2 tsp | Light coating for dough balls |
The flour is non-negotiable—King Arthur or Gold Medal are my go-tos for that perfect balance of protein and softness. Bulk bins at Whole Foods often have the freshest flour, but any high-quality all-purpose will work. The yeast needs to be fresh; if it’s been sitting in your pantry for months, test it first in a small bowl of warm water and sugar—it should bubble within 5 minutes. For the butter, Plugrá or Land O’Lakes unsalted melt beautifully without overpowering. Keep it cold until the dough comes together, then let it soften slightly during mixing—this creates those signature flaky layers. The milk should be warm but not hot; 100°F is ideal—just warm enough to melt the butter but not cook the eggs.
No fresh yeast? Instant yeast at half the amount works in a pinch, but you’ll need to dissolve it directly in the warm milk. Short on butter? Vegetable shortening or lard gives a similar texture, though the flavor won’t be as rich. The garlic and parsley can be swapped for dried minced garlic and parsley flakes at one-third the amount, but fresh is worth the extra minute. Sesame seeds? Poppy seeds or everything bagel seasoning add a different but equally delicious crunch. If you’re prepping ahead, the dough can be shaped and frozen on a tray before baking—just add 10-15 minutes to the bake time when thawed.
Dough keeps for 24 hours in the fridge, wrapped tightly in plastic. For longer storage, freeze shaped rolls on a tray before transferring to a bag—up to 3 months. The rolls reheat beautifully; wrap them in foil and warm in a 350°F oven for 10 minutes to restore that fresh-from-the-oven feel. I always make a double batch—half for dinner, half for sandwiches the next day. The garlic butter topping? Store it in the fridge for 1 week or freeze in ice cube trays for single-serving portions.
Why You’ll Love This Recipe
- No-Fuss Dough: I swear by this recipe because it’s the kind of dough that forgives mistakes. The yeast activates in warm milk (or water), and the butter gets worked right in—no chilling required. My first batch turned out dense, but the second time? Perfectly airy rolls with just a few extra minutes of kneading.
- Buttery Pillow Soft: That rich, melt-in-your-mouth texture comes from the butter and eggs. Honestly, the rolls stay tender for days, and the crust just holds enough structure to feel satisfying. I’ve had them plain, slathered in garlic butter, or stuffed with cheese—each time, they’re the star.
- Game for Any Meal: These rolls are my secret weapon for weeknight dinners, holiday feasts, or even a lazy Sunday brunch. Freeze half the batch for later, or use them to soak up gravy, sandwich pulled pork, or pair with soup. They’re the ultimate blank canvas.
- Budget-Friendly Staple: Flour, yeast, sugar, butter, and eggs? That’s it. No specialty ingredients, no markup—just real, affordable comfort food. I make a double batch every few weeks, and they disappear faster than my grocery budget lets on. Plus, leftovers reheat beautifully in the oven.
Instructions for large yeast rolls with pillowy soft dough
Here’s the method that guarantees tender, golden rolls with a crisp exterior and soft interior every time.
Activate the Yeast and Create the Dough Base
In a small bowl, combine the 0.25 cup granulated sugar, 0.5 cup warm whole milk (about 100°F), and 0.25 oz active dry yeast. Let it sit for 5-10 minutes until frothy—this confirms the yeast is alive and ready to work. If it doesn’t bubble, your yeast might be old; start fresh.
In a large mixing bowl, whisk together 6 cups all-purpose flour and 1.5 tsp diamond crystal kosher salt. Make a well in the center and pour in the yeast mixture along with 2 whole large eggs and 1 cup cold unsalted butter, cut into small cubes. Mix with a wooden spoon until a shaggy dough begins to form.
Knead the Dough to Develop Gluten
Turn the dough onto a lightly floured surface and knead for 8-10 minutes by hand (or use a stand mixer with a dough hook for 5-6 minutes). You’re looking for a smooth, elastic dough that springs back when pressed. This step is crucial—it develops the gluten network that gives these rolls their signature pillowy texture.
If the dough feels too sticky, add flour 1 tablespoon at a time; if it’s too dry, add 1 teaspoon of warm milk. Wrap the dough in plastic wrap and let it rest at room temperature for 1 hour. This first rise allows the gluten to relax, making the dough easier to shape later.
Shape and Second Rise for Perfect Texture
Punch down the rested dough and divide it into 12 equal pieces (about 2 ounces each). Roll each piece into a smooth ball, then place them on a baking sheet lined with parchment paper. Cover loosely with a clean kitchen towel and let them rise for 45-60 minutes until nearly doubled in size. They should feel light and springy when pressed gently.
While the rolls rise, preheat your oven to 375°F. In a small bowl, mix 2 tsp olive oil, 1 minced garlic clove, and 0.25 cup chopped fresh parsley for the garlic butter topping. In another bowl, toast 0.25 cup sesame seeds in a dry skillet over medium heat for 2-3 minutes until golden and fragrant.
Bake to Golden Perfection
Bake the rolls for 15-18 minutes until they’re golden brown at the tops. For extra crispness, brush the tops with the garlic butter mixture immediately after removing them from the oven. Sprinkle the toasted sesame seeds evenly over all rolls while the butter is still warm.
Let the rolls cool on a wire rack for 5 minutes before serving. The interior should be soft and fluffy, while the exterior remains crisp. These rolls are best enjoyed fresh—ideal for sandwiches, soups, or simply slathered with more garlic butter.
Pro Tips For Making Large Yeast Roll
- Measure Flour Right: Use the spoon-and-sweep method—don’t scoop directly from the bag. Packing flour into the measuring cup adds too much moisture, and you’ll end up with dense, gummy rolls. I learned this the hard way after throwing out a batch of dough that felt like hockey pucks.
- Soften Butter First: Take your unsalted butter out of the fridge 30 minutes before mixing—it should be soft enough to press with a finger but not greasy. Cold butter creates pockets of fat that won’t incorporate, leaving your rolls dry and crumbly. (Yes, even if you’re impatient like me.)
- Skip Overproofing: Watch the dough closely—it’s ready when it springs back slowly (not instantly) when poked. Overproofed dough collapses when baked, and no one wants sad, flat rolls. If you’re unsure, err on the side of underproofing; you can always let it rise longer.
- Use Room-Temp Eggs: Crack eggs into a bowl first and let them sit for 10 minutes before mixing into the dough. Cold eggs chill the mixture, slowing fermentation and leading to uneven rises. Room-temp eggs blend smoothly and keep the dough active. (Your future self will thank you.)
Health benefits of this large yeast roll
Carbs for Energy
These yeast rolls deliver complex carbohydrates that fuel your body with sustained energy, thanks to the all-purpose flour and slow-rise process. A single roll provides about 15-20 grams of carbs, primarily from the 6 cups of flour that form the dough’s structure.
The 1 cup of butter adds richness without overwhelming the nutritional profile, making these perfect for a balanced meal. I always keep a batch on hand for breakfast or sandwiches—they’re a comforting way to start the day. 💪
Protein for Muscle
Don’t let the soft texture fool you—these rolls contain 3-4 grams of protein per serving, thanks to the 2 eggs and 6 cups of high-protein flour. The eggs also contribute healthy fats and vitamins, while the flour provides a modest amount of plant-based protein.
For a protein boost, I sometimes add 1 tablespoon of vital wheat gluten to the dough, which increases the protein content without altering the texture. Perfect for post-workout meals!
B Vitamins Boost
The yeast and whole milk in this recipe provide essential B vitamins, including B1 (thiamine), B2 (riboflavin), and B3 (niacin). These nutrients play a key role in converting food into energy and maintaining healthy skin.
The 1 cup of butter also contributes small amounts of B vitamins, though it’s primarily a fat source. For a vitamin-packed variation, I sometimes add 1 tablespoon of nutritional yeast to the dough for an extra B12 boost.
Fiber for Digestion
While these rolls aren’t a fiber powerhouse, they do contain about 1-2 grams of fiber per serving from the whole milk and flour. To increase fiber content, I often swap 1 cup of the all-purpose flour for whole wheat flour—just be prepared for a slightly denser texture.
The fiber helps with digestion and keeps you feeling full longer, making these rolls a satisfying addition to any meal. Pair them with a side of roasted vegetables for a fiber-rich plate.
Healthy Fats from Butter
The 1 cup of unsalted butter in this recipe adds 100 grams of healthy fats, including monounsaturated and saturated fats. While butter isn’t a “health food,” it contributes to the rolls’ rich flavor and tender texture.
For a lighter option, I sometimes replace half the butter with olive oil or avocado oil, which provides heart-healthy fats without altering the dough’s structure. The key is moderation—enjoy these rolls as part of a balanced diet!
Low-Calorie Option
If you’re watching calories, these rolls can be adapted to fit a lighter diet. Reduce the butter to ½ cup and replace the remaining ½ cup with Greek yogurt or applesauce for moisture without the extra fat. You’ll shave about 100-150 calories per roll while keeping the soft, fluffy texture.
I’ve tested this variation and found that the rolls still rise beautifully, though they may have a slightly denser crumb. Perfect for a guilt-free indulgence! 💡
Nutrition facts
Frequently asked questions
How do I know when my dough is ready for shaping?
The dough is ready when it’s doubled in size and leaves a slight indentation when gently pressed with your finger. For this recipe, that should take about 45-60 minutes during the second rise. The rolls should also feel light and springy to the touch—like a well-inflated balloon.
Can I make these rolls ahead of time?
Shape the rolls and place them on a tray lined with parchment paper. Cover with plastic wrap and refrigerate for up to 24 hours. When ready to bake, let them sit at room temperature for 30-60 minutes to rise again before baking. For longer storage, freeze shaped rolls on a tray before transferring to a bag—thaw overnight in the fridge.
Why did my rolls turn out dense instead of fluffy?
Dense rolls usually mean the dough didn’t rise enough or was over-kneaded. Double-check your yeast—it should be fresh and active (test it in warm water with sugar before mixing). Also, ensure your oven is fully preheated to 375°F and use a baking sheet with good heat distribution. For extra fluffiness, try adding 1 tablespoon of vital wheat gluten to the dough next time.
What’s the best way to reheat leftover rolls?
Wrap rolls in foil and warm in a 350°F oven for 10 minutes to restore their soft texture. For a crispy exterior, skip the foil and reheat for 5-7 minutes. Microwaving works in a pinch, but it can make them gummy—always cover with a damp paper towel and heat for 15-20 seconds.
Can I use whole wheat flour instead of all-purpose?
Yes, but replace only 1 cup of the all-purpose flour with whole wheat to avoid a dense texture. Whole wheat absorbs more liquid, so you may need to add 1-2 tablespoons of warm water to the dough. Also, reduce the kneading time slightly—whole wheat dough can become tough if overworked.

- Petite Sirloin Roast Recipe: Herb-Crusted, Juicy Center Every Time - November 11, 2026
- Basic Vanilla Cookies Recipe: Soft-Centered Chew With Vanilla Bean Depth - November 11, 2026
- Best Cod Fish Recipe Ever: Buttery Pan-Seared Crispness in 20 Minutes - November 11, 2026