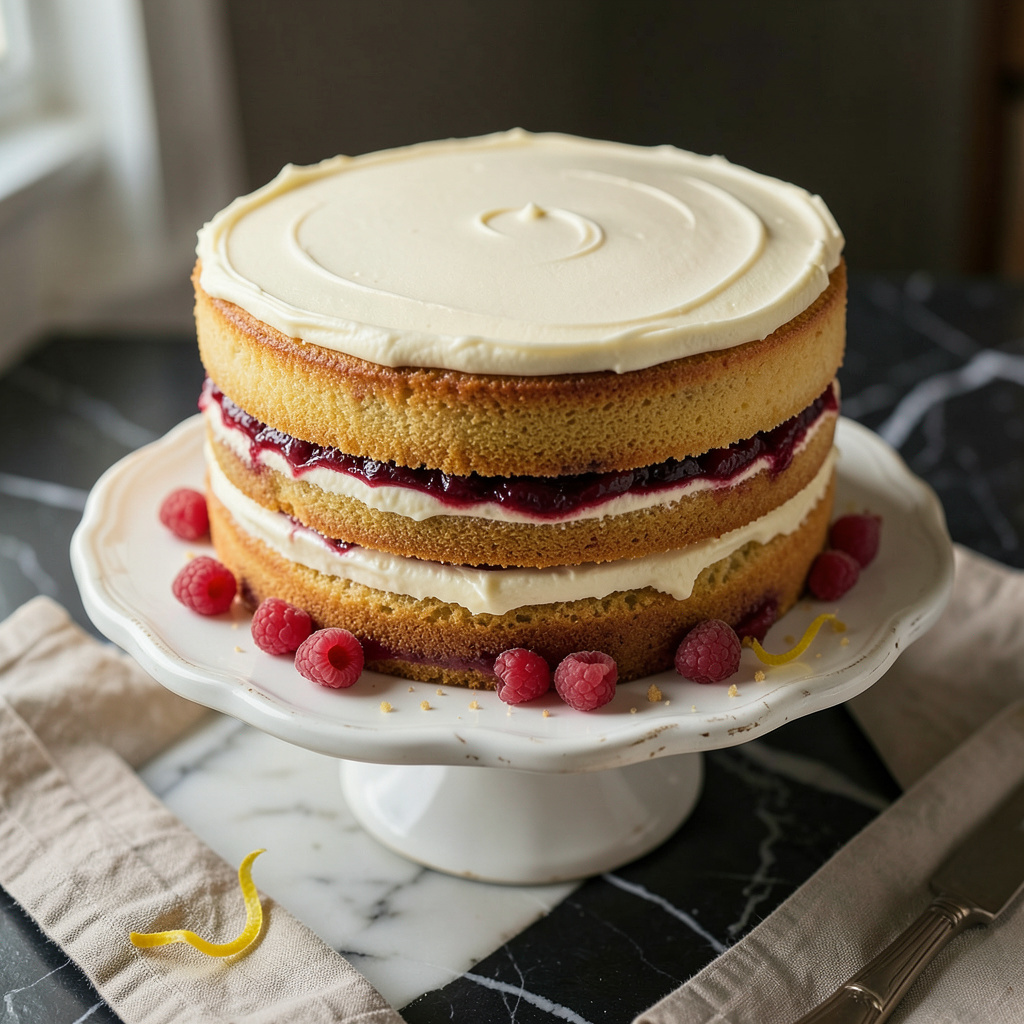
Nothing ruins a beautiful cake faster than crumbs mixing into your frosting or layers tearing apart. I’ve been there—standing over a cake that looked perfect until my spatula turned it into a crumbly mess. After testing (and failing) more times than I’d like to admit, I finally cracked the code for a smooth finish every time.
The secret starts before you even pick up the spatula. Chilling your cake layers for at least 30 minutes firms them up, while adjusting your frosting to that “mayo consistency” prevents pulling. I use an offset spatula and a turntable—game changers for control—but you can make do with a butter knife and a lazy Susan if that’s what you’ve got.
Here’s where technique matters: Apply a thin crumb coat first, then chill again. When spreading the final layer, hold your spatula at a 45-degree angle and use light, even pressure. The frosting should glide, not drag. I learned this the hard way after ruining my sister’s birthday cake—twice.
Even if tears happen, don’t panic. A quick patch with extra frosting and a bench scraper can save the day. The difference between amateur and pro-level cakes often comes down to these small but crucial steps. Let’s get that perfect finish.
📚 In This Guide
- What You’ll Need
- Instructions
- Tips and Common Mistakes
What Youll Need
- ● Baked & cooled cake layers – 2+ layers (fully cooled to room temperature or chilled for 1–2 hours 💡).
- ● Frosting – 3–4 cups (buttercream, cream cheese, or ganache—room temperature for easy spreading).
- ● Offset spatula – 9–10″ or a straight-edge icing spatula (for smooth finishes ✨).
- ○ Bench scraper – Stainless steel (optional but game-changing for sharp edges).
- ○ Turntable – Rotating cake stand (optional but highly recommended for even coverage).
- ● Parchment paper strips – 4–6 strips (3″ wide, tucked under cake edges for clean plating).
- ● Crumb coat frosting – ½ cup (thin layer to seal crumbs—chill 15–20 mins ⏰ before final layer).
- ● Serrated knife – For leveling domed cake tops (if needed).
- ○ Spritz bottle – Water or simple syrup (optional, to moisten dry layers).
- ● Paper towels – Dampened (to wipe spatula between swipes for ultra-smooth results).
Step-by-Step Instructions for Spreading Frosting Without Tearing Cake
Here’s the professional method I use to get that flawless finish every time—no more crumbs or tears.
Chill Your Cake Completely
Before you even think about frosting, your cake layers must be thoroughly chilled. I place mine in the refrigerator for at least 2 hours (or 30 minutes in the freezer if I’m short on time). A cold cake is firmer and much less likely to shed crumbs when you work with it.
Here’s the thing—warm cake layers are your worst enemy. They’re soft, fragile, and will tear at the slightest pressure from your spatula. I’ve ruined more cakes by rushing this step than I care to admit. When you press gently on the cake and it feels firm to the touch, you’re ready to move forward.
Apply a Thin Crumb Coat First
Spread a very thin layer of frosting—about ⅛-inch thick—over the entire cake. This isn’t your final layer; it’s just there to seal in any loose crumbs. I use an offset spatula for this and work quickly with light pressure. Don’t worry about making it perfect—this layer will be completely covered.
After applying the crumb coat, refrigerate the cake for 15-20 minutes to let this base layer set. You’ll know it’s ready when the frosting feels slightly firm to the touch. This step creates a protective barrier between your cake and the final frosting layer, preventing those annoying crumbs from migrating to the surface.
Use the Right Tools and Technique
For the final frosting layer, I always use a long offset spatula (at least 9 inches) and a bench scraper. Start by adding a generous dollop of frosting to the top of your cake. Spread it evenly from the center outward, using smooth, confident strokes. The key is to maintain consistent pressure—don’t press too hard or you’ll compress the cake.
For the sides, I apply frosting in sections, then use my bench scraper to smooth everything out. Hold the scraper perpendicular to the cake and rotate the turntable (or cake stand) slowly while keeping the scraper stationary. This takes practice, but you’ll get the hang of it. I like to dip my spatula in hot water and wipe it clean between strokes for an extra-smooth finish.
Work in Thin, Even Layers
Instead of trying to apply all your frosting at once, build it up in 2-3 thin layers. After each application, chill the cake for 10-15 minutes to let the frosting set. This layering technique gives you more control and helps prevent the weight of thick frosting from pulling at the cake’s surface.
Between layers, I always check for any bare spots or thin areas. It’s easier to fix small imperfections now than after the final layer is on. Remember, you can always add more frosting, but you can’t easily remove it without making a mess. Patience here pays off with that professional bakery look we’re all after.
Final Smoothing and Touch-Ups
For the final touch, I use what’s called the “Viva paper towel method.” Gently press a piece of Viva paper towel (it’s the only brand that works well for this) against the frosted cake, then smoothly pull it away. This removes any final imperfections and gives you that perfectly smooth finish.
If you notice any small tears or exposed cake after this process, don’t panic. Simply dab a tiny bit of frosting on the spot with your finger or a small paintbrush, then smooth it out with the paper towel technique. The beauty of this method is that it’s incredibly forgiving—you can fix mistakes right up until serving time.
Tips and Common Mistakes for Perfect Frosting Application
After years of cake disasters (and one particularly memorable birthday cake that looked like a crumb-covered disaster), I’ve learned these game-changing tricks.
Chilling is Non-Negotiable: The 2 hours in the refrigerator (or 30 minutes in the freezer) mentioned in Step 1 isn’t just a suggestion—it’s the foundation of success. I once tried to skip this when short on time, and the cake layers practically disintegrated under my spatula. A properly chilled cake should feel firm when gently pressed, almost like a slightly soft cookie. This firmness prevents those frustrating tears and crumbs from ruining your smooth finish.
Crumb Coat Precision: When applying that ⅛-inch crumb coat in Step 2, use an offset spatula and work quickly with light pressure. The key is to spread just enough to seal the surface without disturbing the cake. After the 15-20 minutes in the fridge, test doneness by gently touching the frosting—it should feel slightly firm but still tacky. This thin barrier is what prevents crumbs from migrating to your final layer.
Tool Technique: For Step 3, the long offset spatula and bench scraper combination is everything. Dip your spatula in hot water and wipe it clean between strokes—this creates that ultra-smooth finish. When using the bench scraper, keep it perpendicular to the cake and rotate your turntable slowly. I learned the hard way that pressing too hard or moving too quickly creates those frustrating ridges and tears in the frosting.
Layering Patience: The 2-3 thin layers approach in Step 4 might seem time-consuming, but those 10-15 minute chilling periods between layers are crucial. Each thin layer sets properly, preventing the weight of thick frosting from pulling at the cake. I always check for bare spots between layers—it’s much easier to fix small imperfections now than after the final layer is applied.
Pro Tips for Spread Frosting Without Tearing Cake
- After years of cake disasters (and one particularly memorable birthday cake that looked like a crumb-covered disaster…
- Chilling is Non-Negotiable: The 2 hours in the refrigerator (or 30 minutes in the freezer) mentioned in Step 1 isn’t …
- Crumb Coat Precision: When applying that ⅛-inch crumb coat in Step 2, use an offset spatula and work quickly with lig…
Frequently Asked Questions
Can I frost a warm cake, or should I wait for it to cool completely?
Always let your cake cool completely (at least 2 hours) before frosting! A warm cake melts frosting and causes crumbs to stick, leading to tears. For best results, chill it in the fridge for 30 minutes after cooling to room temperature.
What’s the best tool for spreading frosting without tearing the cake?
An offset spatula (or bench scraper) is your best friend! Its angled blade glides smoothly over the surface. For delicate cakes, a silicon spatula works too—just avoid stiff utensils that drag crumbs.
How do I fix a cake that’s already torn while frosting?
No panic! Use a crumb coat (thin layer of frosting) to seal loose crumbs, then chill for 15 minutes. The second layer will hide imperfections. For deep tears, patch with extra frosting or press in cake scraps gently.
Can I use a piping bag instead of spreading frosting directly?
Piping a grid or spiral pattern with frosting, then smoothing with a spatula, reduces direct contact with the cake. This method is great for buttercream and works well on fragile layers.
Does the type of frosting affect how easily the cake tears?
Yes! Stiff frostings (like American buttercream) are more forgiving than runny ones (e.g., whipped cream or glaze). For delicate cakes, add 1 tbsp of cornstarch to stabilize frosting or opt for a ganache that sets firmer.
With the right tools and a little patience, you can spread frosting like a pro—no more torn cake layers! 🎂✨ Remember: a chilled cake, a thin crumb coat, and a warm spatula are your secret weapons for that flawless finish. Don’t stress if it takes a few tries; even bakers perfect their technique over time.
Ready to put your new skills to the test? Grab your favorite frosting recipe and start practicing—your next showstopper cake is just a smooth spread away!

- Asian Restaurant Salad Dressing Recipe: Bold Sesame-Ginger Swirl With Umami Depth - October 18, 2026
- Asian Restaurant Salad Dressing Recipe: Bold Sesame-Ginger Swirl With Umami Depth - October 18, 2026
- Beef Boneless Chuck Country Style Ribs Crock Pot Recipe: Slow-Simmered Smoky Tenderness - October 18, 2026