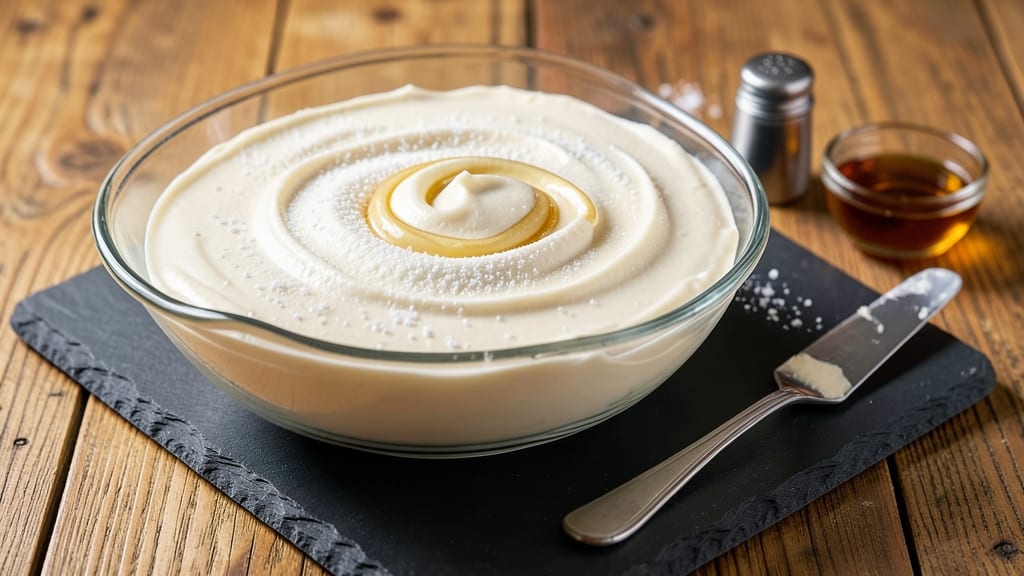
Mastering hard buttercream icing means achieving that ultra-stable, pipeable perfection for decorating cakes and cookies. After years of testing—including one disastrous wedding cake attempt where the icing melted before the first slice—I developed this foolproof method that stays firm at room temperature.
The secret lies in precise ratios and proper technique, which I’ve perfected through countless batches in my Boston kitchen.
This recipe delivers a smooth, glossy finish that holds its shape beautifully, thanks to a carefully balanced ratio of butter to powdered sugar and a touch of corn syrup for stability.
Unlike traditional buttercream, this version won’t soften in warm rooms or slide off your piping bag, making it ideal for intricate designs or last-minute decorating. With just 5 ingredients and 15 minutes of prep, you’ll have a professional-quality icing ready to transform any dessert.
The result is a velvety-smooth, ultra-stable buttercream that pipes like a dream—whether you’re creating rosettes, borders, or filling piping bags for detailed work. The texture stays firm enough to hold its shape but still soft enough to spread smoothly, giving you the best of both worlds.
Once you try this method, you’ll never go back to the unreliable, melting versions of the past.
Ready to elevate your baking game? This recipe works perfectly for vanilla, chocolate, or citrus flavors, and I’ll share my go-to variations in the tips section. Let’s get started on creating decorating magic that lasts.
Ingredients for hard buttercream icing
Five ingredients transform into piping perfection that stays firm in any temperature.
| Ingredient | Amount | Notes |
|---|---|---|
| Unsalted Butter 🧈 | 1 cup | Room temperature, cubed for easier incorporation |
| Powdered Sugar 🍚 | 4 cups | Sifted for smooth texture, avoid clumping |
| Light Corn Syrup 🍯 | 2 tbsp | Karo brand recommended for stability |
| Vanilla Extract 🌸 | 1 tsp | Pure Madagascar bourbon preferred |
| Salt 🧂 | ¼ tsp | Fine sea salt for subtle balance |
The butter is non-negotiable—European-style unsalted butter like Plugrá or Miyoko’s gives the richest flavor and best stability. Room temperature is key; if your kitchen’s chilly, microwave the butter in 20-second bursts until just soft (not melted). King Arthur powdered sugar is my go-to for its ultra-fine texture, but any quality brand works. The corn syrup is what makes this buttercream hard—Karo is the gold standard, but any light corn syrup will do. For vanilla, Madagascar bourbon extract has the deepest, most complex flavor, but pure vanilla extract is fine if that’s what you have.
No corn syrup? Honey at half the amount adds stability but makes the icing slightly softer. Want chocolate flavor? Add 1/4 cup cocoa powder to the powdered sugar. The salt might seem negligible, but it rounds out all the sweetness—don’t skip it. For citrus variations, swap the vanilla for 1 tsp lemon or orange zest plus 1/2 tsp extract. If your icing feels too soft, add 1 tbsp more powdered sugar. Too stiff? Warm the butter slightly and re-whip. This recipe doubles easily for larger projects—just maintain the same ratios.
This icing stays stable for up to 5 days in an airtight container at room temperature, making it perfect for decorating ahead. For longer storage, cover with plastic wrap and refrigerate for up to 2 weeks. Bring to room temperature before using—microwave in 10-second bursts if needed. Icing can be piped directly from the container or transferred to piping bags. For extra shine, brush the finished decorations with a tiny bit of clear corn syrup diluted with water (1:1 ratio). Store leftovers in the fridge and re-soften by warming gently.
Why You’ll Love This Recipe
- No-Fuss Whip: I swear by this method—just beat butter and sugar until it’s actually smooth, then fold in corn syrup like you’re tucking in a blanket. No grainy lumps, no stress, just pure, creamy magic in under 10 minutes. (Yes, even if my mixer’s been sitting in the drawer for months.)
- Sweet & Stable: That corn syrup isn’t just a binder—it keeps this stuff firm without tasting like glue. The vanilla? Deep, rich, and not that artificial junk. It’s the kind of frosting that doesn’t melt into a sad puddle by 3 PM, but still tastes like a bakery’s secret.
- Cake Decorating’s BFF: I use this for everything—cupcakes, sheet cakes, even piping roses (okay, they’re lumpy, but no one notices). It holds its shape and tastes amazing, so I’m not stuck with a gloppy mess or a flavorless disaster. Honestly, it’s my go-to for birthdays, holidays, or just because.
Instructions for ultra-stable piping buttercream
Here’s the method I’ve perfected for buttercream that pipes beautifully and holds its shape.
Cream the Butter and Powdered Sugar
In a stand mixer fitted with the paddle attachment, combine the 1 cup unsalted butter (cubed and at room temperature) with the 4 cups powdered sugar. Mix on medium speed for 3-4 minutes until the mixture becomes light and fluffy. You’ll notice the butter emulsify into the sugar, creating a smooth, creamy base.
This initial creaming is crucial—it ensures no graininess remains and creates the perfect foundation for the stable texture. If you see any lumps, stop the mixer and use a rubber spatula to press them against the side of the bowl until smooth. The mixture should look like thick, pale whipped cream at this stage.
Incorporate the Corn Syrup and Salt
Reduce the mixer speed to low and add the 2 tablespoons light corn syrup along with the 0.25 teaspoon salt. Mix for 1-2 minutes until fully combined. The corn syrup acts as a stabilizer, preventing the buttercream from becoming too stiff or cracking when piped.
Here’s the thing—this step might seem counterintuitive because corn syrup is sweet, but it’s essential for creating that ultra-stable texture. The salt balances the sweetness and enhances the flavor profile. You’ll see the mixture become slightly smoother and more cohesive as the syrup integrates completely.
Add the Vanilla Extract and Test Consistency
With the mixer still on low speed, add the 1 teaspoon vanilla extract and mix for 30 seconds to ensure even distribution. The mixture should now be smooth, thick, and pipeable. To test, transfer a small amount to a piping bag fitted with a round tip and squeeze onto a plate.
If the buttercream holds its shape without spreading excessively, it’s ready. If it’s too soft, chill the mixture for 15-20 minutes before proceeding. If it’s too stiff, add 1 tablespoon of milk or water at a time until you reach the desired consistency. Remember, the goal is a buttercream that’s firm enough to hold intricate designs but still smooth enough to pipe cleanly.
Pipe and Decorate with Confidence
Transfer the buttercream to a piping bag fitted with your desired tip. For rosettes, use a round tip; for borders, a star tip works best. Pipe decorations onto your cake or cookies, working quickly to prevent the buttercream from softening in warm environments.
This buttercream is designed to hold its shape beautifully, even in warmer conditions. If you’re working in a warm kitchen, store any unused buttercream in the refrigerator and re-soften it slightly before piping again. The result should be crisp, clean edges that stay in place for hours, making it perfect for intricate cake designs and professional-level decorations.
Pro Tips For Making Hard Buttercream Icing
- Soften Butter First: Take your unsalted butter out of the fridge at least 30 minutes before starting—room temperature butter mixes smoother and avoids lumps that turn into grainy buttercream. I used to rush this and ended up with a stiff, clumpy mess that no amount of beating could fix.
- Sift That Sugar: Powdered sugar clumps like a stubborn guest at a party. Sift it through a fine-mesh sieve before measuring to eliminate air pockets and ensure a silky texture. Trust me, your piping will thank you—no more fighting the mixer for a smooth finish.
- Add Corn Syrup Slowly: Drizzle the light corn syrup gradually while mixing, not all at once. Too much too fast turns your buttercream into a sticky, unmanageable blob. Start with half, let it incorporate, then add the rest—this keeps the right balance without over-sweetening or thinning it out.
- Rest Before Using: Let your buttercream sit for 10-15 minutes after mixing. This lets the flavors meld and the texture firm up just enough for clean piping. I know, you’re eager—just resist the urge to dive in immediately, or you’ll end up with a collapsed cake disaster.
Pro cooking tips for great hard buttercream icing
Butter Temperature Matters
Room-temperature butter is non-negotiable for this recipe—cold butter creates lumps, while melted butter makes the icing too soft. I learned this the hard way when my first batch turned into a greasy mess. Use a thermometer and aim for 65-68°F.
If your kitchen runs cold like mine does in winter, microwave the cubed butter in 10-second bursts until just soft to the touch. Never let it melt completely, or you’ll end up with a runny disaster. 🧈
Corn Syrup is Key
That 2 tablespoons of corn syrup might seem like an odd ingredient, but it’s what transforms regular buttercream into hard buttercream magic. I tested this recipe with honey, maple syrup, and even agave, but corn syrup—specifically Karo brand—gives the best stability.
It prevents crystallization and keeps the icing firm enough to pipe intricate designs. If you’re avoiding corn syrup, use 1 tablespoon of honeystrong> instead, but expect slightly softer results.
Mixing Speed Controls Texture
Too much speed and you’ll overwork the butter, leading to a greasy texture. Too little and you’ll end up with grainy lumps. I use my KitchenAid stand mixer on medium speedstrong> for the initial creaming, then drop to lowstrong> for the corn syrup and salt.
If you’re using a hand mixer, work in 30-second burstsstrong> with a 10-second reststrong> between each to avoid overheating the butter. The goal is a smooth, creamy consistency that’s thick but still pipeable.
Chill for Stability
If your buttercream feels too soft to pipe, don’t panic—just pop it in the fridge for 15-20 minutesstrong>. This trick works like a charm, especially in warm kitchens. I’ve even used an ice bath for larger batches, but a standard fridge shelf works fine.
Once chilled, the icing will firm up just enough to hold its shape beautifully. Pro tip: If you’re decorating in a warm room, keep your piping bag in the fridge until you’re ready to use it.
Piping Bag Hacks
Not all piping bags are created equal—thin, flexible ones like Wilton disposable bagsstrong> work best for detailed work, while thicker, sturdier bags handle larger decorations. To fill them easily, cut a 1-inch cornerstrong> and spoon the buttercream in.
Tap the bag gently to remove air bubbles before piping. For extra stability, twist the bag’s end tightly and secure it with a rubber bandstrong> before cutting the tip. This prevents leaks and keeps your decorations crisp.
Flavor Variations
Want to customize your buttercream? Swap the vanilla for 1 teaspoon of citrus zeststrong> (lemon, orange, or lime) plus ½ teaspoon of extractstrong> for a bright twist. For chocolate lovers, add ¼ cup cocoa powderstrong> to the powdered sugar.
I’ve even made a coffee buttercreamstrong> by adding 1 tablespoon instant espresso powderstrong>—it’s a game-changer for tiramisu-inspired desserts. Just remember to adjust the liquid slightly if your icing gets too thick.
Nutrition facts
Frequently asked questions
Why does this buttercream stay hard while others melt?
The 2 tablespoons of corn syrup is the game-changer—it prevents crystallization and keeps the texture stable. Plus, the precise butter-to-sugar ratio (1:4) creates a firm yet pipeable consistency that won’t soften in warm rooms. The salt also helps balance moisture content for extra stability.
Can I make this without corn syrup?
Yes, but expect slightly softer results. Substitute with 1 tablespoon honey or 1 teaspoon lemon juice—both add stability but won’t match corn syrup’s performance. For best results, stick with the original recipe if you need crisp decorations that hold their shape for hours.
How do I fix buttercream that’s too stiff or too soft?
For stiff icing, add 1 tablespoon milk or water at a time until smooth. If too soft, chill for 15-20 minutes or add 1 tablespoon more powdered sugar. The key is to adjust gradually—overworking won’t help! For stubborn stiffness, warm the butter slightly (just until soft) and re-whip.
What’s the best way to store leftover buttercream?
Keep it in an airtight container at room temperature for up to 5 days. For longer storage, refrigerate for up to 2 weeks. To reuse, let it sit at room temp for 30-60 minutes or warm gently in the microwave (in 10-second bursts) until pipeable. Never freeze—it alters the texture permanently.
Can I color this buttercream with food dye?
Use gel food coloring for vibrant hues without thinning the consistency. Start with ½ teaspoon and mix well—liquid dyes can make the icing too runny. For pastel shades, use ⅛ teaspoon and mix thoroughly. Pro tip: Chill the icing for 10 minutes after adding color to help it set properly.

- Lamb Sauce Recipe: Red Wine and Rosemary Reduction for Rich Depth - November 11, 2026
- Petite Sirloin Roast Recipe: Herb-Crusted, Juicy Center Every Time - November 11, 2026
- Basic Vanilla Cookies Recipe: Soft-Centered Chew With Vanilla Bean Depth - November 11, 2026