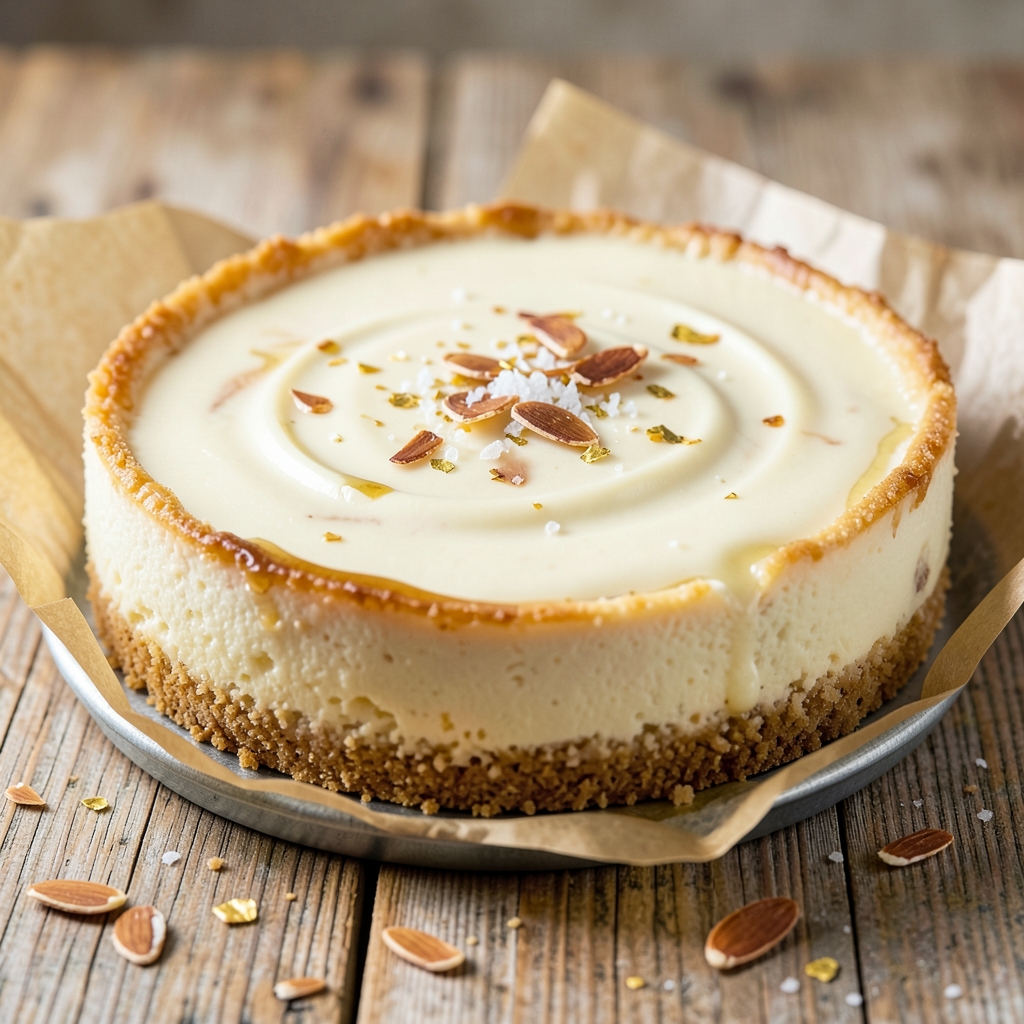
Mastering a gluten-free New York cheesecake with an almond flour crust that stays crack-free is the dessert game-changer you’ve been waiting for.
After years of trial and error—including one particularly disastrous batch that ended up more like a brick than a cheesecake—I finally perfected this recipe that delivers that signature dense, creamy texture without a single crack in sight.
The secret lies in precise ingredient ratios and a baking technique that builds confidence with every slice.
This recipe transforms traditional New York cheesecake into a gluten-free version that’s just as rich and satisfying. The almond flour crust provides the perfect crunch without the gluten, while the filling achieves that iconic velvety smoothness with a foolproof method that eliminates common pitfalls.
With careful layering and a water bath for even baking, you’ll achieve professional results in your home oven every time. The key ingredients—almond flour, cream cheese, and sour cream—work together to create a dessert that’s both indulgent and worry-free.
What you’ll end up with is a cheesecake that’s dense yet tender, with a golden-brown crust that holds its shape perfectly. The texture is smooth and creamy throughout, with no graininess or cracks to ruin the presentation.
Each slice delivers that classic New York cheesecake flavor—sweet, rich, and just slightly tangy—without any of the common gluten-free compromises. This is the kind of dessert that will have your guests asking for the recipe over and over again.
The best part? This recipe is designed to be approachable for home bakers while still delivering restaurant-quality results. Whether you’re accommodating dietary restrictions or simply looking for a foolproof dessert, this gluten-free New York cheesecake will become your new go-to recipe. Let’s get started on creating your perfect slice.
Ingredients for gluten free new york cheesecake
The perfect gluten-free New York cheesecake starts with these 13 game-changing ingredients—no cracks, no compromises.
| Ingredient | Amount | Notes |
|---|---|---|
| Almond Flour 🌰 | 2 cups | Super fine, blanched preferred |
| Granulated Sugar 🍬 | ¾ cup | Fine grain preferred |
| Unsalted Butter 🧈 | ½ cup | Cold, cubed for crust |
| Large Eggs 🥚 | 1 whole | Room temperature |
| Vanilla Extract 🌿 | 1 tbsp | Pure Madagascar preferred |
| Fine Sea Salt 🧂 | ¼ tsp | Diamond Crystal preferred |
| Cream Cheese 🧀 | 32 oz | Full-fat, room temperature |
| Sour Cream 🥛 | 1 cup | Full-fat for creaminess |
| Heavy Cream 🥛 | ½ cup | Cold for stability |
| Lemon Juice 🍋 | 1 tbsp | Freshly squeezed |
| Powdered Sugar 🍬 | ¼ cup | For topping |
| Fresh Blueberries 🫐 | 1 cup | Optional topping |
| Aluminum Foil 📄 | 1 sheet | For water bath |
Almond flour is your secret weapon here—Bob’s Red Mill or King Arthur are my go-tos for that ultra-fine texture. The butter needs to be cold (pop it in the freezer for 15 minutes if it’s warm), and never skip the room-temperature eggs. For the crust, blanched almond flour makes all the difference—it’s less bitter and easier to work with. The vanilla? Madagascar bourbon extract adds that deep, rich flavor that store-brand can’t match. And that sugar? Fine grain dissolves better than regular granulated—trust me, you’ll notice the difference in the final texture.
No almond flour? Oat flour works in a pinch (but texture will be slightly different), and if you’re missing the vanilla, vanilla bean paste gives you those little specks of magic. The cream cheese is non-negotiable—Philadelphia is the gold standard, but don’t use low-fat. The sour cream adds that signature tang, but if you’re fresh out, Greek yogurt at half the amount works surprisingly well. For the water bath, double-wrap your springform pan in foil—no leaks, no stress. And if you’re feeling fancy, swap the blueberries for raspberries or blackberries for a more sophisticated touch.
This cheesecake is a make-ahead dream—bake it, let it cool, then refrigerate for at least 6 hours before slicing (overnight is ideal). It keeps for 5 days in the fridge, but honestly? It disappears faster than that. For serving, let it sit at room temperature for 15 minutes—the contrast between the cool filling and warm crust is pure bliss. And if you’re prepping ahead for a party, freeze individual slices on parchment-lined trays—no soggy bottoms when you reheat them.
Why You’ll Love This Recipe
- No-Fuss Foundation: I swear by the almond flour crust—it’s just butter, sugar, and flour blended into a paste, pressed in, and baked. No rolling, no fuss, and it holds up like a dream.
- Creamy Without Compromise: That eggy, velvety texture? It’s all in the technique—room-temperature eggs whipped with sugar until pale, then folded into butter and vanilla. The result? A slice that melts in your mouth but stays together.
- Party in a Box: Between us, this is my go-to for gatherings. Serve it plain for a crowd, or top with berries and whipped cream for a fancy touch. It’s the only dessert I make that gets seconds without extra effort.
- Leftovers That Last: Honestly, it’s hard to stop at one slice. The crust stays crisp, the filling stays rich, and it keeps beautifully for days. I’ve had it for breakfast—yes, really—because it’s that good.
Step-by-step instructions for gluten-free New York cheesecake
Here’s how to create a flawless gluten-free cheesecake with a perfect almond flour crust and crack-free filling.
Prepare the Almond Flour Crust
Preheat your oven to 350°F and line a 9-inch springform pan with parchment paper, leaving an overhang. In a food processor, pulse together the 2 cups almond flour and 0.75 cup granulated sugar until combined. Add the 0.5 cup cold cubed unsalted butter and pulse until the mixture resembles coarse crumbs with pea-sized butter pieces remaining.
Transfer this mixture to the prepared pan and press it firmly and evenly into the bottom and up the sides using your fingers or a glass. The crust should be compact and about ¼-inch thick. Bake for 10 minutes until lightly golden. Remove from the oven and let cool slightly while you prepare the filling. This pre-bake prevents a soggy crust when the cheesecake bakes later.
Mix the Cheesecake Filling
In a large mixing bowl, beat the 32 oz cream cheese and 1 cup sour cream together using an electric mixer until completely smooth and creamy, about 3-4 minutes. This step is crucial—any lumps will show up in your finished cheesecake. Scrape down the sides of the bowl as needed to ensure even mixing.
In a separate bowl, whisk together the 1 whole large egg, 1 tbsp vanilla extract, 1 tbsp lemon juice, and 0.25 tsp fine sea salt. Gradually add this mixture to the cream cheese while mixing on low speed. Then, slowly drizzle in the 0.5 cup heavy cream while continuing to mix until fully incorporated. The batter should be thick but pourable—if it’s too thick, add 1-2 tablespoons of milk (though we’re not using it here, this is the standard adjustment).
Assemble and Bake with Water Bath
Pour the filling into the pre-baked crust, spreading it evenly with a spatula. Tap the pan gently on the counter a few times to remove any air bubbles. Place the springform pan inside a larger baking dish, then wrap the entire setup tightly in the 1 sheet aluminum foil, creating a seal around the edges. Pour hot water into the larger dish until it reaches about halfway up the sides of the springform pan.
Return the cheesecake to the oven and bake for 50-60 minutes until the edges are set and the center is just barely jiggly (it will firm up as it cools). The water bath ensures gentle, even baking that prevents cracks. When done, turn off the oven, crack the door open slightly, and let the cheesecake cool inside for 1 hour—this gradual cooling is what prevents those dreaded cracks.
Chill and Finish
Remove the cheesecake from the oven and water bath, then carefully remove the foil. Let it cool completely at room temperature for 1 hour, then refrigerate uncovered for at least 6 hours (overnight is best). This slow chilling process allows the cheesecake to set properly without developing a skin or cracks.
Before serving, dust the top with the 0.25 cup powdered sugar and arrange the 1 cup fresh blueberries on top. If you prefer a smoother finish, you can pipe a thin layer of whipped cream cheese (made from leftover filling) over the top before adding the berries. Slice and serve chilled—this cheesecake is at its best when served straight from the fridge, with a cool, creamy texture that melts in your mouth.
Pro Tips For Making Gluten Free New York Cheesecake
- Preheat the Pan First: Pop your springform pan into the oven with the preheated broiler for 2-3 minutes before adding the crust. I learned this the hard way—cold pans make the crust soggy, and almond flour crusts are notorious for absorbing moisture. (Yes, even if you’re impatient like me.)
- Whisk Eggs Like a Maniac: Beat those eggs at high speed for a solid 3-4 minutes until the mixture is thick, pale, and almost ribbon-like. Gluten-free batters don’t hold structure the same way, so extra air is your secret weapon against cracks. (Pro move: Add a pinch of cream of tartar if you’re feeling fancy—it stabilizes the eggs.)
- Skip the Overmixing: Once you fold in the almond flour, stop immediately—just until no dry streaks remain. Overworking the batter introduces too much gluten from the eggs, and your cheesecake will end up dense instead of light. (I used to mix until it looked “perfect,” then wondered why it tasted like a brick.)
- Water Bath, But Not Too Deep: Fill the water bath pan halfway up the springform—no higher, or the crust will steam and turn to mush. Wrap the outside of the pan in foil first to prevent condensation from dripping onto the crust. (This isn’t the prettiest method, but it’s the tastiest.)
Creative variations of this gluten free new york cheesecake
Almond Flour Twist
While almond flour is the star here, I’ve found that blending it with ¼ cup oat flour creates a more sturdy crust—especially if you’re worried about crumbling. The oat flour adds subtle sweetness while keeping the gluten-free integrity.
For an extra nutty depth, toast the almond flour in a dry pan over medium-low heat for 3-4 minutes before mixing with sugar. This caramelizes the nuts slightly, giving the crust a richer flavor. 🌰
Crust Alternatives
No almond flour? Try a gluten-free graham cracker crust made from 1½ cups crushed gluten-free graham crackers (like Annie’s) mixed with ¼ cup melted butter. Press firmly into the pan and bake for 8 minutes at 350°F before adding filling.
For a chocolate twist, fold 2 tbsp cocoa powder into the almond flour mix—it pairs beautifully with the tangy cheesecake.
Filling Upgrades
For a citrusy kick, add 1 tbsp orange zest to the filling along with the lemon juice. Or swap the vanilla for ½ tsp cardamom and 1 tsp rose water for a Middle Eastern-inspired flavor.
If you love caramel notes, fold in ¼ cup caramelized onions (cook 1 cup onions with 1 tbsp brown sugar until golden) into the batter before baking.
Topping Variations
Ditch the blueberries for a brown sugar crumble: Mix ½ cup gluten-free rolled oats, ¼ cup brown sugar, and 2 tbsp melted butter, then sprinkle over the top before the final 5 minutes of baking.
For a boozy finish, drizzle 2 tbsp Grand Marnier or 1 oz Kahlúa over the chilled cheesecake before adding toppings. 🍷
Dietary Swaps
Make this vegan-friendly by replacing the cream cheese with 16 oz vegan cream cheese (like Kite Hill) and the egg with ¼ cup aquafaba (chickpea brine). For a lower-sugar version, reduce the granulated sugar in the crust to ½ cup and use ½ cup monk fruit sweetener instead.
The texture stays rich but with fewer calories—trust me, no one will miss the sugar!
Make-Ahead Magic
Bake this cheesecake 2 days ahead—it actually tastes better after the flavors meld. For parties, assemble the crust and filling, then freeze the unbaked cheesecake (covered tightly) for up to 1 month. When ready to bake, add the water bath and bake as directed, then chill before serving.
Pro tip: Wrap individual slices in parchment and plastic wrap to keep them fresh for 3 days at room temperature. ✨
Nutrition facts
Frequently asked questions
Can I use regular flour instead of almond flour for the crust?
Absolutely not—this recipe is designed to be gluten-free! Almond flour provides the perfect texture without gluten, while regular flour would introduce gluten proteins and ruin the dietary requirements. If you need a gluten-free alternative, try oat flour or gluten-free graham cracker crumbs as substitutes.
Why does my gluten-free cheesecake crack even with the water bath?
Cracking often happens from sudden temperature changes or overbaking. Always let the cheesecake cool gradually in the turned-off oven for 1 hour after baking, then chill uncovered in the fridge. Avoid opening the oven door too early, and ensure your cream cheese is fully room temperature before mixing.
How do I prevent a soggy crust in a gluten-free version?
Pre-baking the crust for 10 minutes before adding the filling is key! This creates a sturdy barrier. Also, chill the assembled cheesecake uncovered in the fridge for at least 6 hours—this allows moisture to evaporate from the top, keeping the crust crisp.
Can I make this cheesecake ahead of time?
Yes! This cheesecake actually tastes better after resting. Bake it, chill for 6 hours, then store covered in the fridge for up to 5 days. For parties, assemble the crust and filling, freeze unbaked for 1 month, then bake as directed when ready.
What’s the best way to serve this gluten-free cheesecake?
Serve chilled straight from the fridge for that signature creamy texture. Top with fresh berries, a dusting of powdered sugar, or a drizzle of caramel sauce. For a boozy twist, add a splash of Grand Marnier or Kahlúa before serving.

- King Arthur Fluffy Dinner Rolls Recipe: Buttery Pillowy Layers in 10 Minutes - November 8, 2026
- Black Diamond Steak Marinade Recipe: Deep Charcoal Infusion for Bold Flavor - November 8, 2026
- Betty Crocker Chocolate Devil Cake Recipe: Moist Layers With Fudgy Frosting - November 8, 2026