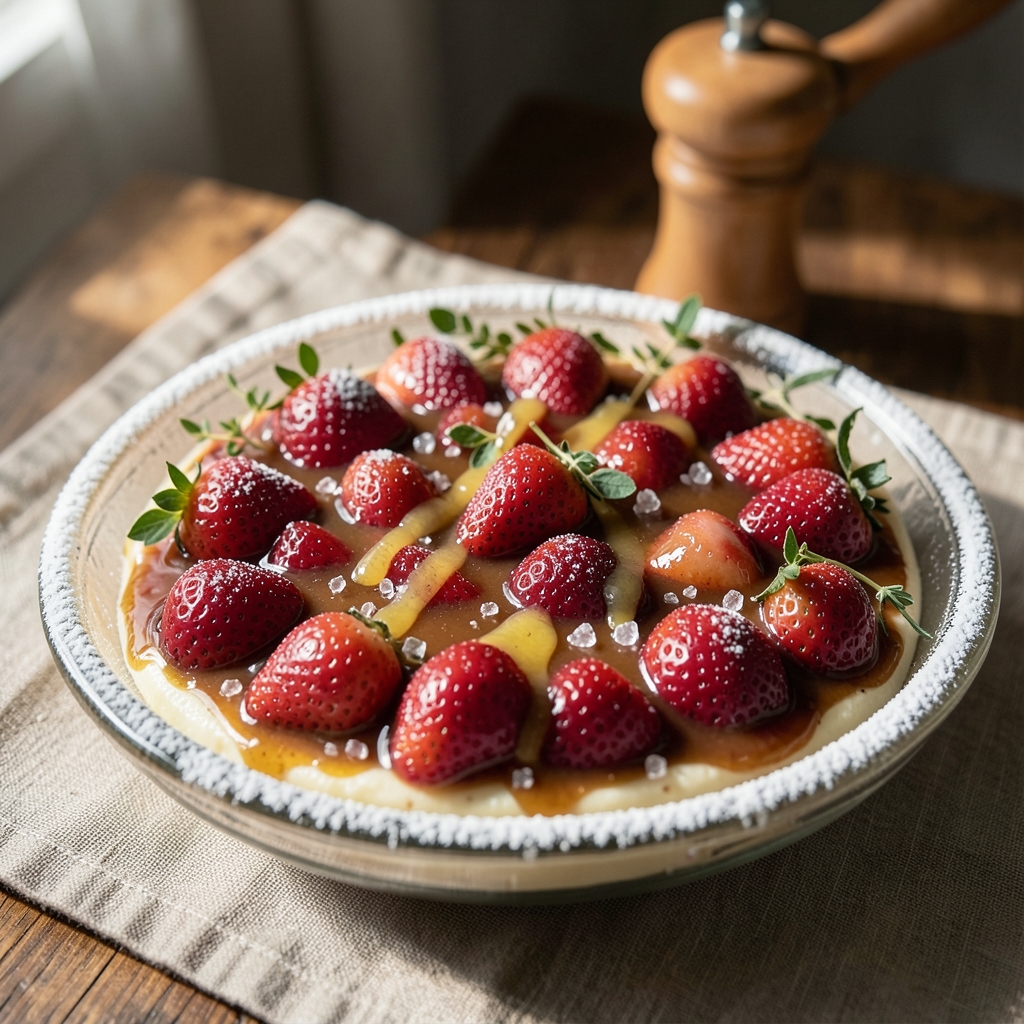
This fruit filling for cake recipe delivers that perfect jammy burst without relying on commercial pectin—just ripe fruit, sugar, and a simple thickening method that works every time. 💛 The secret lies in balancing acidity and natural fruit pectin through controlled simmering, creating a luscious, spreadable filling that stays vibrant in layer cakes, tarts, or cupcakes.
I developed this after years of testing fillings that either broke down too much or remained stubbornly chunky.
The beauty of this method is its versatility—it works with berries, stone fruits, or even tropical combinations, all while maintaining a professional texture. No special equipment is needed beyond a saucepan and fine-mesh strainer, and the process takes just 20 minutes of active time.
The filling thickens naturally as it cools, giving you that ideal jammy consistency that bakers dream of without the gummy aftertaste.
What you’ll achieve is a vibrant, flavorful filling that adds moisture and richness to any cake layer, with just the right balance of fruit intensity and smooth texture.
The acidity from lemon juice or vinegar helps stabilize the natural pectin in the fruit, while the cornstarch slurry ensures it holds its shape beautifully during baking. This is the kind of filling that makes even simple cakes taste like they came from a patisserie.
Perfect for layering in Victoria sponge cakes, filling tart shells, or swirling into cheesecakes, this recipe scales easily from single batches to large quantities. Store it in the refrigerator for up to two weeks or freeze for three months—ideal for meal prep or holiday baking.
Let’s create this versatile filling that elevates every dessert.
Ingredients for fruit filling for cake
Eight simple ingredients transform ripe fruit into a luscious, jammy cake filling without commercial pectin.
| Ingredient | Amount | Notes |
|---|---|---|
| Fresh Strawberries 🍓 | 1 ½ lb | Hulled, sliced into quarters |
| Granulated Sugar 🍚 | 1 cup | White or light brown |
| Lemon Juice 🍋 | ¼ cup | Freshly squeezed, strained |
| Cornstarch 🌾 | 2 tbsp | For smooth thickening |
| Water 💧 | ¼ cup | Room temperature |
| Vanilla Extract 🌸 | 1 tsp | Pure vanilla preferred |
| Pinch of Salt 🧂 | ⅛ tsp | Enhances fruit flavor |
| Fresh Lemon Zest 🍋 | 1 tsp | Brightens flavor profile |
Strawberries are the star here—opt for firm, vibrant berries with minimal bruising. Local farmers markets often have the freshest, most flavorful varieties, but grocery store strawberries work fine if they’re ripe. The sugar-to-fruit ratio is key: underripe fruit needs slightly more sugar (up to 1.25 cups), while overly ripe fruit can handle less (down to 0.75 cups). For a deeper flavor, simmer the strawberries with their juice first—this concentrates their natural sweetness before adding sugar. If you’re using frozen strawberries, thaw and drain them well to avoid excess liquid in the filling.
No strawberries? Raspberries, blackberries, or peaches work beautifully—just adjust the lemon juice to 0.33 cup for tart fruits like raspberries. Substitute the cornstarch with arrowroot powder at the same ratio, though it may require slightly longer simmering. The vanilla extract can be swapped for 1 tsp vanilla bean paste for added depth, or even 1 tbsp orange liqueur for a boozy twist. For a tropical variation, replace strawberries with mango and pineapple (use 1 cup each), but reduce the lemon juice to 0.2 cup to avoid over-acidifying. Always strain the filling through a fine-mesh sieve if you prefer a completely smooth texture—this is especially helpful for berries with seeds.
This filling thickens as it cools, so test consistency before baking—it should coat the back of a spoon but still be spreadable. Store in an airtight container in the fridge for up to 2 weeks, or freeze for 3 months in portion-sized containers. For a restaurant-quality finish, chill the filling for at least 2 hours before using—this allows the flavors to meld and the texture to set perfectly. The filling reheats beautifully in the microwave (30-second intervals) if you need to warm it for assembly, though it’s best used fresh from the fridge for optimal texture in baked goods.
Why You’ll Love This Recipe
- Fewer Ingredients, More Magic: I swear by this combo—just strawberries, sugar, and a splash of lemon. No weird additives or overcomplicated steps. The cornstarch thickens it perfectly every time, so you’re not stuck with runny filling ruining your cake.
- Bright, Bursting Sweetness: That lemon juice? It’s the secret weapon—cuts through the sugar’s richness and makes the strawberries pop. The filling stays vibrant, not mushy, so each bite tastes like summer in a perfect, tangy-sweet balance.
- Weekday or Weekend Star: Make a double batch on Sunday and store it in the fridge. Slap it into muffins, cupcakes, or even pancakes when you’re scrambling for breakfast ideas. Honestly, I’ve used it in three different desserts this month already.
- No Waste, All Win: Strawberries bruise fast, but this recipe uses them up before they spoil. The filling keeps for days, so you’re not tossing money—or fruit—into the trash. Plus, the sugar stretches further than you’d think, making it my go-to budget-friendly treat.
Step-by-step instructions for jammy strawberry filling
Here’s how to create a luxurious strawberry filling that delivers perfect texture and flavor every time.
🍳 Step 1: Prepare the Strawberries for Cooking
Hull the 1.5 lb fresh strawberries by removing the green tops, then slice them into quarters. You want even-sized pieces for consistent cooking. I like to work in batches—place the sliced strawberries in a large mixing bowl as you go. This keeps everything organized and prevents overcrowding later.
Give the strawberries a gentle stir to distribute any juices that may have released. The goal here is to maximize surface area for even cooking and sugar absorption. If your strawberries are particularly juicy, you might want to pat them dry slightly with a paper towel to prevent a watery filling later.
🥘 Step 2: Create the Sugar Syrup
In a medium saucepan, combine the 1 cup granulated sugar, 0.25 cup lemon juice, 0.25 cup water, and 0.125 tsp pinch of salt. Bring the mixture to a boil over medium-high heat, stirring occasionally to help dissolve the sugar completely. You’ll see the sugar crystals dissolve and the liquid turn clear.
Once boiling, reduce the heat to medium and let the syrup simmer for 5-7 minutes until it thickens slightly. You’re looking for a consistency where it coats the back of a spoon but isn’t syrupy. This pre-thickened base will help create that perfect jammy texture in your filling. The lemon juice and salt work together to brighten the strawberries and enhance their natural sweetness.
🍳 Step 3: Cook the Strawberries Until Tender
Add the prepared strawberries to the simmering syrup in the saucepan. Stir gently to combine, then increase the heat to medium-high again. Bring the mixture to a boil, then immediately reduce the heat to medium-low. Let it simmer uncovered for 8-10 minutes, stirring occasionally, until the strawberries are tender but still hold their shape.
Here’s where it gets important: you want the strawberries to break down just enough to release their juices and flavors, but not so much that they turn to mush. You’ll know they’re ready when they’re soft enough to crush slightly between your fingers but still maintain some structure. If they’re breaking down too quickly, reduce the heat slightly to control the cooking process.
👨🍳 Step 4: Thicken the Filling for Perfect Texture
In a small bowl, whisk together the 2 tbsp cornstarch and 1 tsp vanilla extract until smooth. Slowly pour this mixture into the simmering strawberry-syrup combination while stirring constantly. The cornstarch will begin to thicken the filling almost immediately, creating that luxurious, spreadable texture we’re after.
Continue cooking the filling over medium-low heat for 3-5 minutes, stirring frequently, until it reaches your desired consistency. It should coat the back of a spoon smoothly but still be pourable enough to pipe or spread easily. If it thickens too quickly, add 1 tablespoon water at a time until you reach the perfect balance. The 1 tsp fresh lemon zest should be added now—fold it in gently to brighten the flavors without overpowering the delicate strawberry taste.
⏰ Step 5: Cool and Prepare for Cake Assembly
Remove the saucepan from heat and let the filling cool for 10-15 minutes, stirring occasionally to prevent skin formation. The filling will thicken slightly more as it cools, so don’t let it sit too long or it may become too stiff. Once cooled to room temperature, transfer it to a clean jar or container and refrigerate for at least 1 hour before using in your cake.
This cooling step is crucial for two reasons: first, it allows the flavors to meld completely, and second, it gives you time to prepare your cake layers if you’re assembling it right before baking. When you’re ready to use the filling, give it a quick stir to ensure even consistency. The result should be a glossy, jammy filling that bursts with strawberry flavor in every bite, with just the right balance of sweetness and acidity from the lemon.
Pro Tips For Making Fruit Filling For Cake
- Cook Down Slowly: I learned this the hard way—rushing the strawberries on high heat turns them into mush instead of a glossy, jam-like filling. Simmer over medium-low, stirring often, until the mixture thickens enough to coat the back of a spoon (about 15-20 minutes). The longer you let it reduce, the richer the flavor and the better it’ll hold its shape in the cake.
- Hull the Strawberries: Skipping the hulls is a shortcut, but they add grit and make the filling taste dull. Use a strawberry huller or make tiny slits in the berries with a paring knife, then squeeze them gently over a bowl to catch the seeds. Yes, it’s tedious, but the texture and flavor are worth it—especially if you’re making a showstopper cake.
- Balance the Acid: Too much lemon juice and your filling tastes like a science experiment gone wrong. Start with 1 tablespoon per pound of strawberries, taste as you go, and add more sparingly. The goal is brightness, not pucker—think “sunshine” rather than “dental floss.” Save the extra juice for another use (like a quick glaze).
- Prep the Cornstarch: Whisk the cornstarch with a splash of cold water first—this prevents clumping like a nightmare. I mix 1 tablespoon cornstarch with 2 tablespoons water before adding it to the simmering fruit. Stir it into the center of the pot and let it cook for 2 full minutes before folding it in; this guarantees a smooth, velvety finish instead of lumpy surprises.
Best sauces and condiments for this dish
Classic Glaze Pairing
Drizzle a light vanilla glaze over your cake layers before adding the filling for extra shine and moisture. I mix ½ cup powdered sugar with 2 tbsp heavy cream and ½ tsp vanilla extract, then brush it on warm cake layers.
The glaze seals in flavor while creating that bakery-style finish. For a citrus twist, replace vanilla with 1 tsp lemon zest and 1 tsp orange juice. 💫
Cream Cheese Frosting
A smooth cream cheese frosting balances the fruit’s acidity beautifully. Beat 8 oz cream cheese, ½ cup softened butter, 3 cups powdered sugar, and 1 tsp vanilla until fluffy.
Spread between cake layers and on top, then pipe the strawberry filling in decorative swirls. The tangy cream cheese complements the jammy filling perfectly, creating a restaurant-quality dessert. 🍰
Whipped Cream Topping
For a lighter option, top your cake with whipped cream and fresh berries. Whip 1 cup heavy cream with 1 tbsp powdered sugar and ½ tsp vanilla until soft peaks form.
Dollop alongside the filling and garnish with sliced strawberries or raspberries. The airy texture contrasts the dense filling, making every bite feel special. 🍓
Caramel Drizzle
Add a salted caramel drizzle for depth and richness. Heat ½ cup granulated sugar in a saucepan until melted, then whisk in 3 tbsp heavy cream and 1 tbsp butter.
Let cool slightly, then drizzle over the cake before serving. The caramel’s buttery sweetness enhances the strawberry filling’s natural flavors while adding a luxurious touch. 🥄
Chocolate Ganache
For chocolate lovers, pair the filling with a dark chocolate ganache. Melt ½ cup dark chocolate chips with ¼ cup heavy cream, then cool until thickened.
Spread between cake layers or drizzle over the top. The bitterness of dark chocolate cuts through the filling’s sweetness, creating a sophisticated flavor profile. 🍫
Citrus Curd Swirl
Add a lemon or orange curd swirl for extra zing. Whisk 3 egg yolks, ½ cup sugar, ¼ cup lemon juice, and ¼ cup butter until thickened.
Spread between cake layers alongside the filling. The bright citrus curd elevates the strawberry flavor, making the dessert feel fresh and vibrant. 🍋
Nutrition facts
Frequently asked questions
Can I use frozen berries instead of fresh for this filling?
Yes, but thaw and drain them thoroughly first to avoid excess liquid. Frozen berries work well for raspberries or blackberries—just reduce the lemon juice to 0.33 cup since they’re naturally more acidic. For strawberries, frozen ones often have less natural pectin, so you may need to add 1 extra teaspoon of cornstarch to achieve the same thickness.
How do I adjust the sweetness for tart fruits like raspberries?
Start with 1.25 cups sugar for raspberries or blackberries, then taste as you cook. If they’re very ripe, you can reduce to 1 cup. The key is balancing acidity—add 1 extra tablespoon lemon juice if the fruit tastes overly sweet. Remember, the filling will thicken more as it cools, so don’t over-sweeten initially.
Can I make this filling ahead of time?
This filling stores beautifully in the fridge for up to 2 weeks in an airtight container. For longer storage, freeze it in portion-sized containers for 3 months. Thaw overnight in the fridge before using—never at room temperature. The flavors actually improve with time as they meld together.
What’s the best way to layer this filling in a cake?
Spread the filling between completely cooled cake layers using an offset spatula. For a professional look, pipe it in decorative swirls using a pastry bag with a star tip. If your cake is very moist, chill it for 15 minutes before adding the filling to prevent sogginess. The filling should be at room temperature for even distribution.
Why did my filling turn out too thick or too thin?
Too thick? You likely overcooked it—remove from heat immediately when it reaches the desired consistency. Too thin? Add 1 tbsp cornstarch mixed with 1 tsp water and simmer for 2 minutes. The filling should coat the back of a spoon but remain spreadable. If it separates, whisk in 1 tsp lemon juice to help re-emulsify it.

- Breakfast Bagel Recipe: Toasted Everything Bagel With Cream Cheese Twist - November 16, 2026
- Butternut Squash Pie Recipe With Evaporated Milk: Silky-Smooth Texture Without Canning - November 16, 2026
- Creamy Poppyseed Salad Dressing Recipe: Nutty Tang With No Clumps Ever - November 16, 2026