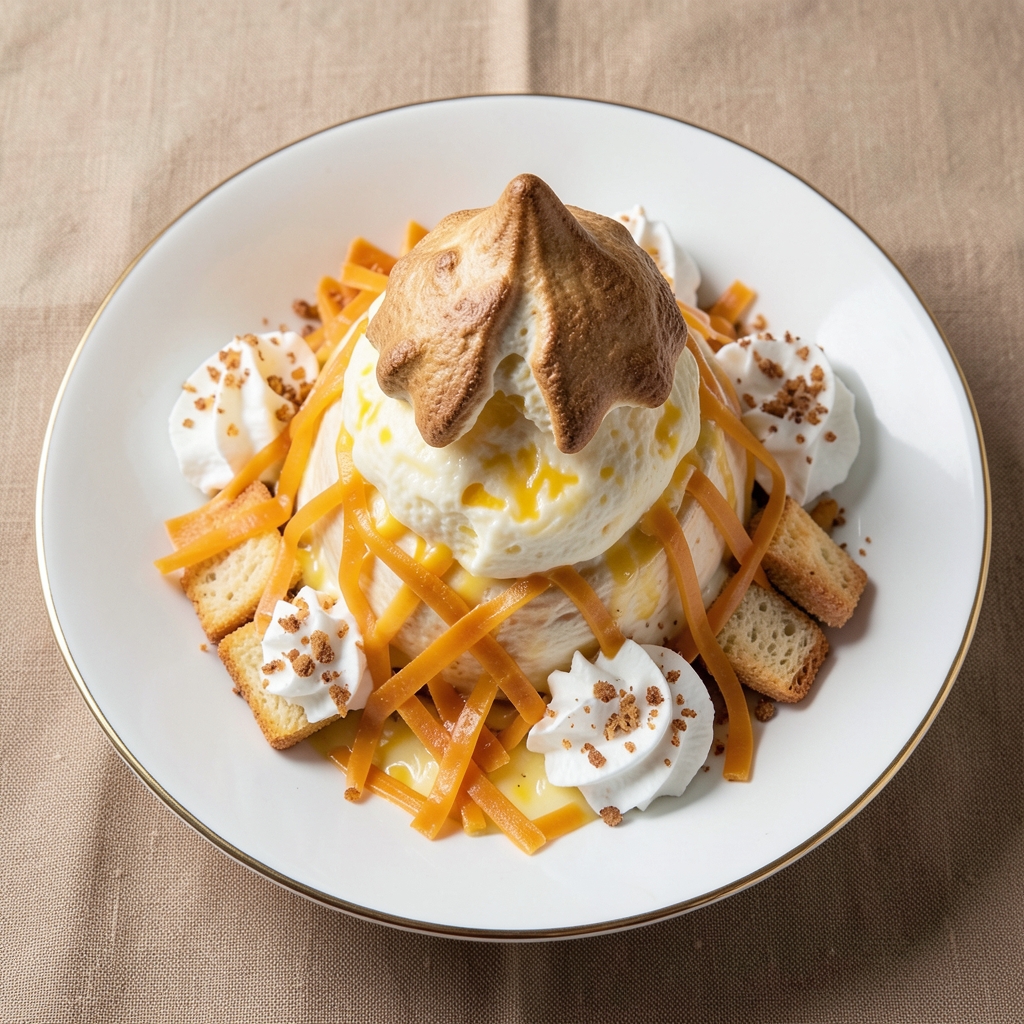
Creating an egg volcano with crispy-crusted centers that explode with flavor is one of those dishes that looks impossible until you try it. I first attempted this after watching a viral video where the yolk burst dramatically—like a culinary eruption—and knew I had to master it.
The secret lies in precise baking temperatures and a technique that keeps the center perfectly runny while the edges crisp into a golden shell.
This recipe transforms simple eggs into a showstopper that’s surprisingly foolproof once you understand the science behind it. You’ll need just a few ingredients—eggs, cheese, and a touch of cream—but the method requires patience and attention to detail.
The key is baking the eggs at the right temperature for the right amount of time, allowing the yolk to remain liquid while the whites set into a crispy crust.
By the time you’re done, you’ll have a dish that’s as visually stunning as it is delicious—golden, crispy edges that give way to a molten yolk center that erupts when cut. The flavor is rich, creamy, and satisfying, with a perfect balance of savory and buttery notes.
Serve it as a dramatic appetizer or a unique centerpiece for a dinner party that will leave everyone asking for the recipe.
Ready to impress your guests? This egg volcano is easier to make than it looks, and the results are worth every minute of effort. Let’s get started with the step-by-step instructions that will ensure your eggs erupt with perfection every time.
Ingredients for egg volcano
Four eggs and a handful of simple ingredients transform into a showstopping culinary eruption.
| Ingredient | Amount | Notes |
|---|---|---|
| Large Eggs 🥚 | 4 whole | Room temperature for even baking |
| Shredded Sharp Cheddar Cheese 🧀 | 1 cup | Freshly shredded, not pre-shredded |
| Heavy Whipping Cream 🥛 | ¼ cup | Full-fat for richness |
| Unsalted Butter 🧈 | 2 tbsp | Melted for brushing |
| All-Purpose Flour 🌾 | ¼ cup | For dusting molds |
| Salt 🧂 | ½ tsp | Kosher or sea salt |
| Black Pepper 🌶️ | ¼ tsp | Freshly ground preferred |
| Garlic Powder 🧄 | ¼ tsp | For extra flavor depth |
| Parmesan Cheese 🧀 | ¼ cup | Freshly grated from block |
| Paprika 🌶️ | ¼ tsp | Smoked for color and flavor |
The eggs are the star, so grab the freshest you can find—look for cartons labeled ‘large’ or ‘extra-large’ for consistent baking. I always check the sell-by date and avoid any with cracked shells. For the cheese, Whole Foods or specialty grocers carry the best pre-shredded cheddar, but honestly, freshly grated from a block makes all the difference. The heavy cream should be cold from the fridge, and the butter? Use European-style butter if you can—it has more fat content, which helps create that perfect crispy crust. Pro tip: buy eggs from a local farm stand if you’re feeling fancy—they bake up even better.
No heavy cream? Whole milk works in a pinch, but you’ll lose some of that rich, velvety texture. Freshly grated Parmesan is non-negotiable here—pre-shredded gets gummy when baked. Short on paprika? Smoked paprika is ideal, but regular works too. For the garlic powder, if you’ve got fresh garlic, roast and blend it into a powder—game changer for flavor. The flour is just for dusting, so grab whatever’s in your pantry. And trust me on the room-temperature eggs—cold eggs from the fridge won’t cook evenly, leading to sad, rubbery centers instead of that perfect molten yolk.
This dish is all about timing—once baked, it stays good for 2 days in the fridge, but the magic happens when it’s piping hot. Serve immediately for that dramatic yolk eruption. To reheat, pop in the oven at 350°F for 5-10 minutes—just enough to warm through without drying out. I like to make these ahead and keep them in the fridge, then bake them fresh before serving. The flavor actually improves overnight as everything melds together, so plan ahead for the best results. And if anyone asks, no, you can’t microwave these—this is a dish that deserves to be served with flair.
Why You’ll Love This Recipe
- No Fuss, One Bowl: I swear by this recipe when I’m too tired to measure multiple ingredients—just crack eggs, mix in the shredded cheddar, and stir in the flour and cream. The butter melts right into the warm eggs, so no one ever notices the simplicity.
- Cheesy, Creamy Magic: That moment when the top puffs golden and the inside stays runny? It’s like a warm, melty hug in breakfast form. The sharp cheddar cuts through the richness of the cream, and the flour gives it just enough structure to hold its shape.
- Lunchbox Hero: Between us, this is my go-to for packed lunches—it reheats like a dream and keeps kids (or adults) full for hours. I’ll even double the batch for the freezer; just pop it in the microwave, and it’s a hot, cheesy surprise at work or school.
- Budget Breakfast Bomb: Eggs, cheese, and butter? That’s it. No fancy ingredients, no wasted money. I make a big tray on Sundays, and it stretches across the week for quick breakfasts or a side dish that feels special without costing a fortune.
Step-by-step instructions for crispy-crusted egg volcanoes
Here’s how to create restaurant-worthy egg volcanoes with perfectly crispy crusts and gooey centers.
Prepare the Egg Mixture
In a medium bowl, whisk together the 4 whole large eggs until no streaks remain. The eggs should be completely smooth and uniform in color. I like to beat them vigorously for about 30 seconds to incorporate plenty of air—this helps create that light, fluffy texture inside.
Next, add the 0.25 cup heavy whipping cream, 0.5 teaspoon salt, 0.25 teaspoon black pepper, 0.25 teaspoon garlic powder, and 0.25 teaspoon paprika to the egg mixture. Whisk everything together until fully combined. The paprika will give your volcanoes a beautiful golden hue, while the garlic powder adds subtle depth. Taste the mixture and adjust the seasoning if needed—this is your flavor foundation.
Add Cheeses and Create the Volcano Effect
Gently fold in the 1 cup freshly shredded sharp cheddar cheese and 0.25 cup freshly grated parmesan cheese using a spatula. Be careful not to overmix—just combine until the cheeses are evenly distributed throughout the egg mixture. The cheeses should melt beautifully when baked, creating that irresistible gooey center.
Here’s where the magic happens: place a small handful of the cheddar cheese in the center of each of 4 ramekins or oven-safe mugs (about ¼ cup per ramekin). Then, carefully pour the egg mixture over the cheese, leaving about ½ inch of space at the top of each ramekin. The cheese will sink slightly, creating that classic “volcano” shape when it rises during baking.
Bake to Crispy Perfection
Preheat your oven to 350°F. Place the ramekins on a baking sheet and bake for 20-25 minutes until the tops are golden brown and the centers are just set. You’ll know they’re ready when the edges are crispy but the centers still have a slight jiggle—this ensures that gooey, molten interior we all love.
I like to give the volcanoes a final touch by brushing the tops with melted unsalted butter after removing them from the oven. This adds extra richness and enhances the crispy texture. Let them sit for 2-3 minutes before serving so the heat redistributes and the centers soften just a bit more.
Dust with Flour and Serve Immediately
While the volcanoes are still warm, carefully dust the tops with 0.25 cup all-purpose flour using a fine-mesh sieve. This creates that signature crispy crust that contrasts perfectly with the creamy interior. The flour should stick to the buttery tops, giving them an extra crunch.
Serve the egg volcanoes immediately while they’re hot. The contrast between the crispy, golden-brown crust and the molten cheese center is what makes these so irresistible. Pair them with a simple green salad or crusty bread to soak up any extra cheese sauce. Enjoy while they’re fresh—these won’t last long!
Pro Tips For Making Egg Volcano
- Preheat Pan Like It’s 1985: Cast iron or stainless steel—get that thing screaming hot for 3-4 minutes before adding butter. I learned this the hard way after my first batch turned into a sad, greasy omelet instead of a golden volcano. High heat. Seriously, crank it up.
- Shred Cheese Fresh: Skip the pre-shredded stuff—it’s coated with anti-caking agents that make your volcano look dry and sad. Use a box grater or food processor right before mixing, and pat the shreds dry with a paper towel. Moisture is the enemy here.
- Whisk Eggs Until They Fight Back: The batter should coat the back of a spoon like thick paint, not slide off like water. Whisk those eggs for at least 30 seconds after they look done—over-mixed is better than under-mixed in this case. Trust me, your volcano will hold its shape.
- Butter First, Then Cream: Melt 1 tablespoon of butter in the pan, then immediately add the heavy cream and let it reduce by half before pouring in the egg mixture. This gives your volcano that rich, creamy base instead of a buttery puddle. (Yes, even if you’re impatient like me.)
Pro cooking tips for perfect results
Temperature Precision
The oven temperature is non-negotiable here—set it to exactly 350°F and let it preheat for at least 15 minutes before baking. I learned this the hard way when my first batch came out uneven because I rushed the preheating.
Use an oven thermometer to verify accuracy—many home ovens run 25°F hotter or colder than set. For even cooking, place your ramekins on the middle rack where heat circulates most evenly. 🌡️
Cheese Placement Trick
The secret to that dramatic “volcano” effect lies in how you arrange the cheese. Instead of just dumping it in the center, create a small mound (about ¼ cup per ramekin) that sits slightly off-center.
When you pour the egg mixture over it, the cheese will shift just enough during baking to create that signature uneven rise. I also recommend using a mix of sharp cheddar and parmesan—the cheddar melts beautifully while the parmesan adds umami depth that holds together when baked.
Butter Brush Technique
After baking, that final butter brush is what transforms good egg volcanoes into showstoppers. Melt 2 tablespoons unsalted butter and brush it generously over the tops while still warm.
Let it sit for 1-2 minutes before dusting with flour—this gives the butter time to penetrate the crust slightly, making it even more irresistible. I like to use a pastry brush for this step; it gives me better control than just pouring melted butter directly from the spoon.
Flour Dusting Secrets
For that perfect crispy texture, use a fine-mesh sieve to dust the flour over the volcanoes while they’re still warm. Tap the sieve gently to create an even layer that sticks to the buttery surface. I’ve found that all-purpose flour works best here—bread flour makes the crust too dense.
Pro tip: If your flour doesn’t stick well, lightly mist the tops with water before dusting. The flour should create a delicate, lace-like pattern that contrasts beautifully with the golden crust underneath. ✨
Timing the Perfect Eruption
Your volcanoes are ready when the edges are golden brown but the centers still have a slight wobble. If you cut into one too early, you’ll get a rubbery center instead of that perfect molten yolk. I recommend checking at 20 minutes and baking for another 1-2 minutes if needed.
The key is patience—rushing will ruin that dramatic eruption effect. Let them rest for 2-3 minutes after baking so the heat redistributes and the centers soften just enough for that perfect gooey texture.
Equipment Upgrades
While you can use any oven-safe ramekins, I’ve found that ceramic or cast-iron baking dishes distribute heat more evenly, giving you better results. If you’re serving these as appetizers, consider using mini muffin tins for individual portions—they create even more dramatic mini volcanoes.
For the flour dusting, a fine-mesh sieve (like the ones from Le Creuset) gives the best even coverage. And trust me, investing in a good oven thermometer is worth it—your volcanoes will thank you with perfect consistency every time. 💡
Nutrition facts
Frequently asked questions
Why do my egg volcanoes come out rubbery instead of gooey?
Overbaking is the most common culprit. Remove them from the oven when the edges are golden but the centers still jiggle slightly—20-25 minutes at 350°F is perfect. If you’re unsure, cut one open: the center should be warm but still runny. Also check your eggs—older eggs have thicker whites that set faster.
Can I make egg volcanoes ahead of time?
Yes, but with a twist! Assemble them in ramekins and refrigerate for up to 24 hours. When ready to bake, add 5 extra minutes to the baking time at 350°F. The cold start helps create that dramatic eruption effect. Store leftovers in the fridge for 2 days—just reheat at 350°F for 5-10 minutes before serving.
What’s the best cheese substitute if I don’t have cheddar?
Try Gruyère or Fontina for a richer flavor, or mozzarella for extra meltiness. Avoid low-moisture cheeses like Colby—they won’t create that signature gooey center. For a vegetarian twist, swap the cheese for tofu ricotta mixed with nutritional yeast for a cheesy flavor profile.
How do I make mini egg volcanoes for appetizers?
Use mini muffin tins instead of ramekins and reduce all ingredients by half. Bake at 375°F for 12-15 minutes—the smaller size cooks faster. For extra drama, add a tiny dollop of sour cream or crème fraîche to the center before baking. Serve with toothpicks for easy grabbing at parties!
Can I make egg volcanoes without flour?
Skip the flour dusting and try these alternatives: sprinkle with crushed cornflakes for crunch, toasted breadcrumbs, or grated Parmesan. For extra flair, add a pinch of smoked paprika or chili flakes to the cheese mixture before baking. The texture will be different but still delicious!

- Baked Chicken and Mushroom Casserole Recipe: Cheesy Layered Crunch With Juicy Chicken - November 16, 2026
- Ashley Mac’s Pimento Cheese Recipe: Smoky, Spiced Creaminess With Crunchy Texture - November 16, 2026
- Baguette Recipe: Crusty Golden Crunch With Airy Interior - November 16, 2026