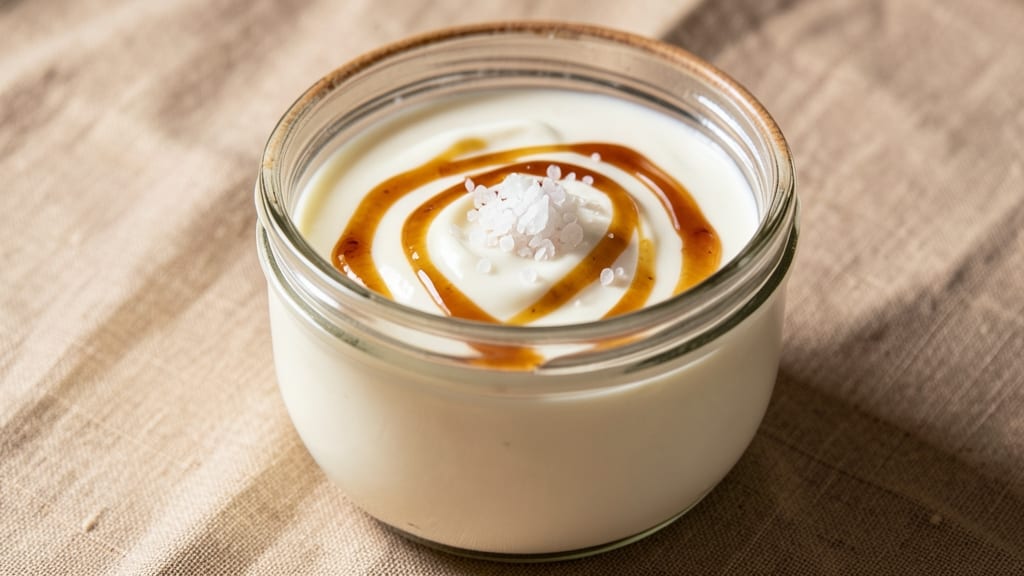
Creating dairy-free yogurt that’s thick, tangy, and packed with probiotics doesn’t require dairy—just the right technique and patience. I’ve perfected this method after testing multiple plant-based milks and fermentation times to ensure consistent results every batch.
The key lies in temperature control and proper starter culture, which transforms simple ingredients into creamy, probiotic-rich yogurt.
This recipe uses soy milk as the base because its protein content creates the thickest texture, but almond or coconut milk work too. You’ll need just three ingredients—plant-based milk, a probiotic starter, and a touch of maple syrup—and about 8 hours of fermentation time at a steady 110°F.
The process mimics traditional yogurt-making, preserving all the beneficial bacteria without dairy.
What you’ll end up with is smooth, tangy yogurt that’s perfect for breakfast bowls, smoothies, or as a creamy sauce base. The fermentation process develops a bright, slightly tangy flavor that’s rich in probiotics, making it a gut-friendly alternative to store-bought options.
No special equipment is needed—just a thermos, slow cooker, or even your oven with the light on.
This method is foolproof once you understand the science behind it, and I’ll walk you through every step—from heating the milk to testing for doneness. Whether you’re avoiding dairy for dietary reasons or simply exploring plant-based alternatives, this recipe delivers restaurant-quality results at home. Let’s get started!
Ingredients for dairy free yogurt
Four cups of plant-based milk and just six ingredients transform into velvety probiotic yogurt.
| Ingredient | Amount | Notes |
|---|---|---|
| Unsweetened Soy Milk 🥛 | 4 cups | Full-fat for optimal creaminess |
| Plain Non-Dairy Yogurt Starter 🍦 | ¼ cup | Store-bought vegan yogurt with live cultures |
| Pure Maple Syrup 🍯 | 2 tbsp | Grade B for robust flavor |
| Probiotic Powder 🦠 | 1 tsp | Optional for extra probiotic boost |
| Diamond Crystal Kosher Salt 🧂 | ¼ tsp | Fine grain preferred |
| Vanilla Extract 🌿 | 1 tsp | Pure, alcohol-based preferred |
| Ground Flaxseed 🌾 | 1 tbsp | For thickening if needed |
The soy milk is non-negotiable for texture—its protein content creates that signature thickness. Silk Organic Soy Milk from the refrigerated section delivers the best results, though any unsweetened soy brand works. The yogurt starter must contain live cultures; brands like Cocojune or Nancy’s organic vegan yogurt work perfectly. For the maple syrup, Grade B has a deeper flavor profile than Grade A, though either will work. Temperature control is critical—use a thermometer to maintain 110°F throughout fermentation, whether using a slow cooker, thermos, or oven method.
No soy milk? Almond or coconut milk can substitute, though texture will be slightly thinner—expect to add an extra 1 tbsp flaxseed per cup to compensate. Running low on starter? Store-bought vegan yogurt with live cultures works in a pinch, but ensure it hasn’t expired. The vanilla extract can be swapped for vanilla bean paste if you prefer speckled flavor, though pure extract is more concentrated. For a nut-free option, coconut milk yields a sweeter, slightly tropical yogurt—adjust sweetener accordingly. Always use fine-grain salt to avoid graininess in the final product.
Fermented yogurt keeps best in glass jars with airtight lids, stored in the refrigerator for up to 2 weeks. For longer storage, transfer to freezer-safe containers and freeze for 3 months. To prevent a skin from forming, press parchment paper directly onto the surface before sealing. The yogurt thickens further after refrigeration—stir well before serving. Use within 5 days for optimal probiotic potency, though it remains safe for consumption for up to 2 weeks when properly stored.
Why You’ll Love This Recipe
- Three-Ingredient Magic: I swear, this is the kind of recipe where you mix, wait, and boom—creamy, tangy perfection. Just soy milk, a starter, and a pinch of salt. No fancy gadgets, no stress.
- Maple-Kissed Tang: That first spoonful? Rich, slightly sweet from the maple syrup, but still bright with the yogurt’s natural tang. It’s like dessert had a probiotic makeover—honestly, I add extra syrup just to be safe.
- Breakfast to Snack: I keep a jar in the fridge for overnight oats, drizzled on toast, or even as a quick smoothie base. It’s my go-to for busy mornings or when I’m craving something cool and satisfying.
- Budget-Friendly Gut Love: A little probiotic powder and salt stretch this into a whole week’s worth of snacks. Plus, soy milk is cheaper than dairy—my wallet and my microbiome thank me every time.
Step-by-step instructions for dairy-free yogurt
Here’s the precise method for crafting velvety, probiotic-rich dairy-free yogurt with perfect texture.
Prepare the Soy Milk Base
Combine the 4 cups unsweetened soy milk with the 2 tablespoons pure maple syrup and 0.25 teaspoon diamond crystal kosher salt in a medium saucepan. Heat over medium heat until the mixture reaches 180°F, stirring occasionally to prevent scorching. You’ll notice small bubbles forming around the edges—this indicates the milk is fully heated and ready for the next stage.
Remove the pan from heat immediately once it reaches temperature. The milk should be steaming but not boiling vigorously. Transfer the hot milk to a clean glass jar or bowl and let it cool to 110°F—this takes about 30-45 minutes. You’ll know it’s ready when you can comfortably touch the jar without it feeling too hot, but still notice warmth radiating from it.
Incorporate Probiotic Elements
While the milk cools, whisk together the 0.25 cup plain non-dairy yogurt starter, 1 teaspoon vanilla extract, and 1 teaspoon probiotic powder in a separate bowl until fully dissolved. This mixture should be smooth with no visible powder—stir vigorously for 1 minute to ensure complete integration of the probiotic powder.
Once the milk reaches 110°F, slowly pour in the yogurt mixture while whisking continuously. This gradual incorporation prevents temperature shock to the starter cultures. Add the 1 tablespoon ground flaxseed and stir for another 30 seconds to evenly distribute all components. The flaxseed will help thicken the final product while adding nutritional benefits.
Ferment for Optimal Texture
Cover the jar with a clean cloth or lid and transfer it to a warm environment—ideal temperature is 105-110°F. I recommend using a yogurt maker, or place the jar in an oven with the light on, or between two layers of towels in a warm oven set to 170°F. The fermentation process should take 8-12 hours, during which you’ll notice the mixture gradually thicken and develop a tangy aroma.
Check the consistency after 6 hours—it should begin to resemble thick pudding. If it’s still too runny, continue fermenting for another 2 hours. The yogurt is ready when it reaches a creamy, spoonable consistency that holds its shape when tilted. Avoid over-fermenting, as this can create a sour taste and thinner texture.
Chill and Serve
Once fermentation is complete, transfer the yogurt to the refrigerator and chill for at least 4 hours to set the texture fully. This cooling period allows the flavors to meld and creates the signature smooth, creamy consistency. The yogurt should thicken further during this time, developing a rich, velvety mouthfeel.
Before serving, give the yogurt a final stir to redistribute any settled flaxseed. The final product should have a bright, clean flavor with subtle notes of vanilla and maple sweetness. For best results, consume within 5-7 days to maintain optimal probiotic activity and texture. This dairy-free yogurt delivers all the creamy satisfaction of traditional yogurt with enhanced nutritional benefits.
Pro Tips For Making Dairy Free Yogurt
- Heat Milk Slowly: Warm the soy milk to 105–110°F—no higher—before mixing in the starter. I learned this the hard way: scorching the milk kills the probiotics, and your yogurt will taste flat or even curdle. Use a thermometer if your stove isn’t gentle; simmering too fast is the fastest route to disappointment.
- Whisk Starter Last: Stir the non-dairy yogurt starter into the warm milk after adding the maple syrup and probiotic powder. The syrup helps the starter disperse evenly, and you’ll avoid clumps that turn into weird texture pockets. Think of it like dissolving sugar in coffee—patience pays off.
- Salt After Fermenting: Hold off on the Diamond Crystal salt until after the yogurt has thickened. Salting too early can slow fermentation or even halt it, leaving you with runny, underdeveloped yogurt. Taste first, then season—just a pinch is enough, and you can always add more.
- Use Cold Milk for Probiotics: Chill the probiotic powder in the fridge for 10 minutes before mixing it into the warm milk. Cold probiotics activate faster and survive the heat better, giving your yogurt a stronger, tangier finish. It’s a tiny step, but it makes a real difference in flavor and texture.
Pro cooking tips for this dish
Temperature Control
Fermentation success hinges on maintaining 110°F—any lower and cultures won’t activate; any higher and they’ll die. I use a Thermoworks Thermapen to monitor my slow cooker, which I set to Warm (around 105°F).
For a budget-friendly hack, place your jar in a thermos pre-filled with 120°F water—this maintains perfect temps for 12 hours without electricity. 🌡️
Starter Culture Secrets
Never use expired store-bought yogurt as a starter—dead cultures mean failed fermentation. I keep a small jar of homemade vegan yogurt in my fridge, refreshed every 2 weeks, so I always have active cultures on hand.
For extra insurance, add ½ tsp probiotic powder (like Culturelle) to boost bacterial diversity. The first batch might be thinner, but subsequent batches thicken dramatically as your starter matures.
Milk Choice Matters
Soy milk is my go-to for thickness, but coconut milk creates a sweeter, almost pudding-like texture—just reduce maple syrup to 1 tbsp. Almond milk works too, though you’ll need to add 1 extra tbsp flaxseed per 2 cups to compensate for lower protein.
Pro tip: Shake the milk can before measuring to distribute proteins evenly. I’ve ruined batches by forgetting this step!
Fermentation Time Hacks
Your kitchen’s humidity affects fermentation speed—dry air slows it down. If your yogurt isn’t thickening after 8 hours, try placing the jar in a plastic bag with a damp towel to create a humid microclimate.
For faster results, use a yogurt maker (like Ninja NY1001)—it locks in 110°F perfectly and cuts fermentation time to 6 hours. Just don’t overdo it: 12 hours max or you’ll get sour yogurt.
Troubleshooting Texture
Runny yogurt? You likely didn’t ferment long enough or used low-protein milk. Fix it by straining through a clean kitchen towel lined with a colander for 2 hours—the liquid (whey) will drain, leaving thickened yogurt.
For grainy texture, blend briefly after chilling. And if it separates, whisk in 1 tsp chia seeds to bind it back together. These tricks saved my first few batches from the trash!
Cleanup Made Easy
Fermentation leaves sticky residue, but I’ve got a foolproof method: Soak all jars and utensils in warm vinegar water (1:1 ratio) for 10 minutes before washing. The acid breaks down proteins and probiotics, making cleanup effortless.
Store your starter spoon in a small jar of milk in the fridge to keep it fresh between batches. This keeps my kitchen smelling fresh and my yogurt consistent. ✨
Nutrition facts
Frequently asked questions
Can I use any plant-based milk for this yogurt?
Soy milk works best for thickness due to its high protein content, but you can try almond or coconut milk. For coconut milk, reduce sweetener to 1 tablespoon—it’s naturally sweeter. Almond milk requires 1 extra tbsp flaxseed per 2 cups to compensate for lower protein. Always shake the milk can before measuring to distribute proteins evenly.
Why did my yogurt turn out runny?
Runny yogurt usually means either insufficient fermentation time or low-protein milk. Try fermenting 2 hours longer next time, or strain through a clean kitchen towel lined with a colander for 2 hours to thicken it. For future batches, use soy milk or add 1 extra tbsp flaxseed per 2 cups of almond milk.
How do I know when the yogurt is fully fermented?
The yogurt is ready when it reaches a creamy, spoonable consistency that holds its shape when tilted. Check after 6 hours—it should resemble thick pudding. If still runny, continue fermenting for another 2 hours. Over-fermenting beyond 12 hours can create a sour taste, so monitor closely.
Can I make this yogurt without a yogurt maker?
Use a slow cooker on Warm setting, a thermos pre-filled with 120°F water, or even your oven with the light on. The key is maintaining 105-110°F for 8-12 hours. Place your jar in a warm, humid environment—like a plastic bag with a damp towel—to speed up fermentation if needed.
How long will this dairy-free yogurt last?
Store in an airtight glass jar in the refrigerator for up to 2 weeks. For longer storage, freeze for 3 months. Press parchment paper directly onto the surface before sealing to prevent skin formation. The yogurt thickens further after refrigeration, so stir well before serving. For optimal probiotic potency, consume within 5-7 days.

- Spanish Coffee Recipe: Rich, Spiced Brew With Cinnamon Kick - November 8, 2026
- Costco Tri-Tip Steak Recipe: Smoky Grill Marks and Buttery Crust - November 8, 2026
- Maine Style Lobster Roll Recipe: Buttery Toasted Buns With Sweet Maine Lobster - November 8, 2026