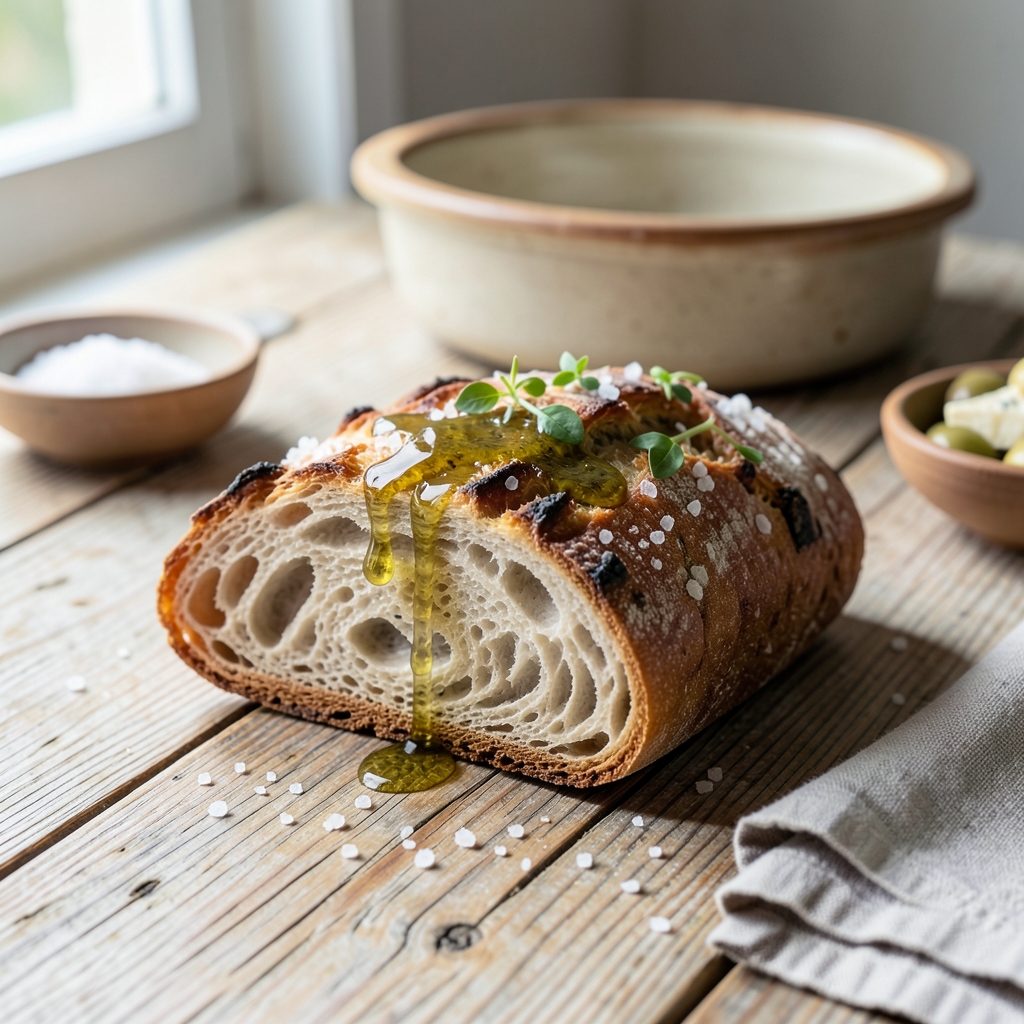
This Corsica bread recipe brings the sun-drenched flavors of the Mediterranean straight to your kitchen table, where golden olive oil and fragrant rosemary create a rustic focaccia that feels like a hug from Corsica. 🌟 Growing up in my family’s triple-decker kitchen, I learned how simple ingredients—flour, olive oil, and time—can transform into something extraordinary, especially when you let the dough rise slowly and develop deep, aromatic flavors.
The beauty of Corsican bread lies in its simplicity and tradition—no fancy techniques required, just patience and a generous hand with olive oil. This recipe delivers a crispy-edged, airy interior bread that’s perfect for soaking up soups, pairing with charcuterie, or simply enjoying warm from the oven.
The herbs infuse the dough while it rises, creating layers of flavor that make every bite taste like a trip to the island.
What makes this recipe special is its adaptability—whether you’re baking for a family dinner or a casual lunch, this bread delivers restaurant-quality results with minimal effort.
The dough comes together in under 30 minutes, but the magic happens during the long rise, where the gluten develops and the flavors meld into something truly unforgettable.
Once baked, the bread has a golden, crackly crust that gives way to a soft, pillowy interior, all infused with the bright, herby notes of rosemary and thyme. Serve it warm with olive oil drizzled on top, or save slices for toast the next morning.
This is bread that feels like a celebration—every bite a testament to the power of simple, traditional cooking.
Ingredients for corsica bread
Golden olive oil, fragrant herbs, and simple flour—this is all you need for Corsica-inspired bread.
| Ingredient | Amount | Notes |
|---|---|---|
| All-Purpose Flour 🌾 | 4 cups | Sifted for even texture |
| Extra-Virgin Olive Oil 🫒 | 1 ½ cups | High-quality, fruity variety |
| Active Dry Yeast 🍞 | ¼ oz | Or 2.25 tsp packet |
| Granulated Sugar 🍚 | 1 tbsp | To activate yeast |
| Warm Water 💧 | 1 cup | 110°F for ideal yeast |
| Salt 🧂 | 1 ½ tsp | Fine sea salt preferred |
| Fresh Rosemary 🌿 | ¼ cup | Chopped, stems removed |
| Fresh Thyme 🌿 | ¼ cup | Leaves only, chopped |
| Coarse Sea Salt 🧂 | 1 tbsp | For sprinkling crust |
| Flaky Sea Salt 🧂 | ½ cup | For finishing (optional) |
| Garlic Cloves 🧄 | 4 cloves | Minced for dough |
The olive oil here isn’t just flavor—it’s the soul of the bread. Look for extra-virgin from Italy or Greece at stores like Whole Foods or Trader Joe’s—the fruity, peppery notes shine through. Fresh rosemary and thyme make all the difference too; grab them from the grocery store’s produce section (they keep for weeks in the fridge). For the flour, King Arthur or Bob’s Red Mill brands work perfectly—they’ve got the right protein for a tender crumb. The garlic? Freshly minced adds depth, but powdered works in a pinch if you’re short on time.
No fresh rosemary? Dried works at half the amount, but it won’t have that same bright, piney aroma. Out of thyme? Oregano or basil can stand in, though the flavor will shift slightly. For the olive oil, avocado oil is a neutral swap if you’re avoiding olive oil for dietary reasons. The yeast is non-negotiable though—if it’s past its expiration, test it first in warm water with sugar (it should foam within 5-10 minutes). And hey, if you don’t have flaky sea salt, regular coarse salt sprinkled generously will give you that same crunchy finish.
This dough is all about patience—let it rise at least 2 hours (overnight in the fridge is even better). Store any leftovers wrapped in a clean kitchen towel at room temp for 2-3 days, or freeze the whole loaf for up to 3 months. To reheat, wrap in foil and warm in a 350°F oven for 10 minutes. Pro tip: Toast slices in a dry pan for crispy, restaurant-style bread.
Why You’ll Love This Recipe
- Five-Ingredient Magic: I swear by this combo—yeast, flour, olive oil, sugar, and water. That’s it. No fancy add-ins, no stress. The yeast does all the work while I sip my coffee.
- Golden Crust Secret: Between us, the olive oil crust is everything. It’s crispy, fragrant, and stays soft for days—no sad, dry bread here. (Yes, even on a Tuesday night.)
- Weeknight Hero: Toss one in the oven while dinner simmers. It’s my go-to for sandwiches, dipping in soup, or just tearing into with butter. No planning, no guilt.
- Budget-Friendly Staple: A loaf costs pennies to make, but it stretches across meals like a champ. Freeze extras for toast or garlic bread later—zero waste, all flavor.
Step-by-step instructions for Corsica bread: rustic focaccia with olive oil and herbs
This focaccia comes together with minimal effort but delivers maximum flavor—crispy, herby, and dripping with olive oil goodness.
👨🍳 Step 1: Activate the Yeast and Mix the Dough
In a large bowl, combine the 1 cup warm water (about 110°F) with the 1 tbsp granulated sugar and 0.25 oz active dry yeast. Let it sit for 5-10 minutes until frothy—this means your yeast is alive and kicking. If it doesn’t bubble, your yeast might be dead, and you’ll need to start over.
Once bubbly, add the 4 cups all-purpose flour and 1.5 tsp salt to the bowl. Mix with a wooden spoon until a shaggy dough forms. Then gradually drizzle in the 1.5 cups extra-virgin olive oil while mixing. The dough will feel sticky but should come together when you press it with your fingers. Real talk: don’t worry if it looks messy—this is normal for focaccia dough.
🍳 Step 2: Knead and Let the Dough Rise
Turn the dough onto a lightly floured surface and knead for 5-7 minutes until smooth and elastic. You’re not going for a tight, smooth bread dough here—just enough to develop the gluten so it holds its shape. If it feels too sticky, wet your hands slightly to prevent sticking.
Place the dough in a lightly oiled bowl, cover with a damp towel, and let it rise in a warm spot for 1-2 hours until it’s doubled in size. I like to put it near the oven with the light on to create a warm, cozy environment. The dough should feel puffy and springy when you press it gently with your finger—this is your cue that it’s ready for the next step.
🥘 Step 3: Shape and Season the Dough
Punch down the risen dough to release any air bubbles, then transfer it to a 9×13-inch baking pan lined with parchment paper. Press the dough gently into the pan, stretching it to fit the edges. Use your fingers to create dimples all over the surface—this is where those beautiful pockets for olive oil will go.
In a small bowl, mix the 0.25 cup chopped fresh rosemary, 0.25 cup chopped fresh thyme, and the 4 minced garlic cloves. Sprinkle this herb mixture evenly over the dough, pressing it lightly into the surface. Then drizzle the remaining 2-3 tablespoons extra-virgin olive oil (from the original amount) over the top. This step is where the magic happens—those herbs will infuse the bread with incredible flavor.
⏰ Step 4: First Rise and Dimple the Dough Again
Cover the pan with a damp towel and let the dough rise for another 30-45 minutes until it’s puffy and just about ready for the oven. While it’s rising, preheat your oven to 425°F. Once it’s hot, use your fingers to press dimples into the dough again—this time, make them deeper and more pronounced. This creates more pockets for that delicious olive oil to pool in.
Sprinkle the 1 tbsp coarse sea salt evenly over the dough, then drizzle with another 2-3 tablespoons extra-virgin olive oil. The salt will caramelize slightly in the oven, adding another layer of flavor. Don’t skip this step—it makes all the difference in the final texture and taste.
🔥 Step 5: Bake to Golden Perfection
Bake the focaccia for 20-25 minutes until the edges are deep golden brown and the top looks slightly crispy. You’ll see the dough puff up and then slowly deflate as it bakes—this is normal. The bread is done when it sounds hollow when you tap the bottom.
Remove from the oven and immediately sprinkle with the 0.5 cup flaky sea salt (if using). Let it cool for 5-10 minutes before slicing—this gives the bread time to set and makes it easier to handle. The result should be a rustic, crispy focaccia with pockets of herby olive oil oozing out at every bite. Serve warm with your favorite dips or enjoy it on its own!
Pro Tips For Making Corsica Bread
- Test Yeast First: Skip the guesswork—mix 1 teaspoon yeast, 1 teaspoon sugar, and ¼ cup warm water (110°F). If it bubbles within 5 minutes, your yeast is active. No bubbles? Toss it and start fresh. I learned this the hard way when a “fresh” packet of yeast flaked out on me mid-proof.
- Oil the Bowl Properly: Coat the mixing bowl with extra-virgin olive oil—not just a drizzle, but enough to slick the sides. This prevents the dough from sticking when you turn it out later. My first batch stuck so badly I nearly lost it all. Trust me, a little oil now saves a lot of frustration later.
- Knead Until Smooth: Corsica bread dough should feel like a satiny ribbon when you stretch it—no cracks or dry spots. If it tears or resists, knead another 2-3 minutes. I used to stop at “looks done,” but that’s how you end up with dense, chewy bread instead of light, airy loaves.
- Shape Tightly, Rest Longer: Roll the dough into a tight spiral, tucking the ends under to seal. Let it rest covered for 30 minutes before baking—this relaxes the gluten and gives you that perfect rise. I skipped this once and got a sad, flat loaf. Patience here makes all the difference.
Essential equipment for great corsica bread
Must-Have Tools
You don’t need a fancy kitchen to make this Corsican focaccia, but a few key tools will make your life easier. A 9×13-inch baking pan is essential—look for one with rimmed edges to prevent oil spills (I love the Nordic Ware Natural Aluminum Half-Sheet Pan).
A lightweight rolling pin helps stretch the dough without overworking it, and a damp kitchen towel keeps the dough from drying out during rises. 🌟
Olive Oil Essentials
This recipe demands high-quality extra-virgin olive oil—don’t skimp! I use Colavita or California Olive Ranch from the grocery store’s international aisle. For measuring, a small ladle or squeeze bottle works best to drizzle evenly over the dough.
A sharp chef’s knife (like Mercer Culinary Genesis) is perfect for mincing garlic and chopping herbs—freshness matters here. Store any leftover oil in a dark glass bottle in your pantry for up to 6 months.
Yeast and Dough Prep
A digital kitchen scale (like the OXO Good Grips) ensures precise measurements for yeast and flour, but a measuring cup set works fine if you’re new to baking. For kneading, a lightly floured surface (I use a wooden cutting board) prevents sticking.
A wooden spoon helps mix the initial dough, while a damp microfiber towel keeps the dough moist during rises. Pro tip: Keep a small bowl of warm water nearby to wet your fingers if the dough gets too sticky. ✨
Baking and Finishing
Your oven is the star here—preheat it to 425°F for that perfect golden crust. A parchment-lined pan makes cleanup effortless, and a pizza stone or baking sheet (if you don’t have a pan) works too.
For finishing, flaky sea salt (like Maldon) adds texture, while a fine-mesh strainer helps sprinkle it evenly. A spatula helps transfer the hot bread to a cooling rack, and a serrated knife gives clean slices. Store leftovers in an airtight container or wrap tightly in foil. 💫
Budget-Friendly Swaps
No fancy tools? No problem! Use a large mixing bowl for dough prep and a spoon for mixing. A plastic wrap works for covering dough during rises (just poke holes for airflow). For measuring oil, a tablespoon from your silverware drawer does the job.
A wooden spoon can double as a dough scraper, and a clean dish towel replaces a microfiber towel. The key is patience—let the dough rise naturally, and the bread will turn out delicious anyway. 💪
Nutrition facts
Frequently asked questions
Can I make Corsican bread without fresh rosemary?
Yes! Use ½ teaspoon dried rosemary instead, but reduce the amount since dried herbs are more concentrated. For extra flavor, add ½ teaspoon dried oregano or 1 teaspoon lemon zest to mimic the bright notes. The dough will still taste delicious—just slightly different.
How do I know when the dough is fully risen?
Press your finger gently into the dough. If it springs back slowly (like Jell-O) and leaves a slight indentation, it’s ready. For Corsican bread, the dough should double in size and feel puffy and airy. If it collapses when touched, give it 30 more minutes. Pro tip: Place the bowl near a warm oven with the light on to speed up rising.
Why did my bread turn out dense instead of airy?
Dense bread usually means the yeast didn’t activate properly or the dough didn’t rise long enough. Double-check your yeast—it should foam within 5-10 minutes in warm water with sugar. Also, ensure your kitchen is warm enough (above 70°F) for rising. If your oven is too cool, try placing the dough on a baking sheet near the oven’s light. Patience is key—rush the rise, and you’ll get a heavy loaf.
Can I bake this bread in a smaller pan?
Yes, but the edges won’t be as crispy. Use a 8×8-inch pan for a thicker, heartier loaf, or a 9-inch round pan for a focaccia-style shape. Just reduce the olive oil to 1 cup total and adjust the baking time to 18-22 minutes. The dough will spread more, so press it firmly into the pan to avoid overflow.
How should I store leftover Corsican bread?
Wrap it tightly in plastic wrap or an airtight container to keep it fresh for 2-3 days at room temperature. For longer storage, freeze slices in a bag for up to 3 months. To reheat, warm in a 350°F oven for 5-10 minutes or toast in a dry pan until crispy. The crust stays crispy, but the interior softens slightly over time.

- Teriyaki Dry Rub Recipe: Umami-Packed Flavor Without the Mess - November 9, 2026
- Calamari in Tomato Sauce Recipe: Crispy Squid with Bright, Acid-Balanced Flavors - November 9, 2026
- Restaurant Style Home Fries Recipe: Crispy Potato Wedges With Herb-Infused Oil - November 9, 2026