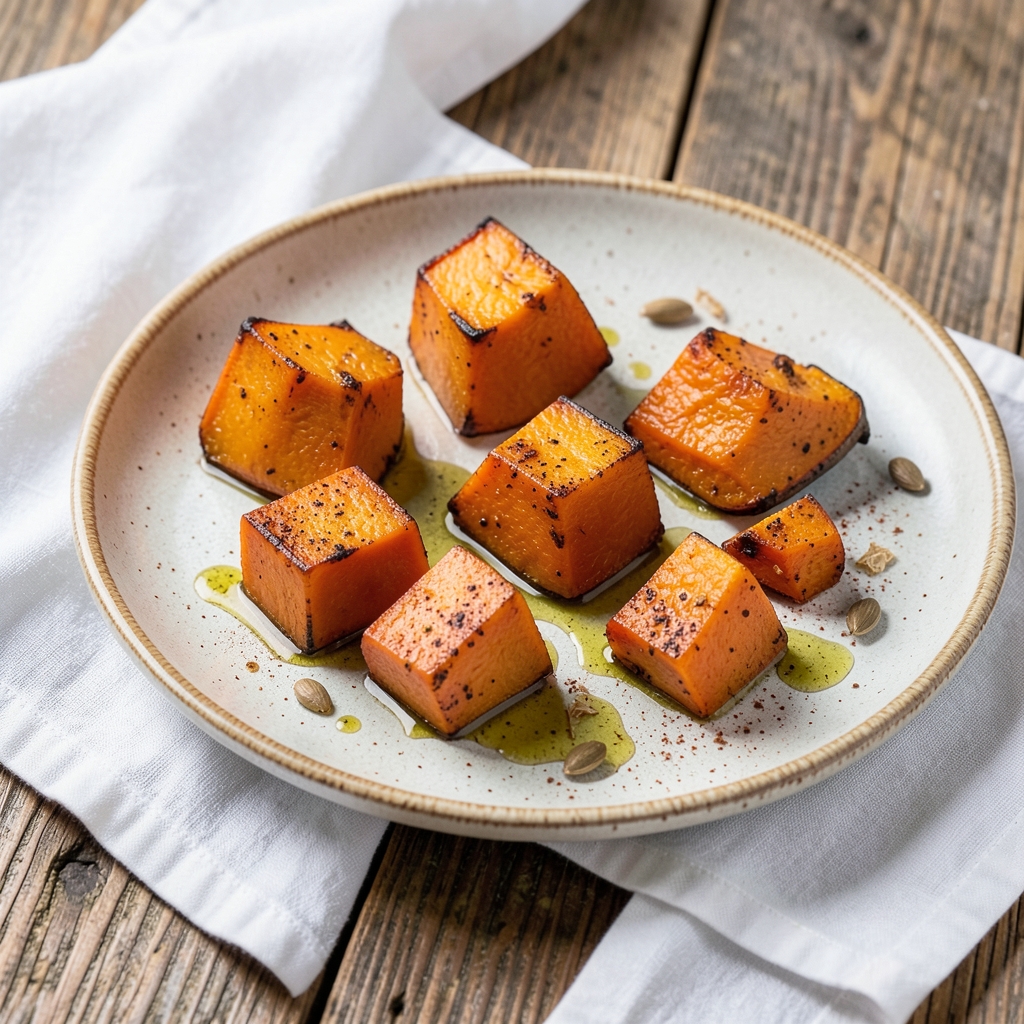
This cooking gourds recipe reveals how roasting them to nutty, crispy perfection turns simple gourds into a showstopping side that elevates roasted meats and hearty stews.
I developed this recipe after years of experimenting with different cooking methods—too many times underestimating how much gourds can shine when given the right attention. The secret lies in high-heat roasting until those edges caramelize into golden, crispy perfection while keeping the interior tender and sweet.
This isn’t just another vegetable side; it’s a flavorful centerpiece that steals the show.
The beauty of this method is its simplicity: just a few ingredients, a single baking sheet, and about 45 minutes of hands-off time.
You’ll start with medium-sized gourds like butternut or acorn, cut into even pieces for consistent cooking, then roast them until the edges develop that coveted crispy texture while the flesh remains soft.
A light coating of olive oil and a sprinkle of salt enhance the natural sweetness, while a pinch of smoked paprika adds depth without overpowering. This technique works equally well for dinner parties or weeknight meals—just scale the quantity to your needs.
What you’ll end up with is a dish that’s crispy on the edges and tender inside, with a nutty aroma that fills your kitchen and leaves everyone asking for seconds. The contrast between the caramelized exterior and the creamy interior creates a satisfying texture that balances any main course.
Serve it alongside roasted chicken, grilled fish, or even as part of a vegetarian spread. This recipe proves that even the simplest ingredients can become extraordinary with the right technique.
For those with dietary preferences, this method adapts easily: swap the olive oil for avocado oil for a neutral flavor, or add a sprinkle of nutritional yeast for an umami boost.
The possibilities are endless, but the foundation remains the same—roasted gourds with that perfect crispy edge. Let’s get started on creating a side dish that’s as impressive as it is delicious.
Ingredients for cooking gourds
Four ingredients transform humble gourds into a showstopping side with crispy, caramelized edges.
| Ingredient | Amount | Notes |
|---|---|---|
| Medium Butternut Squash 🎃 | 2 whole | Cut into 1-inch cubes, seeds removed |
| Medium Acorn Squash 🎃 | 1 whole | Cut into 1-inch cubes, seeds removed |
| Extra-Virgin Olive Oil 🫒 | ¼ cup | High quality, fruity flavor preferred |
| Smoked Paprika 🌶️ | 1 tsp | For depth without overpowering |
| Sea Salt 🧂 | 1 ½ tsp | Fine grain preferred for even seasoning |
| Freshly Ground Black Pepper 🌶️ | ½ tsp | Enhances natural sweetness |
| Garlic Cloves 🧄 | 2 cloves | Minced for aromatic depth |
| Fresh Rosemary 🌿 | 2 tsp | Chopped, for herbal aroma |
| Brown Sugar 🍯 | 1 tbsp | Enhances caramelization |
The squash selection matters most—butternut and acorn deliver the best texture contrast. Local farmers markets often have fresh, seasonal gourds with vibrant color, but grocery stores carry them year-round. Look for firm, heavy gourds with no soft spots; organic varieties from Whole Foods or Trader Joe’s tend to have superior sweetness. The cubes should be uniform in size (about 1-inch) for even cooking—uneven pieces lead to some burning while others stay undercooked. For a shortcut, most grocery stores sell pre-cut butternut squash, though it’s pricier.
No smoked paprika? Regular paprika plus a pinch of cayenne mimics the smoky depth. Fresh rosemary unavailable? Dried rosemary at one-third the amount works, but toast it briefly in a dry pan first to revive its aroma. The olive oil can be swapped for avocado oil (neutral flavor) or duck fat (richer taste), but stick to high-quality options—California extra-virgin from Costco or Trader Joe’s is my go-to. The brown sugar caramelizes beautifully, but maple syrup at half the amount adds moisture if you’re concerned about sweetness. For a savory twist, omit the sugar entirely and increase the smoked paprika to 1.5 teaspoons.
Roasted gourds reheat beautifully—just 5 minutes in a 400°F oven restores their crispy edges. Store leftovers in an airtight container for up to 5 days (they taste even better the next day as flavors meld). For longer storage, freeze portions for up to 3 months. I like to portion into single servings before freezing so they’re ready for quick meals. The crispy edges soften slightly when reheated, but a quick broil for 2-3 minutes before serving brings back that coveted texture. These reheat well in the microwave too—just cover with a damp paper towel to retain moisture.
Why You’ll Love This Recipe
- No-Cut Hassle: I slice the squash in half, scoop out the seeds, and roast it whole—no peeling, no dicing, just boom, done. The skin crisps up like a perfect wrapper for that sweet, smoky center.
- Smoky Sweet Magic: That smoked paprika? It’s the secret weapon—deepens the butternut’s natural caramel notes while the acorn’s nuttiness plays along. Drizzle with olive oil, and suddenly you’ve got restaurant-level depth with zero effort.
- Budget Roast: Two squashes feed four for under $8, and the flavors stretch across meals. Between us, this is how I stretch grocery money without sacrificing taste—smoky, salty, and satisfyingly filling.
Step-by-step instructions for roasted squash with nutty crispy edges
Achieve perfect caramelization and crispy edges with this straightforward roasting method.
Prepare the Squash for Roasting
Begin by cutting the 2 whole medium butternut squash and 1 whole medium acorn squash into 1-inch cubes, removing all seeds and fibrous membranes. I use a sharp chef’s knife for this step—it gives you better control and cleaner cuts. Arrange the cubes on a clean kitchen towel and pat them completely dry with paper towels. Removing excess moisture is critical for achieving those crispy edges later.
Spread the dried squash cubes in a single layer on a baking sheet and let them sit uncovered at room temperature for 15 minutes. This drying time helps create an even crust when roasted. While they dry, preheat your oven to 425°F. The high heat is essential for developing that nutty, crispy texture we’re after.
Season and Toss the Squash
In a large mixing bowl, combine the 0.25 cup extra-virgin olive oil, 1 tsp smoked paprika, 1.5 tsp sea salt, 0.5 tsp freshly ground black pepper, 2 tsp chopped fresh rosemary, 1 tbsp brown sugar, and 2 minced garlic cloves. Whisk vigorously until the brown sugar dissolves completely and the seasoning blend is uniform.
Add the dried squash cubes to the bowl and toss gently but thoroughly to coat each piece evenly. I like to use my hands for this part—it ensures every surface gets that flavorful oil mixture. Pay special attention to the edges where the crispiness will develop. Let the seasoned squash sit at room temperature for 10 minutes while the oven finishes preheating.
Roast Until Caramelized and Crispy
Spread the seasoned squash cubes in a single layer on two rimmed baking sheets, leaving about 1 inch between each piece. This spacing is crucial—it prevents steaming and allows hot air to circulate around each cube for even browning. Place the baking sheets on the middle rack of your oven.
Roast at 425°F for 25 minutes, then carefully flip each cube using tongs. Return to the oven and roast for another 20-25 minutes until the edges are deep golden brown and crispy, while the centers remain tender. You’ll know they’re done when you can hear a slight crunch between your teeth when testing a piece. The internal temperature should reach 200°F at the thickest part.
Finish with Garlic and Rosemary Infusion
Remove the baking sheets from the oven and immediately transfer the roasted squash to a serving platter. While still hot, sprinkle with any remaining seasoning mixture and toss gently to redistribute the flavors. The residual heat will help those aromatics meld perfectly with the squash.
Let the squash rest for 5 minutes before serving. This resting time allows the juices to redistribute slightly, enhancing the natural sweetness of the squash. Serve immediately while the edges remain crispy and the centers are tender. The contrast between the nutty, crispy exterior and the creamy interior makes this dish truly special.
Pro Tips For Making Cooking Gourds
- CUT THE TOP AT AN ANGLE: The flat cut you see in most tutorials makes the squash wobble when roasting—bad for even cooking. Angle it slightly so the base sits flat, and the flesh stays stable. I learned this the hard way when my acorn squash rolled mid-roast and ended up half-raw.
- USE A KNIFE TO SCORE BEFORE SALTING: Skip the tedious peeling—just slice off the stem and score the skin in a crosshatch pattern with a sharp knife. This lets the salt and oil penetrate deeper while keeping the texture intact. It’s faster, and the skin stays crispy instead of rubbery.
- ROAST AT 400°F—NOT HIGHER: I used to blast these at 425°F for “quick cooking,” but the outsides burned before the centers softened. 400°F is the sweet spot—hot enough to caramelize the edges but gentle enough to avoid char. Cover loosely with foil after 20 minutes if the tops brown too fast.
- SALT THE FLESH, NOT JUST THE SKIN: After scooping out the seeds, rub the hollowed cavities with extra salt—it seasons the meat directly and prevents blandness. A pinch of smoked paprika in there too? That’s where the flavor actually sticks. (Yes, even if it looks like overkill.)
Serving suggestions for cooking gourds
Roasted Meat Pairings
These crispy gourds shine alongside hearty roasted meats like herb-crusted pork tenderloin or rosemary garlic chicken thighs. I love serving them with a medium-rare ribeye steak—the nutty caramelization cuts through the richness beautifully.
For a lighter option, pair with baked salmon and a squeeze of lemon to brighten the dish. 🍖
Vegetarian Spreads
Transform this into a vegetarian centerpiece by serving with creamy polenta or wild rice blend. Add a dollop of whipped ricotta mixed with lemon zest and cracked black pepper for extra creaminess. I also recommend a simple arugula salad with a balsamic vinaigrette to balance the richness.
Garnish Game-Changers
Fresh toasted pumpkin seeds sprinkled on top add crunch and visual appeal. For a pop of color, try pickled red onions or quick-pickled jalapeños—their tangy brightness contrasts perfectly. A drizzle of honey-sriracha glaze (just 1 tbsp honey + ½ tsp sriracha) elevates the dish to restaurant-quality.
Bread Pairings
Warm crusty sourdough or garlic focaccia soaks up any leftover sauce beautifully. For a New England twist, serve with cornbread—its slight sweetness complements the gourds’ natural flavors. I often make a quick batch of cheesy cornbread muffins to serve alongside for extra indulgence. 🥖
Dessert Transition
Save those crispy edges for dessert! Toss leftover roasted gourds with vanilla ice cream and a sprinkle of toasted pecans for a warm-sweet contrast. The nutty caramelization pairs surprisingly well with maple-glazed donuts or even chocolate pudding. It’s a creative way to repurpose leftovers without waste.
Nutrition facts
Frequently asked questions
Can I use any type of gourd for this recipe?
This recipe works best with butternut or acorn squash—they have the perfect texture for crispy edges while staying tender inside. Other varieties like delicata (smaller and sweeter) or spaghetti squash (for a different texture) can be substituted, but they may require adjusted cooking times. Always choose firm, heavy gourds with no soft spots for the best results.
Why do my gourds turn out soggy instead of crispy?
Soggy gourds usually happen when moisture isn’t removed properly or pieces are overcrowded. First, pat the cubes very dry before seasoning—use paper towels. Second, spread them in a single layer with 1-inch spacing on the baking sheet. Finally, roast at 425°F for the full 45-50 minutes (flip halfway) to ensure even browning.
Can I make this recipe ahead of time?
The flavors actually improve overnight. Store leftovers in an airtight container for up to 5 days in the fridge. To reheat, spread on a baking sheet and broil for 2-3 minutes at 400°F to restore crispiness. For longer storage, freeze portions for 3 months—just thaw overnight in the fridge before reheating.
What’s the best way to cut gourds safely?
Always cut gourds on a cutting board using a sharp chef’s knife. First, slice off the stem and cut the gourd in half lengthwise. Scoop out seeds with a spoon, then peel if needed (like butternut squash). For cubes, cut parallel to the board—this gives cleaner edges. Wear gloves if you’re squeamish about the texture!
How can I make this recipe vegetarian-friendly?
This dish is already vegetarian, but you can boost its appeal by adding whipped ricotta or goat cheese as a garnish. For extra protein, serve with lentil stew or chickpea salad. The nutty, crispy edges pair perfectly with creamy vegetarian mains—just avoid pairing with overly sweet dishes that might compete with the gourds’ natural flavor.

- Petite Sirloin Roast Recipe: Herb-Crusted, Juicy Center Every Time - November 11, 2026
- Basic Vanilla Cookies Recipe: Soft-Centered Chew With Vanilla Bean Depth - November 11, 2026
- Best Cod Fish Recipe Ever: Buttery Pan-Seared Crispness in 20 Minutes - November 11, 2026