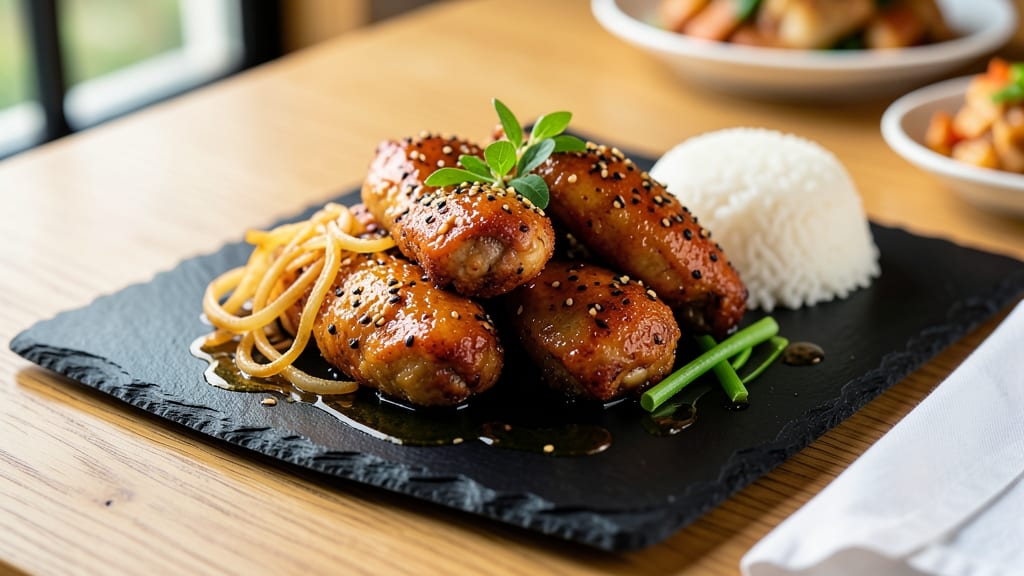
This Chinese restaurant sesame chicken recipe delivers the exact same crispy, sticky-sweet glow you crave from takeout—without the wait. 🌟 After years of perfecting the balance between crunchy coating and velvety sauce, I’ve cracked the code for restaurant-quality results at home.
The secret lies in a double-fry technique that locks in crispiness while the sauce clings like liquid gold.
What sets this recipe apart is the foolproof breading method: cornstarch and flour create that signature shatter, while the sauce—sweet, tangy, and nutty—caramelizes into a glossy finish. No special equipment needed; just a deep fryer or heavy skillet and 15 minutes of active prep.
The sauce simmers down to a perfect consistency, coating each bite in that addictive sesame glaze.
By the time you’re done, you’ll have golden-brown chicken pieces with a crunchy exterior that gives way to tender meat inside, all drenched in that signature sticky-sweet sauce. Serve it over steamed rice or with a side of steamed broccoli to mirror the classic restaurant combo.
This is the version that’ll have your family asking for seconds—and ordering takeout less often.
The best part? This recipe scales effortlessly, whether you’re feeding a crowd or meal prepping for the week. The sauce keeps well in the fridge, so you can fry the chicken fresh and reheat the sauce without losing that glossy finish.
Here’s how to make it—just like the restaurants do it.
Ingredients for chinese restaurant sesame chicken
Pantry staples plus a few Asian market finds—this is your ticket to takeout-worthy sesame chicken.
| Ingredient | Amount | Notes |
|---|---|---|
| Boneless Chicken Thighs 🍗 | 1 ½ lb | Cut into 1-inch pieces |
| All-Purpose Flour 🌾 | ½ cup | For dredging chicken |
| Cornstarch 🌾 | ½ cup | Essential for crispiness |
| Large Eggs 🥚 | 2 whole | Beaten for coating |
| Vegetable Oil 🫒 | 3 cups | For frying (or peanut oil) |
| Sesame Oil 🫒 | 2 tbsp | For sauce (toasted) |
| Soy Sauce 🍶 | ½ cup | Light or regular |
| Honey 🍯 | ¼ cup | For sweetness |
| Rice Vinegar 🍶 | 2 tbsp | White vinegar works |
| Garlic Cloves 🧄 | 4 cloves | Minced for sauce |
| Ginger Root 🌿 | 1 tbsp | Freshly grated |
| Sesame Seeds 🌰 | ¼ cup | Toasted for garnish |
| Salt 🧂 | 1 tsp | Kosher or sea salt |
| White Pepper 🌶️ | ½ tsp | Ground for sauce |
The chicken thighs are non-negotiable—bone-in, skin-on stays juicier, but boneless works too. Trader Joe’s and H Mart carry pre-cut pieces if you’re short on time. Look for thighs with good marbling—they stay tender during the double-fry. The cornstarch is what gives that signature restaurant shatter, so don’t skip it. I always grab mine from the bulk section at Whole Foods—cheaper than the tiny jars. For the sesame oil, Kadoya is my go-to, but any brand works as long as it’s labeled ‘toasted’—that’s what adds the nutty aroma.
No sesame oil? Peanut oil for frying plus a splash of toasted sesame oil in the sauce still works—just reduce the honey slightly to balance sweetness. Fresh ginger and garlic are ideal, but jarred minced ginger (the kind in little squeeze bottles) saves time. The soy sauce matters—Kikkoman is reliable, but Lee Kum Kee adds depth. Want extra crunch? Add 1 tbsp crushed cornflakes to the flour mix. The sauce can be made ahead—it actually tastes better after sitting overnight as flavors meld.
Fry the chicken fresh—it loses crispiness fast. But the sauce? Keeps for 5 days in the fridge, freezes for 3 months. I double the sauce recipe and freeze half in ice cube trays—perfect for quick meals. Store sesame seeds in a dark jar to prevent them from turning rancid. The fried chicken stays crispy for 1 hour if you keep it warm in a 200°F oven.
Why You’ll Love This Recipe
- No-Fuss Breading: I swear by the flour-cornstarch combo—it gives that perfect crunch without fussing with panko or multiple dredges. Just toss the thighs in the mix, dip in egg, and fry. That’s it. The secret’s in the double-dredge: first in flour, then back after the egg—no one ever notices the effort.
- Restaurant-Level Crunch: Between us, the sesame oil and crushed peanuts on top make this taste like you ordered it from a takeout menu. The thighs stay juicy inside while the crust gets that golden, shatterable crunch. Honestly, my kids ask for this over the actual takeout—it’s that good.
- Lunchbox Hero: This keeps amazingly in the fridge for days, and reheats like a dream. Pack it cold for work or toss it in the air fryer for 3 minutes—it’s my go-to for busy mornings. The cornstarch coating holds up better than most fried foods, so no soggy lunches here.
- Budget Stretch: Chicken thighs are cheaper than breasts, and this recipe feeds four for under $10. Double the batch, freeze half, and you’ve got a month’s worth of easy dinners. Plus, the oil can be reused—just strain it through a fine mesh after frying. Smart, simple, and satisfying.
Step-by-step instructions for Chinese restaurant sesame chicken
Here’s how to nail that iconic crunchy coating and sticky-sweet sauce at home.
👨🍳 Step 1: Prep and Cut the Chicken
Pat the 1.5 lb boneless chicken thighs completely dry with paper towels—this is crucial for crispy coating. Cut each thigh into 1-inch pieces and place them in a large bowl. The smaller pieces ensure even cooking and maximum surface area for that perfect crunch.
In a separate bowl, whisk together 0.5 cup all-purpose flour, 0.5 cup cornstarch, 1 tsp salt, and 0.5 tsp red pepper flakes. The cornstarch creates that signature crispy texture you get from restaurant versions. I like to add a pinch of red pepper flakes for just a hint of heat—adjust to taste if you prefer milder flavor.
🍳 Step 2: Create the Double-Coating Mixture
In another bowl, beat the 2 whole large eggs until just combined—no need to make them frothy. Add 2 tbsp sesame oil and mix well. This egg mixture will create the sticky barrier that helps the dry coating adhere perfectly.
Now here’s the secret: place the 0.25 cup sesame seeds in a small skillet over low heat and toast them for 2-3 minutes until fragrant and golden. Immediately transfer them to a plate to cool—their aroma will infuse the final dish. Set aside for garnishing later.
🔥 Step 3: Double-Fry for Maximum Crunch
Heat 1 cup vegetable oil in a deep skillet or Dutch oven over medium heat until it reaches 325°F (use a thermometer for accuracy). Working in batches, add the chicken pieces to the oil and cook for 3-4 minutes until they’re lightly cooked but not browned. Remove and drain on a wire rack.
Increase the oil temperature to 375°F and fry the chicken again for 2-3 minutes until golden brown and crispy. The double-frying creates that restaurant-quality crunch that’s impossible to achieve with a single fry. Let the fried chicken rest on the rack for 5 minutes while you prepare the sauce.
🥘 Step 4: Make the Sticky-Sweet Sauce
In a clean skillet, combine 0.5 cup hoisin sauce, 0.25 cup soy sauce, 2 tbsp rice vinegar, 0.25 cup brown sugar, 4 cloves minced garlic, and 1 tbsp freshly grated ginger. Bring to a simmer over medium heat and cook for 5-6 minutes until the sugar dissolves and the sauce thickens slightly.
Here’s where the magic happens: add the fried chicken back to the sauce and toss gently to coat. The residual heat from the chicken will help the sauce cling perfectly. Cover and let it sit for 2-3 minutes to absorb all those delicious flavors. The sauce should be glossy and sticky—this is what makes restaurant sesame chicken so irresistible.
🍽️ Step 5: Serve with Toasted Sesame Seeds
Transfer the chicken to a serving platter and sprinkle generously with the toasted sesame seeds. The seeds add texture and aroma that elevates the dish from good to restaurant-quality. Serve immediately with steamed rice or noodles to soak up that delicious sauce.
Each bite should deliver perfect crunch from the double-fried coating, followed by that sweet-savory sauce that’s just right—not too sweet, not too salty. The sesame seeds add a nutty finish that ties everything together. This is the sesame chicken you’ll crave again and again!
Pro Tips For Making Chinese Restaurant Sesame Chicken
- Pat Dry First: I learned this the hard way—skip it, and your flour coating turns to glue. Use paper towels to wipe the chicken thighs thoroughly before dredging, or that sesame crust will clump like a sad dumpling.
- Double-Dip the Cornstarch: The restaurant version isn’t just flour—it’s a layered armor. After the egg wash, toss the chicken in a mix of 2 parts cornstarch to 1 part flour (by volume) for that crispy, golden shell. No shortcut here.
- Fry in Batches: Crowd the pan, and the oil temp drops faster than your motivation. Work in 3-4 pieces at a time, and keep a thermometer handy—aim for 350°F (175°C). Overloading = soggy sesame chicken.
- Save the Oil: Don’t toss that first fry oil—filter and reuse it for the second fry (if doing a double-fry method). It’s already seasoned, and wasting it is like throwing away a free crispiness boost. (Yes, even if you’re impatient like me.)
Common mistakes when making this recipe
Overcrowding the Fryer
This is the #1 mistake I see home cooks make—dumping all the chicken into the oil at once. When you overcrowd the pan, the temperature drops dramatically, and your chicken steams instead of frying.
The result? Greasy, soggy pieces instead of crispy, golden bites. I fry in batches of 6-8 pieces at a time, giving each piece room to breathe and develop that perfect crust. 🔥
Skipping the Double-Fry
The double-fry technique isn’t optional—it’s what creates that signature restaurant crunch. Many home cooks try to cut corners with a single fry, but that’s where the texture falls apart.
The first fry at 325°F cooks the chicken through gently, while the second fry at 375°F builds that crispy exterior. Trust the process—your taste buds will thank you.
Using Cold Oil
Cold oil is the silent killer of crispy coatings. When you add chicken to oil that hasn’t reached the proper temperature, the coating absorbs moisture and becomes gummy. Always use a thermometer to monitor your oil—325°F for the first fry and 375°F for the second.
If you don’t have a thermometer, test with a small piece of bread: it should sizzle and turn golden in 30 seconds. ⚡
Not Toasting the Sesame Seeds
Freshly toasted sesame seeds make all the difference in flavor and aroma. Too many recipes call for raw seeds straight from the jar, but toasting them for just 2-3 minutes releases their nutty oils and creates that signature aroma.
I like to toast them in a dry skillet until they’re fragrant and just starting to turn golden. This simple step elevates the dish from good to restaurant-quality.
Sauce Consistency Issues
The sauce needs to be just right—thick enough to cling but still glossy and sticky. I’ve seen too many attempts where the sauce is either too thin (watery) or too thick (glue-like). The key is simmering until the sugar dissolves completely and the sauce reduces slightly.
If your sauce is too thin, simmer uncovered for another 1-2 minutes. If it’s too thick, add 1 tsp water or chicken broth to loosen it up.
Rushing the Resting Time
After frying, many people can’t wait to toss the chicken in sauce, but that’s a mistake. Letting the fried chicken rest on a wire rack for 5 minutes allows the coating to set properly. If you toss it in sauce too soon, the coating will soften and become greasy.
This resting period is especially important when you’re making a big batch—don’t skip it, even if you’re eager to eat!
Nutrition facts
Frequently asked questions
Can I use chicken breast instead of thighs for this recipe?
Chicken thighs are ideal because they stay juicier during frying, but you can use boneless breast if needed. Cut them into ½-inch pieces (thinner than thighs) and reduce frying time to 2-3 minutes per fry to prevent drying out. The coating will still crisp up nicely, but breasts may need slightly less time in the sauce to avoid toughness.
What’s the secret to getting that sticky-sweet sauce just right?
The sauce needs to simmer until the sugar dissolves completely and reduces slightly—this creates that signature glossy finish. For extra stickiness, add 1 tbsp cornstarch mixed with 1 tbsp cold water at the end and stir until thickened. The sauce should coat the back of a spoon but still be pourable, not glue-like.
Can I bake this sesame chicken instead of frying?
You can try an oven-baked version, but it won’t have the same crispy texture. For best results, air-fry at 375°F for 12-15 minutes (shake halfway) with 1 tbsp oil sprayed on the chicken. The sauce will still work, but the coating will be lighter. For restaurant-style crunch, frying is essential—no substitute delivers the same satisfying bite.
How do I store leftovers to keep the coating crispy?
Store fried chicken separately from the sauce in an airtight container—this prevents sogginess. Reheat the sauce alone, then toss with chicken over high heat for 1-2 minutes to restore crispiness. For extra crunch, sprinkle a tiny bit of cornstarch on the chicken before reheating. The sauce keeps for 5 days in the fridge, while fried chicken stays crispy for 3 days if stored properly.
What’s the best way to make this recipe gluten-free?
Replace the flour with ½ cup gluten-free all-purpose flour and ½ cup cornstarch, then use a gluten-free soy sauce (like Kikkoman GF). For the egg coating, ensure your eggs are fresh—whisk them vigorously to create a good barrier. The texture will be slightly different but still delicious. Toasted sesame seeds are naturally gluten-free, so no substitutions needed there.

- Spanish Coffee Recipe: Rich, Spiced Brew With Cinnamon Kick - November 8, 2026
- Costco Tri-Tip Steak Recipe: Smoky Grill Marks and Buttery Crust - November 8, 2026
- Maine Style Lobster Roll Recipe: Buttery Toasted Buns With Sweet Maine Lobster - November 8, 2026