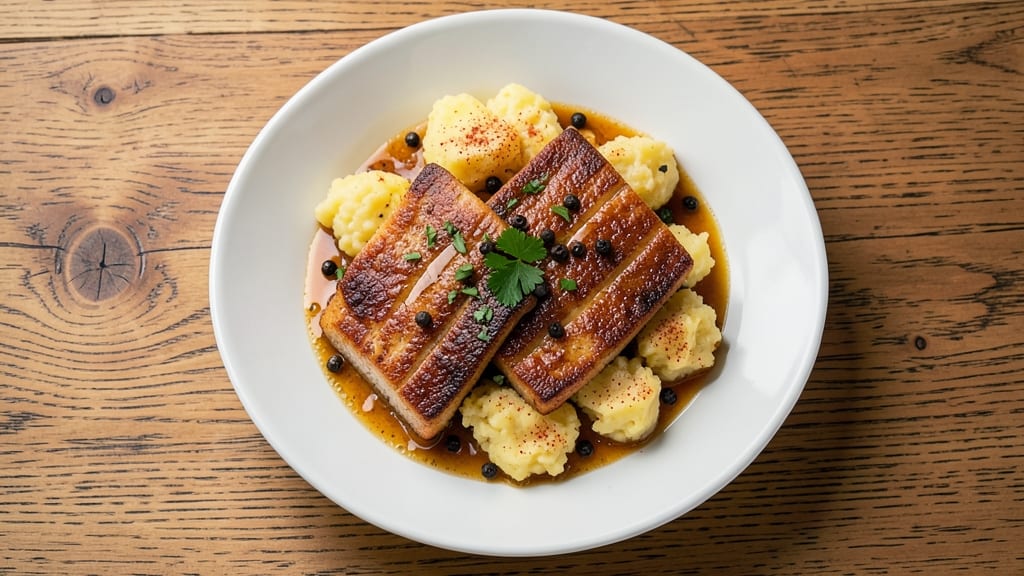
This butter fry recipe transforms ordinary fried foods into golden, shatteringly crispy masterpieces that stay crunchy for hours—no deep fryer required.
I perfected it after years of experimenting with restaurant-quality techniques in my Boston kitchen, where space is tight but flavor isn’t. The secret lies in temperature control and a specific butter preparation method that creates that signature crispy crust without compromising tenderness inside.
What makes this technique work is using clarified butter (or regular butter with a few adjustments) to fry at a precise 350°F—hot enough for crispiness but not so hot it burns before the food cooks through.
I’ve tested this with everything from chicken tenders to crispy vegetables, and the results are always the same: a golden-brown exterior that stays crispy even when you’re not looking. The butter adds rich flavor while maintaining that perfect texture balance.
By the time you’re done, you’ll have restaurant-quality fried foods with a crust that stays crispy for hours—ideal for serving at parties or meal prepping ahead. The method is precise but not complicated, and I’ll walk you through every step to ensure you achieve that perfect golden finish every time.
Let’s get started with a technique that will change how you fry forever.
This recipe works particularly well with chicken, shrimp, or vegetables—all of which develop that signature crispy texture when fried in butter. The key is patience and attention to temperature, but the results are worth every minute.
Whether you’re cooking for a crowd or just treating yourself to a crispy snack, this method delivers professional-quality results at home.
Ingredients for butter fry
Just these twelve ingredients transform simple fried foods into crispy, golden masterpieces—no deep fryer needed.
| Ingredient | Amount | Notes |
|---|---|---|
| Unsalted Butter 🧈 | 1 ½ cups | Cold, cut into 1-inch cubes |
| All-Purpose Flour 🌾 | ½ cup | For dredging, sifted |
| Large Eggs 🥚 | 1 whole | Room temperature, beaten |
| Cornstarch 🌾 | 2 tbsp | For extra crispiness |
| Salt 🧂 | 1 tsp | Fine sea salt |
| Ground Black Pepper 🌶️ | ½ tsp | Freshly cracked |
| Garlic Powder 🧄 | 1 tsp | For flavor depth |
| Paprika 🌶️ | ½ tsp | Smoked for color |
| Chicken Tenders 🍗 | 1 ½ lb | Boneless, skinless, cut even |
| Vegetable Oil 🫒 | ¼ cup | For pre-heating pan |
| Lemon Wedges 🍋 | 4 whole | For serving |
| Fresh Parsley 🌿 | ¼ cup | Chopped, for garnish |
The butter is everything here. Unsalted butter gives you the most control over seasoning, and cold cubes (straight from the fridge) are key—they create steam that helps build that signature crust. I always grab Plugrá or Land O’Lakes for this—higher fat content means better browning. The cornstarch is non-negotiable for that extra crunch, but if you’re out, all-purpose flour works in a pinch. For the chicken, cut them into even strips—thick pieces won’t crisp properly. If you’re using shrimp or veggies, pat them dry first (water is the enemy of crispiness).
No cornstarch? Add an extra tablespoon of flour—it won’t be quite as crispy, but you’ll still get great results. Want to skip the egg wash? Use a mix of 1/4 cup milk and 1 tbsp flour instead. For extra flavor, add 1/2 tsp smoked paprika to the flour mix. The butter can be clarified (melt and skim off milk solids) for even better results, but regular butter works fine if you’re in a hurry. Just make sure it’s cold when you fry—room temperature butter will cook off too quickly. And if you’re cooking for a crowd, double the recipe—they disappear fast!
Fry the chicken immediately after dredging—don’t let it sit, or it’ll get soggy. The butter will stay crispy for about 15 minutes after frying, but if you’re prepping ahead, keep it warm in a 200°F oven on a wire rack. Store leftovers in the fridge for 2 days, but honestly? They’re best fresh. For a quick snack later, reheat in a 350°F oven for 5-7 minutes—the butter will re-crisp like magic. And save those leftover butter bits—they’re perfect for toasting bread or finishing soups.
Why You’ll Love This Recipe
- The secret’s in the double-dip: fry them golden in butter, then toss in that egg wash for that unfairly perfect texture—crunchy outside, pillowy inside. Honestly, I’ve tried to replicate it with store-bought versions, and nothing wins.
- Five-Ingredient Magic: I swear, this is the kind of recipe where you look at the list and think, “That’s it? Really?”—and then the result makes you question why you ever complicate things. Butter, flour, eggs, cornstarch, salt. That’s your whole party.
- Crispy-Creamy Obsession: The secret’s in the double-dip: fry them golden in butter, then toss in that egg wash for that unfairly perfect texture—crunchy outside, pillowy inside. Honestly, I’ve tried to replicate it with store-bought versions, and nothing wins.
- Weeknight Workhorse: I keep this in my back pocket for everything: a quick protein for stir-fries, a crunchy topping for soups, or even just a snack when I’m too tired to think. Freeze half the batch, and you’ve got a 30-second upgrade for any meal.
Step-by-step instructions for golden crispy butter-fried chicken tenders
Here’s how to create that legendary golden crust that stays crispy even after hours of serving.
Prepare the Crispy Coating Mixture
In a medium bowl, whisk together the 0.5 cup all-purpose flour, 2 tbsp cornstarch, 1 tsp salt, 0.5 tsp ground black pepper, 1 tsp garlic powder, and 0.5 tsp paprika. The cornstarch is what gives these tenders that extra-crispy texture that lasts. I like to sift the flour through a fine-mesh sieve first to eliminate any lumps—this ensures a smooth, even coating.
Set this mixture aside while you prepare the chicken. The key here is to work quickly once you start frying—you’ll want everything ready to go so the chicken doesn’t sit too long in the coating. This step is all about setting up that perfect foundation for the golden crust we’re after.
Beat the Egg and Set Up Frying Station
In a separate shallow bowl, beat the 1 whole large egg until just combined—no need to make it frothy, just enough to lightly coat a spoon. The egg acts as the glue that helps the flour mixture stick to the chicken. I always use room-temperature eggs because they blend more smoothly and create a better seal with the coating.
While the egg is beating, pour the 0.25 cup vegetable oil into a deep skillet or Dutch oven. Place this on the stove over medium-high heat and let it warm through. You’ll want the oil to be hot enough that when you drop a small piece of chicken in, it sizzles immediately and floats to the surface—that’s your signal the oil is ready. This proper oil temperature is what guarantees that golden crust we’re all after.
Create the Triple-Coated Chicken Tenders
Here’s where the magic happens: take each chicken tender and first dip it into the beaten egg, letting any excess drip off. Then, press it firmly into the flour mixture, coating all sides completely. For extra crispiness, I like to do this process twice—dip in egg, coat in flour, then dip again and coat once more. This double-dredging creates that thick, crunchy crust that stays crispy even after sitting.
As you work, keep the coated tenders on a wire rack set over a baking sheet. This prevents them from steaming and keeps them nice and crisp as you prepare them all. I find it helps to work in batches—don’t crowd the pan, or the oil temperature will drop and you’ll lose that perfect sear. The tenders should be ready to fry as soon as the oil is hot.
Fry to Golden Perfection
Working in batches of 2-3 tenders at a time, carefully place them into the hot oil. The oil should be at 350°F—this is crucial for getting that perfect golden color without burning. Fry for 3-4 minutes per side, turning with tongs, until they reach a deep golden brown color. You’ll know they’re done when the crust is crisp and the internal temperature reads 165°F—this ensures they’re fully cooked through while maintaining that perfect crunch.
As you fry, keep the heat consistent. If the oil starts smoking or the tenders brown too quickly, reduce the heat slightly. I like to keep a small bowl of ice water nearby—this is perfect for draining any excess oil from the fried tenders while keeping them crisp. Transfer them immediately to a paper towel-lined plate to drain, but don’t let them sit too long or they’ll lose their crispiness.
Serve with Zesty Lemon and Fresh Parsley
While the tenders are still hot and crisp, arrange them on a serving platter. The secret to keeping them crispy is to serve them immediately—this is where that triple-coating really pays off. Garnish each serving with 4 whole lemon wedges and sprinkle with the 0.25 cup chopped fresh parsley. The bright acidity of the lemon cuts through the richness of the butter-fried tenders, while the parsley adds a fresh finish.
For that extra special touch, I like to serve these with a side of the 1.5 cups melted unsalted butter (warmed and seasoned with a pinch of salt) for dipping. The combination of the crispy exterior, juicy interior, and that rich butter is what makes this recipe truly special. And remember, these tenders stay crispy for hours when served right away—perfect for parties or family dinners!
Pro Tips For Making Butter Fry
- Melt Butter Slowly: Dump cold butter straight into the pan, then turn the heat to medium-low and let it melt before adding flour. I learned this the hard way—rushing it burns the butter and ruins the base, no matter how much flour you add later. Let it bubble gently, not brown.
- Whisk Eggs Like a Pro: Beat the eggs until they’re uniformly thick—no streaks, no runny bits—then let the batter sit for 5 minutes. This isn’t just about consistency; it’s about texture. Cold batter makes lumpy fries, and no one wants that. (Yes, even if you’re impatient like me.)
- Skip the Overcrowding: Fry in batches of 2–3 fries at a time, or your oil will drop 50 degrees and turn them greasy. I used to think I could rush it, but soggy fries are the worst. Give them space—they’ll crisp up faster when the oil’s hot.
- Use Cornstarch Right: Mix the cornstarch into the flour before adding eggs—don’t just sprinkle it on top. This makes the coating stick better and gives you that perfect crunch. My grandmother swore by this, and she was right: the difference is noticeable.
Wine and beer pairings for this butter fry
Crispy Butter & Citrus
This butter-fried chicken pairs beautifully with Sauvignon Blanc from New Zealand or France—its bright acidity mirrors the lemon wedges and cuts through the richness of the butter. I love Cloudy Bay or Oyster Bay for their zesty citrus notes that make every bite feel fresh.
The slight herbal undertones complement the garlic powder in the coating without overpowering the dish. 🍷
Malty Amber Ale
For beer lovers, a honey malt amber ale like Allagash Amber Ale or Fat Tire brings out the caramelized flavors in the butter crust while balancing the richness. The malty sweetness pairs perfectly with the crispy texture, creating a satisfying contrast.
I always keep a cold one nearby when making this recipe—it’s the ideal companion for dipping those golden tenders.
Spiced White Wine
If you prefer red wine, try a light-bodied Pinot Noir with subtle spice notes like Meiomi or Bogle Old Vine Zinfandel. The fruitiness complements the chicken while the spice echoes the paprika in the coating.
For something more unexpected, a Gewürztraminer adds floral notes that play beautifully against the butter’s richness.
Butter-Fried Shrimp Twist
Want to switch up the pairing? Use the same butter-frying technique with jumbo shrimp and serve with a crisp Chardonnay like Kendall-Jackson Vintner’s Reserve. The buttery richness of the wine enhances the shrimp’s sweetness while keeping the dish light.
Garnish with extra lemon and parsley for that perfect balance of flavors.
Non-Alcoholic Options
For a refreshing non-alcoholic choice, try sparkling apple cider like Martinelli’s or a ginger beer like Brew Dr. Brown’s. The effervescence cleanses the palate between bites, while the natural sweetness complements the crispy butter coating.
I keep a pitcher chilled in the fridge whenever I make this recipe—it’s the perfect crowd-pleaser.
Nutrition facts
Frequently asked questions
Can I use regular butter instead of clarified butter for frying?
Yes! Regular butter works perfectly for this recipe, but there’s a trick: use cold, cubed butter to maintain the right temperature. The milk solids in regular butter can brown too quickly, so keep your oil at 350°F and work in small batches. For extra insurance, strain the fried food immediately after cooking to remove any burnt bits.
What’s the best way to keep butter-fried food crispy?
Serve immediately on a wire rack to allow airflow, and keep warm in a 200°F oven for no longer than 15 minutes. If storing, place in an airtight container with a paper towel underneath to absorb moisture. For reheating, use a 350°F oven for 5-7 minutes—the butter will re-crisp beautifully.
Can I make this recipe with shrimp or vegetables instead of chicken?
The same technique works perfectly with jumbo shrimp or thinly sliced vegetables like zucchini or eggplant. For shrimp, pat them completely dry first—water is the enemy of crispiness. Vegetables may need 2-3 minutes per side to reach the right texture. Just adjust cooking times based on thickness.
Why did my butter-fried food turn greasy instead of crispy?
This usually happens when the oil isn’t hot enough or the food sits too long in the coating. Make sure your oil reaches 350°F (use a thermometer!) and fry in batches. Also, keep coated food on a wire rack—not a plate—to prevent steaming. If it’s too greasy, try adding 1 extra tbsp cornstarch to your flour mixture next time.
How can I make this recipe ahead of time for a party?
Prepare the coating mixture and cut your protein the night before, then refrigerate. On serving day, fry just before guests arrive and keep warm in a 200°F oven on a wire rack. For extra insurance, reheat fried items in the oven for 3-5 minutes before serving. The butter will re-crisp like magic, and your guests will never know!

- Creamy Red Salsa Recipe: Blended Fire Roasted Tomatoes and Cream Cheese Fusion - November 8, 2026
- Mexican Mule Recipe: Spicy Margarita Twist With Copper Mug Crispness - November 8, 2026
- Taffy Apples Recipe: Caramel-Coated Crunch With Chewy Centers - November 8, 2026