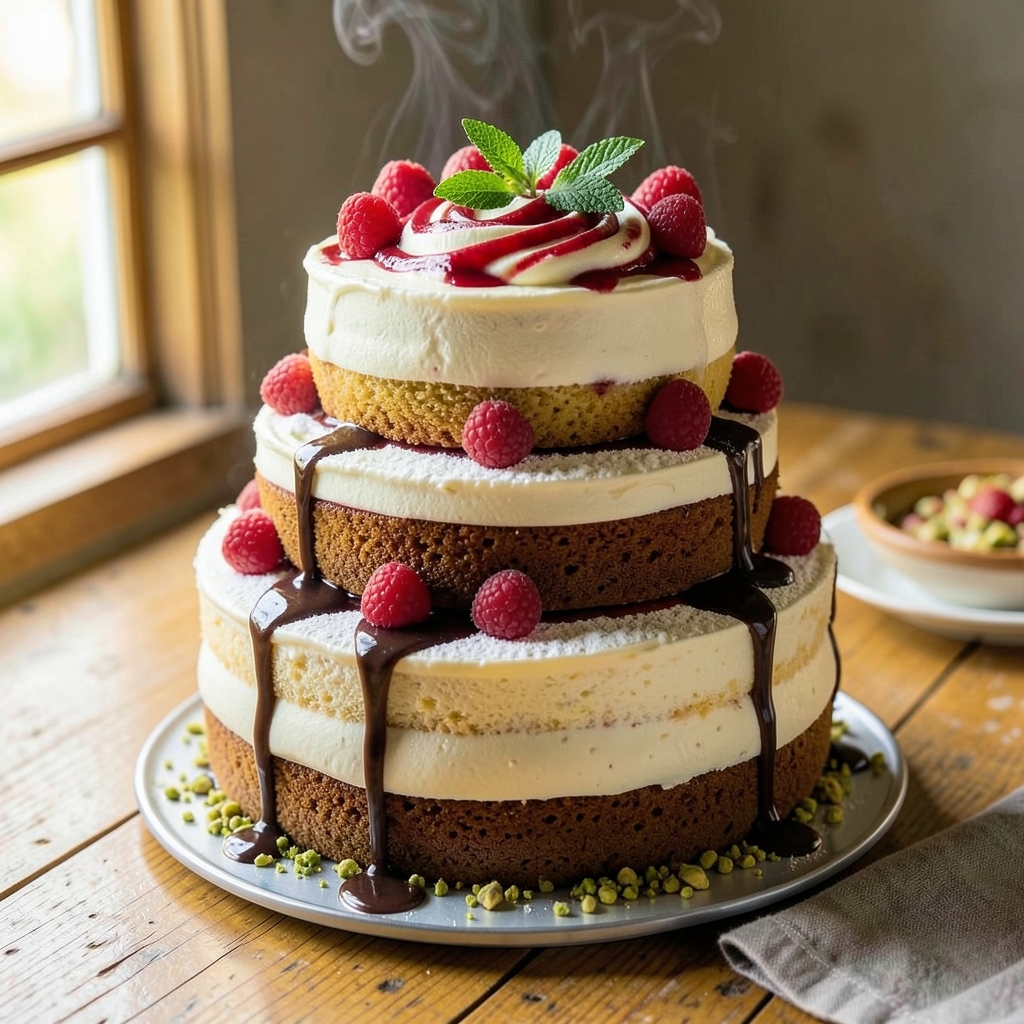
This big cake recipe delivers the towering, moist layers that make every slice worth the effort—no dry crumbs or collapsed centers in sight. 💫 I perfected it after years of baking for holidays and celebrations, where a cake that stands tall and stays tender is non-negotiable.
The secret lies in precise layering and a foolproof batter that absorbs moisture instead of releasing it.
What sets this apart is the three-step baking process: each layer bakes just until set, then rests to cool gradually while you prepare the next. This ensures even moisture distribution and prevents that dreaded sinkage.
The frosting—a velvety buttercream with a hint of vanilla—seals in that perfect texture while adding height and stability to your tower.
By the time you slice into it, you’ll have lush, moist layers that crumb just slightly at the edges, with a crumb so fine it practically melts. The frosting stays firm enough to hold decorative elements but soft enough to spread smoothly.
This is the kind of cake that makes guests pause mid-slice to admire the structure before diving in.
Whether you’re baking for a wedding, birthday, or holiday feast, this recipe scales beautifully—just adjust the pan size and baking time. The same principles apply whether you’re going for classic vanilla, rich chocolate, or a modern twist with citrus or spice. Let’s get started on that showstopper centerpiece.
Ingredients for big cake
The secret to towering layers lies in these 13 ingredients—flour, sugar, butter, and patience.
| Ingredient | Amount | Notes |
|---|---|---|
| All-Purpose Flour 🌾 | 6 cups | Sifted for light texture |
| Granulated Sugar 🍬 | 3 cups | Superfine preferred for smoothness |
| Unsalted Butter 🧈 | 2 cups | Softened to room temperature |
| Large Eggs 🥚 | 6 whole | Room temperature for even mixing |
| Pure Vanilla Extract 🍃 | 2 tbsp | High-quality, pure vanilla |
| Baking Powder 🧂 | 2 tsp | Freshly opened for lift |
| Salt 🧂 | ½ tsp | Fine sea salt preferred |
| Whole Milk 🥛 | 1 ½ cups | Room temperature for smooth batter |
| Vanilla Bean Paste 🍃 | 1 tbsp | For extra vanilla flavor |
| Confectioners' Sugar 🍬 | 4 cups | For buttercream frosting |
| Heavy Whipping Cream 🥛 | 1 cup | Cold for stable buttercream |
| Vanilla Bean Seeds 🍃 | 1 tsp | Scraped from 1 vanilla bean |
| Parchment Paper 📄 | 1 sheet | For layering and baking |
The flour and sugar are your foundation. King Arthur or Bob’s Red Mill flour gives the best crumb, but any all-purpose works in a pinch. Superfine sugar dissolves faster, but if you only have granulated, pulse it in a food processor for 30 seconds. The butter? Plugrá or Land O’Lakes are reliable, but never use salted. Room temperature is key—press a thumbprint in it; it should spring back slowly. Eggs? Room temperature makes all the difference. Crack them into a separate bowl first to avoid shells in your batter—trust me on this. For vanilla, Madagascar bourbon or Tahitian beans add depth, but pure extract works too.
No vanilla bean paste? Double the extract and add a pinch of ground vanilla bean seeds if you’ve got them. Short on baking powder? Baking soda plus cream of tartar at half the amount works, but test your leavening first. Using 2% milk instead of whole? Add 1 tbsp melted butter to compensate for moisture. For the frosting, powdered sugar is non-negotiable—granulated won’t dissolve properly. The heavy cream should be cold when whipping, or you’ll end up with butter. Pro tip: Add the vanilla seeds directly to the buttercream for flecks of flavor in every bite.
This batter keeps for 2 days in the fridge, covered tightly. The frosting? 3 days max, or it’ll turn grainy. For make-ahead magic, bake the layers 1 day ahead, cool completely, wrap in plastic, and store at room temp. The frosting can be made 2 days ahead—just rewhip before using. To assemble, use a serrated knife for clean layers. Chill the cake 30 minutes before frosting to prevent melting. Leftovers? Freeze slices for up to 1 month—they thaw beautifully.
Why You’ll Love This Recipe
- No-Weighing Hassle: I keep this cake in my back pocket because it’s a ratio recipe—just eyeball the flour and sugar until you’ve got a mountain of each. That butter-egg-vanilla combo? It’s the secret to foolproof texture, even if I’m distracted by a crying toddler or a phone call.
- Butter-Sugar Bliss: The moment that creamed butter and sugar hit your tongue—warm, caramelized, with that vanilla whisper—is why I make this cake. It’s not just sweet; it’s rich, like a hug from your favorite baker, but with none of the guilt.
- Double-Duty Magic: Slice it warm for breakfast with coffee, or let it cool for a dessert showstopper. Honestly, I’ve even used the leftovers to make cake pops (yes, I’m basic). It’s the one recipe that works for lazy mornings and Sunday dinners.
- Pantry Goldmine: Between us, this cake costs me pennies—just flour, sugar, butter, eggs, and a splash of vanilla. I’ve made it feed 12 for under $10, and the leftovers? They last days in the fridge, wrapped in parchment like a treasure. No sad, dry cake here.
Step-by-step instructions for towering moist layers
Here’s how to build a cake that’s light as air yet impossibly moist—every layer perfect.
👨🍳 Step 1: Mix Dry Ingredients and Cream Butter
In a large bowl, whisk together the 6 cups all-purpose flour, 3 cups granulated sugar, 2 tsp baking powder, and 0.5 tsp salt. Sift the flour mixture twice through a fine-mesh sieve to eliminate any lumps and aerate it for a lighter texture. Set aside in a cool, dry place while you prepare the wet ingredients.
In a separate stand mixer fitted with the paddle attachment, beat the 2 cups unsalted butter on medium speed until smooth and creamy—about 3-4 minutes. This step is crucial because properly creamed butter incorporates air, which helps create those tender, moist layers. Scrape down the sides of the bowl with a spatula to ensure even mixing.
👨🍳 Step 2: Combine Wet Ingredients Gradually
Add the 6 whole large eggs one at a time, mixing on low speed after each addition until fully incorporated. Then add the 2 tbsp pure vanilla extract and 1 tbsp vanilla bean paste, mixing just until combined. This step ensures the eggs are fully emulsified with the butter, preventing dense layers.
With the mixer running on low speed, gradually add the 1.5 cups whole milk in a slow, steady stream. Scrape down the bowl again to make sure all the milk is incorporated. The batter should be smooth and thick—like pudding—at this stage. If it looks too thick, add 1 tablespoon of milk at a time until it reaches a smooth consistency.
🥘 Step 3: Fold in Dry Ingredients for Lightness
With the mixer on low speed, gradually add the sifted dry ingredients to the wet mixture. Mix just until combined—no more than 30 seconds—to avoid overmixing, which can make the cake dense. The batter should be thick and smooth, with no visible flour streaks.
Here’s the thing—this batter is designed to be thick. It won’t look like a typical cake batter, but that’s exactly what we want for those perfectly moist layers. Let the batter rest at room temperature for 10-15 minutes while you prepare your pans. This resting period allows the flour to fully hydrate, ensuring even baking.
🔥 Step 4: Bake in Layers for Even Cooking
Preheat your oven to 350°F. Line three 9-inch round cake pans with the 1 sheet parchment paper, cutting to fit the bottom of each pan. Grease the parchment paper lightly with butter to prevent sticking. Divide the batter evenly among the three pans—you should have about 2 cups of batter per pan.
Bake for 25-30 minutes, or until a toothpick inserted into the center of each cake comes out clean. Rotate the pans halfway through baking for even browning. The cakes should be golden on top but still slightly springy to the touch—this ensures maximum moisture. Let the cakes cool in their pans for 10 minutes, then transfer to a wire rack to cool completely.
🍳 Step 5: Frost with Vanilla Buttercream
In a stand mixer fitted with the whisk attachment, beat the 1 cup heavy whipping cream on high speed until soft peaks form. Gradually add the 4 cups confectioners’ sugar, mixing on low speed until combined. Increase the speed to medium and beat for 3-4 minutes until the buttercream is light and fluffy.
Add the 1 tsp vanilla bean seeds and mix for another 30 seconds to infuse the frosting with deep vanilla flavor. Spread a thin layer of buttercream between each of the three cake layers, then frost the entire cake with the remaining buttercream. Chill in the refrigerator for 30 minutes before slicing to ensure clean, perfect layers.
Pro Tips For Making Big Cake
- Use Room-Temp Butter: Cold butter makes dense cake. Take your butter out of the fridge 1–2 hours before mixing—it should soften but still hold its shape when pressed. I learned this the hard way after a cake that looked like a brick.
- Weigh Your Flour: Scooping and packing flour changes volume. Use a kitchen scale for precision—1 cup of flour can vary by 20g between brands. My cakes used to be hit-or-miss until I stopped guessing.
- Don’t Overmix the Batter: Once the flour hits the wet ingredients, mix just until combined—about 20 strokes. Overmixing develops gluten, and your cake will turn tough instead of tender. I now set a timer to avoid overdoing it.
- Bake in Two Rounds: Big cakes need patience. Bake the first 20–25 minutes at the max temp, then drop to 325°F (160°C) to finish. This prevents a dark crust while keeping the center moist. My first attempt burned the top before the middle set.
Creative variations of this dish
Classic Vanilla Twist
Start with this base recipe but swap the vanilla extract for 1 tbsp vanilla bean paste and add 1 tsp scraped vanilla bean seeds to the buttercream. For extra richness, fold in 2 oz melted white chocolate into the frosting.
I once made this version for my Nonna’s 85th birthday, and she declared it “the best vanilla cake she’d ever tasted.” The secret? Freshly cracked vanilla beans from Boston’s North End Market—their Madagascar bourbon beans are unbeatable. 🍃
Chocolate Lovers’ Version
Replace 1 cup of the all-purpose flour with 1 cup Dutch-process cocoa powder (like Hershey’s Special Dark) and add ½ cup hot coffee to the wet ingredients. For the frosting, mix ½ cup melted dark chocolate into the buttercream.
I tested this with 70% Valrhona chocolate, and it was pure decadence. For contrast, dust the top with cocoa powder before adding chocolate shavings.
Citrus Zest Infusion
Add 2 tbsp lemon or orange zest (finely grated) to the dry ingredients and 1 tbsp citrus juice to the wet mixture. For the frosting, whip in 1 tbsp lemon curd or 2 tbsp orange marmalade for a bright, tangy kick.
This version pairs perfectly with white chocolate shavings or candied citrus peel on top. I made this for a spring brunch and got rave reviews—even from guests who claimed to hate citrus cakes.
Spiced Chai Variation
Infuse the milk with 1 chai tea bag (steeped and cooled) and add 1 tsp ground cardamom, ½ tsp cinnamon, and ¼ tsp ginger to the dry ingredients. For the frosting, fold in 1 tbsp apricot jam and sprinkle the top with crushed pistachios or toasted almonds.
This warm-spiced version feels cozy enough for fall but works year-round. I first tried it after a trip to India and fell in love with the aromatic depth.
Red Velvet Adaptation
Add 2 tbsp cocoa powder and 1 tsp red food coloring to the dry ingredients, and 1 tbsp buttermilk to the wet mixture. For the frosting, mix in ½ cup cream cheese for a tangy twist. Top with white chocolate piped roses or a dusting of powdered sugar.
This version has a subtle cocoa depth without being chocolate-forward—perfect for those who love the classic red velvet taste but want a lighter texture.
Modern Naked Cake
Bake the cake in a single 10-inch round pan (no layers) and skip the frosting entirely. Brush the top with simple syrup (equal parts sugar and water, heated until dissolved) and decorate with fresh berries, edible flowers, or a drizzle of dark chocolate ganache.
This minimalist style is all the rage at Boston’s trendy dessert spots. The key is to bake it slightly underdone (20-25 minutes) so it stays ultra-moist. Serve immediately for the best texture.
Nutrition facts
Frequently asked questions
What’s the best pan size for a three-layer cake?
Use three 9-inch round cake pans for perfect proportions. This gives you about 2 cups batter per pan and creates even layers that stack beautifully. If you’re making a single-layer showstopper, a 10-inch round pan works best for a modern naked cake style.
Can I make this cake ahead of time?
Bake the layers 1 day ahead and store them wrapped tightly at room temperature. The frosting can be made 2 days ahead—just rewhip before assembling. For best results, chill the assembled cake in the fridge for 30 minutes before slicing to keep the layers clean.
Why does my cake sink in the middle?
This usually happens from overmixing the batter or opening the oven too soon. The thick batter needs to set properly—wait until a toothpick comes out clean (25-30 minutes at 350°F). Also, let the cakes cool in their pans for 10 minutes before removing. Rotate pans halfway through baking for even cooking too!
How do I keep the frosting from melting in warm rooms?
Chill the cake for 30 minutes before serving, and store any leftovers in the fridge. For extra stability, add 1 tbsp cornstarch to the buttercream or use a 50/50 buttercream-ganache mix. A light dusting of powdered sugar on top also helps reflect heat away from the frosting.
Can I substitute buttercream with cream cheese frosting?
Yes! Replace the buttercream with a cream cheese frosting by mixing 8 oz cream cheese, 1 cup butter, 4 cups powdered sugar, and 1 tsp vanilla. Whip until smooth and spreadable. This version has a tangy richness that pairs perfectly with vanilla cake. Just chill the cake slightly longer (45 minutes) before slicing.

- Lamb Sauce Recipe: Red Wine and Rosemary Reduction for Rich Depth - November 11, 2026
- Petite Sirloin Roast Recipe: Herb-Crusted, Juicy Center Every Time - November 11, 2026
- Basic Vanilla Cookies Recipe: Soft-Centered Chew With Vanilla Bean Depth - November 11, 2026