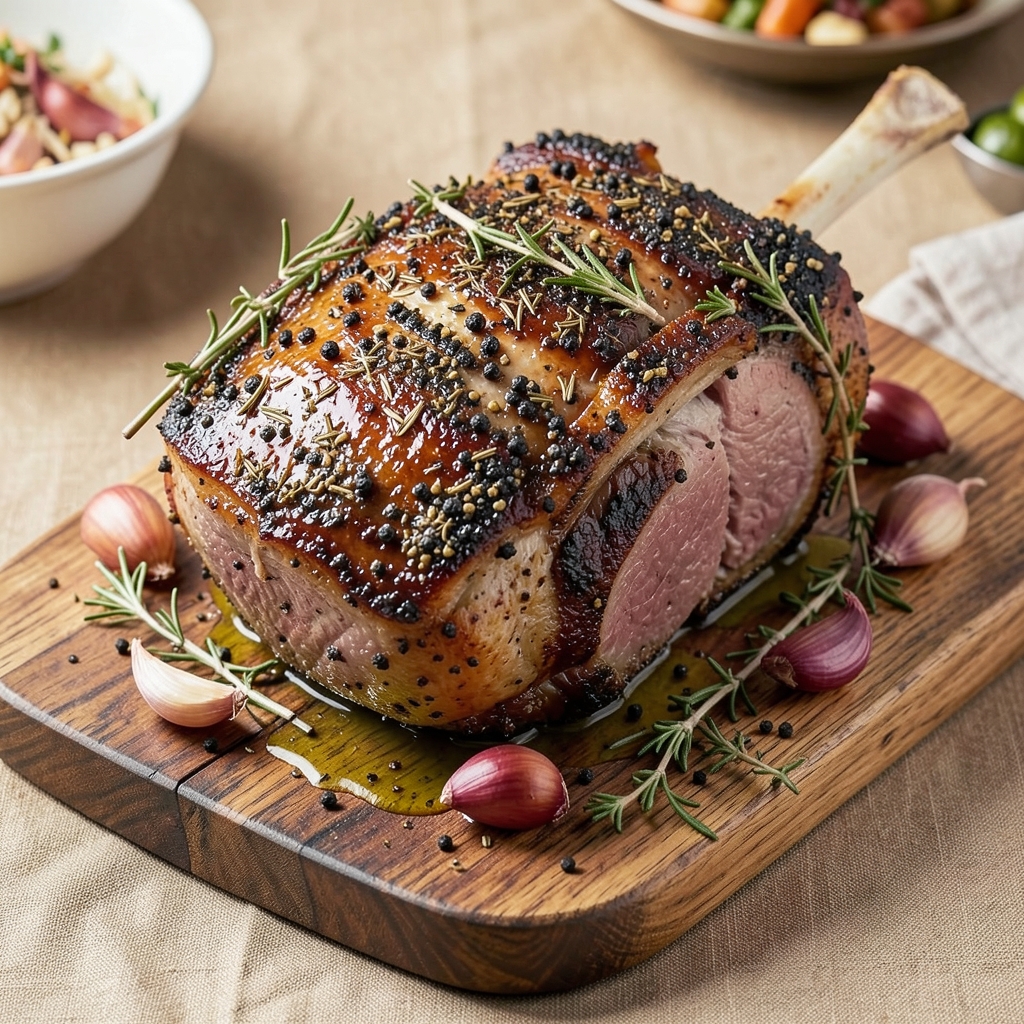
Mastering a beef rib roast bone-in standing rib recipe transforms Sunday dinners from ordinary to extraordinary—juicy, flavorful, and packed with rich bone marrow that turns every bite into an experience.
The secret lies in dry-brining the meat overnight, which ensures a perfectly seasoned crust while keeping the interior tender and moist.
I’ve perfected this method over years of holiday feasts, and the results speak for themselves: a roast so tender it nearly falls apart, with a crust that crackles with every slice.
This recipe focuses on precision: starting with a high-heat roast to render fat and build flavor, then finishing with a reverse sear to lock in juices at the perfect internal temperature.
The herb crust—made with rosemary, thyme, and garlic—adds an aromatic depth that pairs beautifully with the natural richness of the beef. What sets this apart is the attention to detail, like scoring the fat cap for even cooking and resting the roast before carving to preserve every drop of moisture.
By the time you serve this roast, your table will be set for a meal worthy of a fine-dining restaurant. The bone marrow, exposed by careful carving, adds a velvety richness that elevates every bite.
Pair it with roasted root vegetables, a bold red wine reduction, or a simple herb butter for a complete, cohesive dish. This isn’t just dinner—it’s a centerpiece that commands attention and leaves guests asking for seconds.
The beauty of this recipe lies in its versatility. Whether you’re hosting a holiday gathering or treating yourself to a special weeknight meal, the same techniques deliver restaurant-quality results at home.
With careful timing and a few key steps, you’ll achieve a roast that’s as impressive as it is delicious—proof that great cooking is about technique, not shortcuts.
Ingredients for beef rib roast bone in standing rib
Six pounds of beef, aromatic herbs, and a few key techniques transform this standing rib roast into a showstopping centerpiece.
| Ingredient | Amount | Notes |
|---|---|---|
| Beef Rib Roast (Bone-In, Standing Rib) 🥩 | 6 lb | Prime grade, 1.5-2 inches thick fat cap |
| Kosher Salt 🧂 | ½ cup | Diamond Crystal preferred for even coating |
| Fresh Rosemary 🌿 | ¼ cup | Tough stems removed, finely chopped |
| Fresh Thyme 🌿 | ⅛ cup | Leaves only, stems discarded |
| Garlic Cloves 🧄 | 8 cloves | Peeled, smashed but not minced |
| Extra-Virgin Olive Oil 🫒 | ¼ cup | High-quality, fruity variety |
| Black Peppercorns 🌶️ | 1 tbsp | Freshly cracked, coarse grind |
| Yellow Onion 🧅 | 1 whole | Large, peeled and quartered |
| Carrots 🥕 | 4 whole | Large, peeled and halved lengthwise |
| Fresh Parsley 🌿 | ⅛ cup | Flat-leaf, finely chopped for garnish |
| Red Wine 🍷 | 1 cup | Bold dry variety like Cabernet Sauvignon |
| Beef Bone Marrow 🦴 | ½ cup | From roast's marrow cavity, optional |
| Unsalted Butter 🧈 | ¼ cup | Cold, cubed for herb crust |
The beef is everything here—prime grade standing rib with that thick fat cap is non-negotiable. Costco or high-end butchers carry the best cuts, and if you’re buying online, Snake River Farms delivers consistently excellent quality. Look for a roast with good marbling—those white flecks of fat within the meat—because that’s what keeps it juicy. The fat cap should be at least 1.5 inches thick; thicker means more flavorful drippings. If your roast comes with a bone marrow cavity, save that for the velvety finish—it’s pure liquid gold when heated properly. For the herbs, farmers markets often have fresher options than grocery stores, but the dried stuff works in a pinch if you’re in a hurry.
No fresh rosemary? Dried works at one-third the amount, but it lacks that piney aroma. Swap the red wine for beef broth plus a splash of balsamic vinegar if you’re avoiding alcohol. The butter in the herb crust can be ghee for a dairy-free version, though it’ll taste different. For the vegetables, parsnips or turnips work alongside carrots and onions—whatever’s in season. The key is to keep the prep simple: just chop, don’t overthink it. And if you’re short on time, pre-cut frozen veggies (no sauce added) are perfectly fine here—they won’t overcook in the oven.
This roast tastes even better the next day, so plan ahead. Store leftovers in the fridge for up to 5 days, wrapped tightly in butcher paper to keep it moist. For longer storage, freeze portions for up to 3 months, but thaw slowly in the fridge overnight. The herb crust keeps well for 3 days in the fridge if you make it ahead—just press it onto the roast right before roasting. And that bone marrow? Roast it separately at 400°F for 15 minutes, then let it cool slightly before spooning out the creamy goodness. Trust me, it’s worth the extra step.
Why You’ll Love This Recipe
- Minimal Prep Work: I swear by this—just a few slashes with a knife, a sprinkle of salt, and those whole garlic cloves tucked under the skin. No fancy brining, no stressing over marinades. The bones do the heavy lifting while you sip wine and pretend you’re a sous chef.
- Crispy-Creamy Magic: That rosemary and thyme? They cling to the fat like it’s their job, while the garlic caramelizes into something ridiculously good. The crust is so satisfying—crunchy on the outside, tender enough to melt in your mouth. (Yes, even on a Tuesday night.)
- Leftovers That Don’t Suck: This roast practically begs to be made extra. Slice it thin for sandwiches, cube it for hash the next day, or freeze half for when you’re too tired to cook. Honestly, the second life of this meat is just as impressive as the first.
- Budget-Friendly Crowd-Pleaser: A bone-in rib roast stretches further than you’d think—feeds six, leaves scraps for broth, and costs less than takeout for two. Plus, fresh herbs make it feel fancy without breaking the bank. (My wallet and dinner guests thank me every time.)
Step-by-step instructions for herb-crusted beef rib roast with bone marrow
Here’s how to transform your rib roast into a showstopper with melt-in-your-mouth tenderness.
Prepare the Herb Crust and Season the Roast
In a food processor, pulse the 0.5 cup kosher salt, 0.25 cup fresh rosemary, 0.125 cup fresh thyme, 8 cloves garlic, 1 tbsp black peppercorns, and 0.25 cup extra-virgin olive oil until you get a coarse, paste-like consistency. This will be your flavor bomb crust. Spread this mixture all over the 6 lb beef rib roast, pressing firmly so it adheres to every inch of the meat and fat cap.
Place the roast on a wire rack set inside a rimmed baking sheet. The rack is crucial—it allows hot air to circulate underneath, preventing soggy skin. Let the roast sit at room temperature for 30 minutes before roasting. This step ensures even cooking and maximum juiciness. I know it’s tempting to skip, but trust me—this makes all the difference.
Sear the Roast for Maximum Flavor
Preheat your oven to 450°F. While it heats, place the roast fat-side up in a cold skillet over medium-high heat. Let it sear undisturbed for 8-10 minutes until the fat is sizzling and the crust is deeply golden brown. This initial sear locks in juices and builds incredible flavor. If the pan gets too hot and starts smoking excessively, reduce the heat slightly—you want a steady sizzle, not a fire.
Once the crust is beautifully browned, transfer the roast to the preheated oven. The residual heat from the sear will help kickstart the cooking process. Here’s the thing—don’t be tempted to flip the roast. The fat cap needs to stay up to baste the meat as it cooks.
Roast Low and Slow for Perfect Doneness
Reduce the oven temperature to 325°F. Roast the rib roast for 3-3.5 hours, or until the internal temperature reaches 130-135°F on a meat thermometer inserted into the thickest part of the meat (not touching bone). This low-and-slow approach is key to achieving that juicy, fork-tender texture you’re after. The roast will continue cooking slightly after you remove it from the oven, so don’t worry if it’s not quite there at the 3-hour mark.
About 30 minutes before the roast is done, prepare your vegetables. Toss the 1 whole yellow onion (quartered) and 4 whole carrots (halved lengthwise) with 1 tbsp olive oil, 1 tsp kosher salt, and ½ tsp black peppercorns. Spread them on a separate baking sheet and roast alongside the meat. These will caramelize beautifully and make an excellent side.
Rest and Prepare the Bone Marrow Sauce
Once the roast reaches the target internal temperature, remove it from the oven and transfer to a cutting board. Tent loosely with foil and let it rest for 30-45 minutes. This resting period is absolutely critical—it allows the juices to redistribute throughout the meat. If you skip this step, you’ll end up with dry slices. I know it’s hard to wait, but the payoff is worth it.
While the roast rests, prepare the bone marrow sauce. Carefully extract the 0.5 cup beef bone marrow from the marrow cavity of the roast (if you didn’t remove it earlier). Place it in a small saucepan with 0.25 cup unsalted butter and 1 cup red wine. Simmer over medium-low heat for 8-10 minutes, stirring occasionally, until the marrow melts and the sauce thickens slightly. Strain through a fine-mesh sieve to remove any impurities, then keep warm.
Carve and Serve with Herb Garnish
After the resting period, slice the roast between the ribs, cutting through the bone and meat. The slices should be about 1.5 inches thick, including the bone. Arrange the slices on a warm platter, fanning them slightly to showcase the beautiful crust and juicy meat. Spoon the bone marrow sauce over the top and around the slices.
Garnish with 0.125 cup fresh parsley for a pop of color and freshness. The contrast between the rich, herby crust and the silky marrow sauce will make this dish unforgettable. Serve immediately with the roasted vegetables and a glass of the same red wine you used in the sauce—it’s perfect for cutting through the richness.
Pro Tips For Making Beef Rib Roast Bone In Standing Rib
- Sear the Ribs First: Get that pan screaming hot—cast iron or stainless steel—and walk away for 5 minutes after the first flip. I used to rush this, and my roast would steam instead of brown. Let the fat render first; that’s when the crust forms.
- Trim the Fat, Not the Flavor: Standing ribs have a thick fat cap—leave at least ¼ inch. It baste the meat and adds richness. My first attempt left it too thin, and the roast dried out faster than I expected.
- Salt the Night Before: Generously coat the roast with kosher salt and refrigerate uncovered for 12–24 hours. Sounds weird, but it works: the salt penetrates deeper, and the herbs stick better when you sear. (Yes, even if you’re impatient like me.)
- Rest Under Foil: After pulling the roast from the oven, tent it loosely with foil and let it sit for 15–20 minutes. I learned this the hard way—carving too soon turns juicy meat into a sad, stringy mess. Patience here guarantees tender slices.
Dietary considerations for this recipe
Gluten-Free Adaptations
The herb crust in this recipe is naturally gluten-free, but if you’re serving guests with gluten sensitivities, double-check that your kosher salt (like Diamond Crystal) and fresh herbs are certified gluten-free.
The only potential concern is the red wine used in the bone marrow sauce—opt for a gluten-free brand like Freixenet or Gallo Family Vineyards if needed. The roast itself is completely safe for gluten-free diets. 🥩
Low-Carb Adjustments
This dish fits perfectly into a low-carb lifestyle, as it’s primarily protein and fat with minimal carbs. Skip the roasted vegetables if you’re strict about carbs, or substitute them with cauliflower mash (steamed cauliflower blended with butter and cream).
The bone marrow sauce is also low-carb, but if you want to reduce fat slightly, use half butter and half bone broth instead of full-fat butter. 🥕
Dairy-Free Modifications
For a dairy-free version, replace the unsalted butter in the herb crust with ghee or olive oil, and use coconut oil instead of butter in the bone marrow sauce.
The flavor will still be rich, though slightly different. The roast itself remains dairy-free, so the only adjustments are in the sauces and crust. 🧈
Allergen-Friendly Tips
If you’re accommodating egg allergies, this recipe is already safe—no eggs are used. For nut allergies, ensure your extra-virgin olive oil is nut-free (some brands process in facilities with nuts).
Always check labels on kosher salt and herbs for cross-contamination warnings. The bone marrow sauce is naturally free of common allergens. 🌿
Protein-Packed Customization
Want to boost the protein content? Serve this roast with a side of cauliflower rice or a spinach salad with a protein-rich dressing. For a heartier meal, add sautéed mushrooms or roasted Brussels sprouts—both pair well and add extra nutrients without overpowering the beef. 💪
Meal Prep Considerations
This roast reheats beautifully for meal prep, but avoid overcooking it. Store leftovers in an airtight container for up to 5 days in the fridge. To reheat, warm slices in a skillet over low heat with a splash of beef broth to retain moisture.
The herb crust will stay flavorful, though the texture may be slightly firmer after reheating. ❄️
Nutrition facts
Frequently asked questions
How long should I let the roast rest after cooking?
Always let the roast rest for 30-45 minutes before carving. This crucial step allows juices to redistribute, preventing dry slices. Pro tip: Tent loosely with foil to keep it warm while resting.
Can I use a meat thermometer instead of guessing doneness?
Insert the thermometer into the thickest part of the meat (not touching bone) until it reads 130-135°F for medium-rare. The roast will rise 5°F while resting, so pull it out slightly early.
What’s the best way to reheat leftover rib roast?
Slice leftovers and reheat in a skillet over low heat with a splash of beef broth to keep them moist. Avoid microwaving—it dries out the meat. Store in an airtight container for up to 5 days.
How do I handle the bone marrow from the roast?
Carefully extract it from the marrow cavity using a spoon or small knife. Roast it separately at 400°F for 15 minutes, then let cool slightly before spooning out the creamy marrow. Use it as a sauce or spread on toast.
Can I make the herb crust ahead of time?
Yes! Mix the herb crust ingredients up to 3 days ahead and store in an airtight container in the fridge. Press it onto the roast right before roasting for maximum flavor.

- Lemon Pound Cake Recipe: Bright Citrus Layers With Buttery Crumb - November 18, 2026
- Spumoni Cake Recipe: Layers of Fruit, Cream, and Chocolate Magic - November 18, 2026
- Chocolate Gnache Recipe: Silky Smooth Pour With Perfect Snap - November 18, 2026