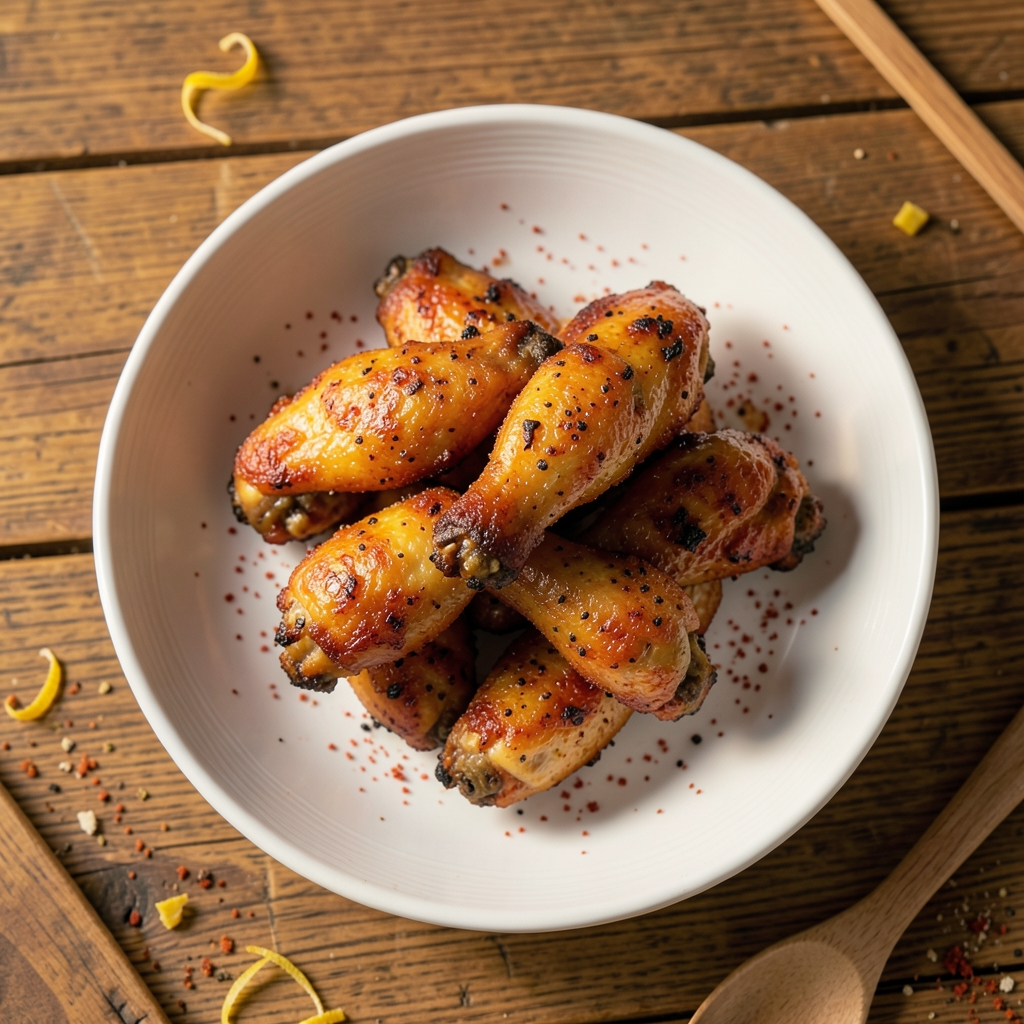
Baking full chicken wings delivers crispy, golden perfection without the grease or cleanup of frying—this recipe proves you don’t need deep-fried results to get restaurant-quality flavor.
The secret lies in a precise balance of high heat, proper seasoning timing, and a technique that keeps the wings juicy inside while achieving that coveted crispy exterior. After years of perfecting this method (and burning through a few batches), I’ve developed a foolproof approach that works every time.
What sets this recipe apart is its simplicity: just six core ingredients transform ordinary wings into something extraordinary. You’ll start with fresh, bone-in wings—never frozen, never pre-battered—because quality matters. A dry rub of salt, pepper, and paprika creates the foundation, while a light coating of oil ensures even browning.
The real magic happens at 400°F, where the wings bake for 45 minutes, flipping once to guarantee crispiness on both sides.
By the time they emerge from the oven, your wings will be golden brown and crackling, with tender meat that pulls cleanly from the bone. The skin stays crispy even after resting, and the juices remain locked inside—no soggy disappointment here.
This method also lets you customize flavors effortlessly: swap the seasoning for buffalo, BBQ, or garlic-herb blends without altering the technique.
The best part? No standing over a smoky grill or scrubbing grease from your hands. These wings are restaurant-quality without the hassle, perfect for game day, family dinners, or a solo indulgence.
Serve with your favorite dipping sauce and watch them disappear. Let’s get baking—your taste buds will thank you.
Ingredients for baked full chicken wings
Six ingredients, zero shortcuts—this is how you get wings that taste like they came from a smoky kitchen.
| Ingredient | Amount | Notes |
|---|---|---|
| Bone-In Chicken Wings 🍗 | 2 lb | Fresh, never frozen, tips attached |
| Kosher Salt 🧂 | 1 ½ tbsp | Diamond Crystal preferred, coarse grain |
| Freshly Ground Black Pepper 🌶️ | 1 tbsp | Freshly cracked from whole peppercorns |
| Smoked Paprika 🌶️ | 1 tbsp | High-quality, not sweet variety |
| Avocado Oil 🫒 | 2 tbsp | High smoke point, neutral flavor |
| Cornstarch 🌾 | 1 tbsp | Light coating for extra crispiness |
The wings are non-negotiable. Fresh, bone-in, tips attached—none of that pre-cut nonsense. I always grab mine from Whole Foods or my local butcher shop where they’re still attached to the drumette. If you’re buying frozen, thaw them overnight in the fridge, but honestly, fresh is worth the extra trip. The skin is your secret weapon here—leave it intact for that crispy texture. For best results, pat them dry with paper towels before seasoning; moisture is the enemy of crispiness. If you’re short on time, Costco’s bulk chicken wings work great and save you a trip to the store.
No Diamond Crystal kosher salt? Morton’s coarse kosher salt is the next best thing—just measure carefully since it’s slightly finer. The smoked paprika adds depth without overpowering; if you can’t find it, regular paprika plus a pinch of liquid smoke gets you close. Swapping the avocado oil for grapeseed oil works too, but stick with high-smoke-point oils—no olive oil here. The cornstarch is optional but makes a noticeable difference in crispiness. If you’re feeling fancy, toss the wings in a little extra paprika after baking for that restaurant-worthy look. And trust me, don’t skip the double-coating of oil—it’s what keeps those wings from sticking to the tray.
These wings are best served fresh from the oven, but they reheat beautifully if you’ve got leftovers. Store them in an airtight container for up to 3 days—just warm them in a 350°F oven for 10-15 minutes to restore that crispy texture. For meal prep, bake a double batch and freeze half. Portion them into single-serving bags and freeze flat for easy storage. They’ll keep for up to 3 months without losing quality. Pro tip: save the leftover wing tips for stocks—they’re packed with flavor.
Why You’ll Love This Recipe
- No-Fuss Prep: I swear, this takes less effort than ordering takeout. Pat wings dry, toss in a bowl with salt, pepper, and smoked paprika—that’s it—then pop them in the oven. No marinating, no basting, no stress.
- Crispy Without Grease: That avocado oil high-heat magic? It delivers a golden crust so satisfying, you’ll forget deep frying exists. The bone-in wings stay juicy inside while the outside gets that addictive crunch—no soggy edges here.
- Game for Any Gathering: Between us, these wings work for game day, lazy Sundays, or even a “I’m too tired to cook” Tuesday. Double the batch, freeze half, and you’ve got a backup plan for when life gets busy.
- Budget-Friendly Protein: Bone-in wings stretch further than you’d think, and this method costs a fraction of restaurant prices. Plus, the leftovers reheat like a dream—toss them in a salad or wrap them in a tortilla for next-day lunches. Smart, simple, and satisfying.
Step-by-step instructions for baked full chicken wings
Crispy, juicy wings with minimal cleanup—here’s how to nail them every time.
Prep the Wings for Maximum Crisp
Pat the 2 lb bone-in chicken wings completely dry with paper towels—this is non-negotiable for crispy skin. I press down firmly on each wing, especially around the joints and tips, to remove all moisture. Any remaining dampness will steam the wings instead of crisping them.
Next, separate the wings into individual pieces at the joints. This ensures even cooking and makes them easier to handle. Place them in a large bowl and toss gently with 2 tbsp avocado oil until evenly coated. The oil helps create a barrier between the meat and the hot oven, preventing dryness while promoting crispiness.
Season Generously and Coat with Cornstarch
In a small bowl, mix together 1.5 tbsp kosher salt, 1 tbsp freshly ground black pepper, and 1 tbsp smoked paprika. Sprinkle this seasoning blend evenly over the oiled wings, pressing gently to ensure it adheres to every surface. The smoked paprika adds depth, while the coarse salt enhances flavor and helps draw out moisture for extra crispiness.
Now, here’s the secret move: dust each wing lightly with 1 tbsp cornstarch. I use a fine-mesh sieve to distribute it evenly, shaking off any excess. The cornstarch creates a crispy, almost breaded texture without needing flour. Toss the wings gently to coat, then let them sit at room temperature for 10 minutes—this allows the seasoning to penetrate slightly and the cornstarch to adhere better.
Arrange for Even Airflow and Bake
Preheat your oven to 425°F and position a wire rack on a rimmed baking sheet. The rack elevates the wings, allowing hot air to circulate underneath for even cooking. Arrange the wings in a single layer on the rack, leaving ½ inch of space between each piece. Don’t overcrowd—they need room to crisp, not steam.
Bake for 45 minutes, flipping the wings halfway through at the 22-minute mark. You’ll know they’re ready when the skin is deep golden brown and crispy, and the internal temperature reaches 165°F at the thickest part of the meat. If the oven runs hot, check at 40 minutes—every oven behaves differently, and you want that perfect balance of crisp and juicy.
Rest and Serve for Optimal Texture
Transfer the wings to a clean cutting board or platter and let them rest for 5 minutes before serving. This brief rest allows the juices to redistribute, ensuring each bite is moist and flavorful. The wings will stay crispy during this time, so no need to worry about sogginess.
Serve immediately with your favorite dipping sauce—ranch, blue cheese, or a homemade honey mustard all pair beautifully. The wings should have a crispy, almost shattering exterior with tender, juicy meat underneath. If you’re serving a crowd, keep them warm in a 200°F oven for up to 20 minutes, but they’re best enjoyed fresh out of the oven.
Pro Tips For Making Baked Full Chicken Wings
- Preheat Like a Pro: Fire up that oven to 425°F (220°C) and let it scream hot for 15 full minutes before adding the wings—no cutting corners here. I used to skip this, and my wings would steam instead of crisp up. Trust me, the extra wait guarantees that golden crust you’re after.
- Pat Dry, Don’t Rush: Grab paper towels and thoroughly dry every wing—even the crevices—before seasoning. Wet wings = sad, soggy skin. I learned this the hard way after a batch turned out greasy instead of crispy. Take the 2 minutes; it’s worth it.
- Skip the Overcrowding: If your sheet pan looks like a chicken buffet, space the wings ½-inch apart or bake in batches. I crammed a full rack once and ended up with wings steaming in their own juices. Less is more—trust the process.
- Rotate for Even Heat: Flip the pan halfway through baking (around 25 minutes in) to ensure the wings on the edges don’t dry out while the middle stays raw. I was skeptical until I tried it—now it’s non-negotiable for consistent doneness.
Dietary considerations for this recipe
Gluten-Free Adaptations
The original recipe is already gluten-free, but if you’re using pre-made seasoning blends, always check labels—some contain hidden gluten. For extra crispiness, replace the cornstarch with arrowroot powder (same ratio), which works beautifully and is naturally gluten-free.
I’ve tested this swap and found the texture remains identical—crispy outside, juicy inside. 🌾
Low-Carb/Keto Options
This recipe fits perfectly into low-carb diets since the wings are naturally carbohydrate-free. Skip the cornstarch entirely if avoiding starches, but don’t skip the oil—it’s essential for crispiness.
For an extra flavor boost, toss the wings in 1 tbsp nutritional yeast after baking (it adds a cheesy, umami note without carbs). Pair with sugar-free dipping sauces like ranch or blue cheese made with heavy cream instead of mayo.
Dairy-Free Considerations
If you’re avoiding dairy, the base recipe works as-is, but check your dipping sauces. Ranch and blue cheese are common culprits. For a dairy-free alternative, make a garlic-herb aioli using olive oil, garlic, and lemon juice.
The wings’ smoky, salty flavor pairs wonderfully with this bright, tangy dip. I also recommend a spicy sriracha mayo (use dairy-free mayo) for a kick.
Allergen-Free Swaps
For nut allergies, ensure all oils and seasonings are nut-free (some smoked paprika blends use paprika processed in nut facilities). If you’re sensitive to corn, substitute the cornstarch with tapioca starch—it works just as well for crispiness.
For egg allergies, no changes are needed; this recipe is egg-free by design. Always double-check labels on oils and spices, as cross-contamination can occur during processing.
Vegetarian Adaptations
While chicken wings are inherently meat-based, you can recreate the crispy, smoky experience with cauliflower wings. Use 1 lb cauliflower florets, toss them in the same seasoning blend, and bake at 425°F for 25 minutes, flipping halfway.
For extra crispiness, brush with 1 tbsp aquafaba (chickpea brine) before baking—it mimics the binding effect of egg whites. Serve with the same dipping sauces for a satisfying alternative. 🌱
Nutrition facts
Frequently asked questions
Why do your baked wings need cornstarch? Can I skip it?
The cornstarch creates that signature crispy texture without needing flour or breading. It forms a light, dry coating that caramelizes beautifully in the oven. You can omit it, but the wings will be slightly less crispy—think more “snacky” than “restaurant-style.” For a similar effect, try arrowroot powder instead.
My oven runs hot—how do I adjust the baking time?
Start checking at 40 minutes if your oven tends to run hot. The wings are done when the internal temperature hits 165°F and the skin is deep golden brown. If they brown too quickly, tent them loosely with foil for the last 10 minutes to prevent over-browning while they finish cooking.
Can I bake these wings ahead of time for a party?
Bake them up to 2 days ahead and store in an airtight container. Reheat at 375°F for 10-15 minutes until crispy again. For serving, keep them warm in a 200°F oven while you finish other dishes. The flavor actually improves after resting overnight, and they reheat beautifully.
What’s the best way to tell if chicken wings are fully cooked?
Use a meat thermometer to check the thickest part of the meat—it should read 165°F. Visually, the skin will be deep golden brown and crispy, while the meat should pull cleanly from the bone with no pink remaining. If you don’t have a thermometer, cut into the thickest part—juices should run clear, not pink or bloody.
How can I make these wings extra crispy without deep-frying?
Double-coat the wings with oil (apply first, then a second light coat after seasoning) and use a wire rack on the baking sheet for maximum airflow. Bake at 425°F (not lower) and flip them halfway. For next-level crispiness, broil for 1-2 minutes at the very end—just watch them like a hawk to avoid burning!

- Chocolate Gnache Recipe: Silky Smooth Pour With Perfect Snap - November 18, 2026
- Rasgulla Sweet Recipe: Silken Cheese Jewels in Cardamom-Infused Syrup - November 18, 2026
- Bubble Waffle Recipe: Crispy Bubbles and Pillowy Centers - November 18, 2026