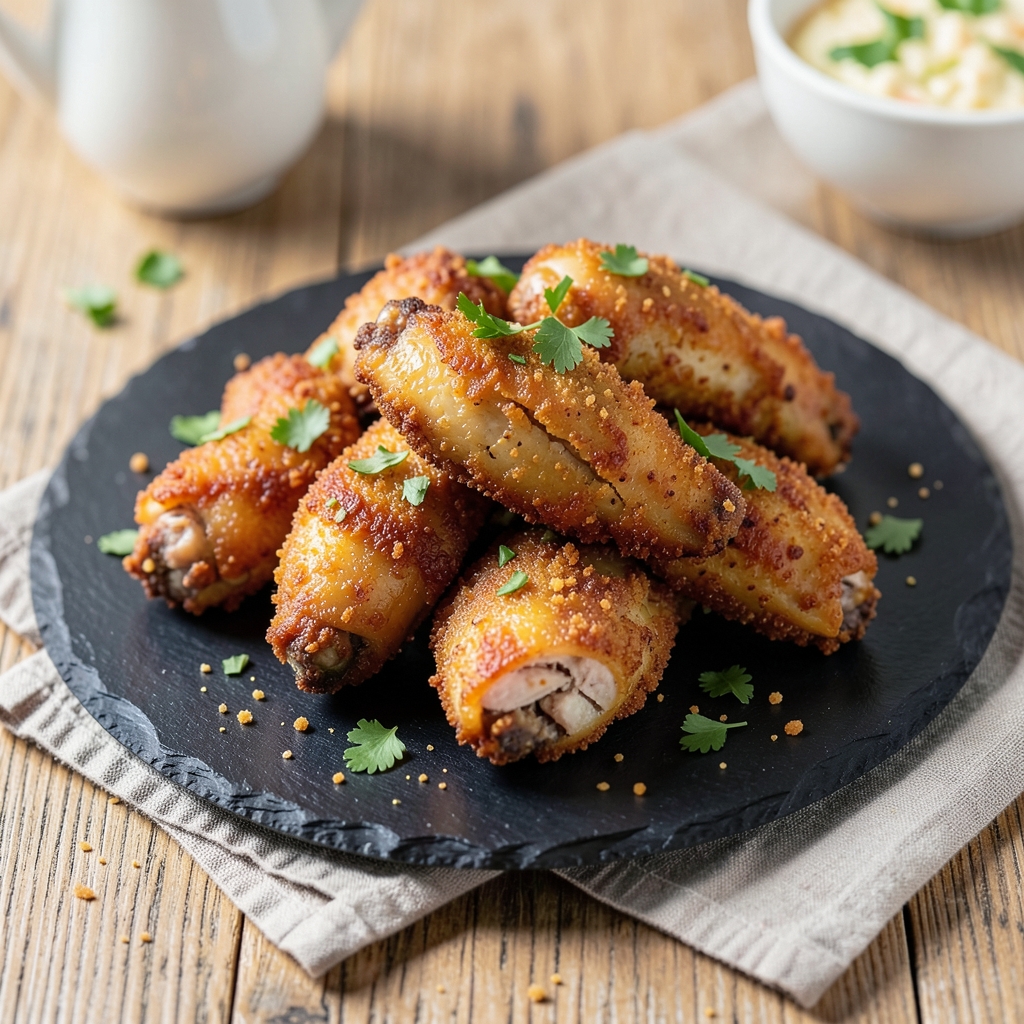
This baked breaded chicken wings recipe delivers a crispy crust that stays golden and crunchy even after hours on the table—no soggy disappointment here. The secret lies in a precise baking technique and a breading mix designed to lock in that satisfying crunch while keeping the meat juicy inside.
I perfected this method after testing countless variations, and the difference between good and restaurant-quality wings comes down to these key steps.
What sets this recipe apart is the two-stage breading process that creates an extra-thick, flavorful crust while preventing moisture from escaping during baking. You’ll work with a simple pantry staple mix—flour, spices, and a touch of cornstarch—that transforms ordinary chicken wings into something worth sharing.
The high-heat baking method ensures that crispy texture stays intact, even when you’re serving a crowd.
By the time these wings emerge from the oven, you’ll have perfectly crispy edges that shatter with every bite, paired with tender meat that falls apart just slightly when you pull.
The aroma alone will have everyone gathering around the table, and the visual appeal—golden brown with that irresistible crunch—makes them perfect for game day, parties, or a special weeknight dinner.
Serve with your favorite dipping sauces—spicy buffalo, tangy ranch, or a sweet honey mustard—to complete the experience. This recipe is designed to impress without requiring advanced skills, making it ideal for both beginners and seasoned cooks looking for a foolproof method.
Let’s get started on wings that will have everyone asking for seconds.
Ingredients for baked breaded chicken wings
Sixteen ingredients transform ordinary wings into restaurant-quality crunchy perfection.
| Ingredient | Amount | Notes |
|---|---|---|
| Chicken Wings 🍗 | 3 lb | Split into drumettes and flats, frozen works |
| All-Purpose Flour 🌾 | 2 cups | For first breading layer |
| Cornstarch 🌾 | ½ cup | For extra crispiness |
| Garlic Powder 🧄 | 2 tbsp | Freshly ground preferred |
| Onion Powder 🧅 | 2 tbsp | For flavor depth |
| Paprika 🌶️ | 1 tbsp | Smoked or sweet variety |
| Salt 🧂 | 1 ½ tsp | Kosher or sea salt |
| Ground Black Pepper 🌶️ | 1 tsp | Freshly ground preferred |
| Large Eggs 🥚 | 2 whole | Room temperature preferred |
| Buttermilk 🥛 | ½ cup | Full-fat for creaminess |
| Panko Breadcrumbs 🍞 | 1 ½ cups | For second crispy layer |
| Vegetable Oil 🫒 | 1 tbsp | For light coating |
| Olive Oil 🫒 | 1 tbsp | For brushing before baking |
| Fresh Parsley 🌿 | ¼ cup | Chopped, for garnish |
The chicken wings should be fresh or high-quality frozen—look for air-chilled at Whole Foods or Costco for the best texture. Split them into drumettes and flats yourself if buying whole wings (the extra effort makes a difference). For the flour, King Arthur or Bob’s Red Mill brands work best—they absorb moisture without getting gummy. The cornstarch is non-negotiable here; it’s what creates that shatteringly crisp crust that stays crunchy even after reheating. If you’re short on time, pre-cut frozen wings from Trader Joe’s save prep work without sacrificing quality.
No buttermilk? Substitute with milk plus 1 tbsp vinegar—let it sit for 5 minutes to curdle. Short on panko? Crush regular breadcrumbs in a food processor for a finer texture. The spices can be adjusted—add cayenne for heat or more paprika for color. For the oil, vegetable oil gives the best neutral flavor, but avocado oil works too. If you’re baking a large batch, double the egg mixture—just keep it in a covered bowl in the fridge until ready to use. The parsley is optional but adds that restaurant-fresh touch that makes wings feel special.
Prep the wings ahead and store them covered on a wire rack in the fridge for up to 24 hours before baking—they’ll stay crispy longer. The breading mix keeps well in an airtight container for 1 week, though the cornstarch loses potency after 3-4 days. Baked wings reheat best in a 350°F oven for 5-10 minutes—place them on a wire rack to avoid sogginess. For serving a crowd, bake in batches and keep the first batch warm in a 200°F oven while finishing the rest.
Why You’ll Love This Recipe
- No-Fuss Breading: I swear by the cornstarch trick—it’s what gives these wings that golden, shatteringly crisp crust without frying. Just toss the wings in flour, then dredge them in that magic mix, and you’re done. No messy deep-fryer, no waiting for oil to heat. My kids help pat the seasoning on, and honestly? They’re just as excited as I am when the oven timer goes off.
- Garlic-Onion Bomb: That powdered garlic and onion blend isn’t just flavor—it’s depth. The wings get this warm, savory punch that sticks to every bite, like a hug from your favorite comfort food. I’ll be real: I’ve tried fancy marinades, but this? It’s the secret weapon that costs pennies and delivers big.
- Game-Day Ready: Super Bowl? Movie night? A last-minute dinner for your partner’s coworkers? These wings disappear fast. They bake in 30 minutes, stay crispy for hours, and I’ve even served them cold in salads when I’m lazy. Between us, they’re the reason I got invited to every gathering last year.
- Budget Crunch Saver: Chicken wings are cheap, and this recipe stretches them far. I make a double batch on Sundays, freeze half, and pull them out for weeknights when I’m too tired to think. The cornstarch makes the breading go further, so I’m not scrambling for extra ingredients. Plus, leftovers reheat like they’re fresh—no sad, soggy wings here.
Step-by-step instructions for baked breaded chicken wings
Here’s the method for achieving a crunchy crust that stays crispy through every bite.
Prepare the Wings for Breading
Preheat your oven to 375°F and position a wire rack on a baking sheet. Pat the 3 lb chicken wings completely dry with paper towels—this is critical for maximum crispiness. Split each wing into drumettes and flats if they’re still attached, and discard any excess fat or connective tissue.
In a large bowl, whisk together the 2 cups all-purpose flour, 0.5 cup cornstarch, 2 tbsp garlic powder, 2 tbsp onion powder, 1 tbsp paprika, 1.5 tsp salt, and 1 tsp ground black pepper. This dry mixture creates the foundation for your crispy crust. The cornstarch adds extra crunch that regular flour alone can’t match.
Create the Breading Station
In a shallow dish, whisk the 2 whole large eggs until fully combined. In another shallow dish, pour the 0.5 cup buttermilk. Set up a third dish with the 1.5 cups panko breadcrumbs for the final crispy layer. Arrange these stations in order of use for an efficient breading process.
Lightly brush each wing with 1 tbsp vegetable oil using a paper towel or pastry brush. This step ensures the breading adheres properly and creates an additional barrier for moisture. Dip each wing into the flour mixture first, pressing gently to coat evenly. Then dip into the egg wash, allowing excess to drip off, and finally roll in the panko breadcrumbs, pressing firmly to adhere.
Arrange and Pre-Bake for Extra Crispiness
Place the breaded wings on the prepared wire rack, leaving at least 1 inch between each piece. This allows hot air to circulate evenly, preventing steaming which would make the crust soggy. Transfer the rack to the preheated oven and bake for 12 minutes. This initial bake helps set the breading before the final crisping stage.
After 12 minutes, remove the wings from the oven and brush each piece lightly with 1 tbsp olive oil. This step is what guarantees that signature crispy crust that stays crunchy even after sitting out. Return the wings to the oven and bake for an additional 10-12 minutes until they’re deep golden brown and the internal temperature reaches 165°F.
Finish and Garnish
Remove the wings from the oven and transfer them to a serving platter. Immediately sprinkle with 0.25 cup chopped fresh parsley for a pop of color and freshness. The parsley not only looks beautiful but also adds a subtle brightness that cuts through the richness of the breaded wings.
Serve immediately while the crust is at its peak crispiness. For even better results, serve with your favorite dipping sauce like ranch or blue cheese dressing. The secret to maintaining that perfect crunch is serving them right away—don’t let them sit too long after baking.
Pro Tips For Making Baked Breaded Chicken Wings
- Pat dry those wings: Wet wings = soggy breading. I learned this the hard way—after frying a batch that came out mushy, I realized the paper towels I used were barely damp. Grab fresh towels, press hard, and let them air-dry for 5 minutes. That’s the thing that matters most for crispy wings.
- Mix cornstarch into flour: Skip the cornstarch, and your breading will clump like wet sand. I used to just use flour, but now I blend 3 parts flour to 1 part cornstarch—it gives that perfect crunch without sticking. (Yes, even if you’re impatient like me.)
- Bake in one layer: Stacked wings steam instead of crisp. After burning three batches, I finally figured out: spread them in a single layer on the baking sheet, with no overlaps. If your pan’s too small, bake in batches—crowding ruins the texture.
- Start at 425°F, then lower: High heat for the first 10 minutes seals the breading, but after that, drop to 375°F to cook through without burning. I was skeptical until I tried it—the outside stays crisp, and the inside stays juicy. (Your future self will thank you.)
Storing and reheating this baked breaded chicken wings
Refrigerator Storage
Store baked wings in an airtight container with parchment paper between layers to prevent sticking. They’ll stay crispy for up to 3 days at 40°F or below—the key is keeping moisture out.
I like using Rubbermaid Brilliance containers because they seal tightly. Let wings cool completely before storing to avoid condensation that ruins the crust. 💫
Freezer Prep
For long-term storage, freeze wings on a wire rack for 1 hour to prevent ice crystals, then transfer to a freezer bag with all air squeezed out.
They’ll keep for 2 months—thaw overnight in the fridge before reheating. I add a paper towel to the bag to absorb any moisture during freezing. 🥶
Oven Reheating
Reheat wings in a 375°F oven for 8-10 minutes on a wire rack (never a plate!) to restore crispiness. Brush with 1 tsp olive oil before reheating for extra crunch.
For a large batch, reheat in two batches to avoid steaming. The internal temp should reach 165°F—use a meat thermometer for accuracy. 🔥
Air Fryer Option
For smaller batches, use an air fryer at 375°F for 4-5 minutes, shaking halfway. This method works best for single servings or reheating 3-4 wings at a time.
The high heat recrisps the breading without drying out the meat. I prefer my Ninja Foodi for this—it gets hot enough to revive that golden crust. ⚡
Microwave Emergency
When you’re in a rush, cover wings with a damp paper towel and microwave for 30-45 seconds on high. This won’t restore crispiness but keeps them warm. For better results, transfer to a 350°F oven for 2 minutes after microwaving to crisp up the edges. 💡
Serving Warm Tips
Keep wings warm in a 200°F oven on a wire rack for up to 30 minutes while finishing the batch. For parties, bake in two batches and keep the first batch warm this way.
The low heat maintains crispiness without overcooking. Always serve with fresh dipping sauces—the contrast of cold sauce with hot wings is key! 🍗
Nutrition facts
Frequently asked questions
Why does my breaded chicken wing crust turn soggy?
The most common causes are moisture buildup or insufficient drying. Always pat wings completely dry before breading, and use a wire rack in the oven to allow air circulation. Baking at 375°F with the two-stage oil brushing (after 12 minutes) locks in crispiness. Skipping the rack or overcrowding wings traps steam, which ruins the crunch.
Can I use frozen chicken wings for this recipe?
Yes, but thaw them completely first in the refrigerator overnight. Never use frozen wings straight from the freezer—they release moisture that makes the breading stick instead of crisp. For convenience, buy pre-cut frozen wings from stores like Trader Joe’s or Costco, which are often pre-split and ready to bread. Always pat them extra dry after thawing.
How do I make these wings extra crispy?
The secret is the two-stage baking method and cornstarch. First, bake for 12 minutes to set the breading, then brush with olive oil and bake another 10-12 minutes. Use panko breadcrumbs for the final layer—they’re lighter and crispier than regular breadcrumbs. For even more crunch, chill the breaded wings on a wire rack for 15 minutes before baking.
What’s the best dipping sauce for these wings?
Classic ranch or blue cheese work perfectly, but try this quick honey-sriracha glaze: mix 2 tbsp honey, 1 tbsp sriracha, and 1 tbsp soy sauce. For heat lovers, blend 1/4 cup hot sauce with 2 tbsp mayonnaise and 1 tsp garlic powder. The contrast of cold sauce with hot, crispy wings is what makes them irresistible!
Can I bake these wings ahead of time?
Yes, but serve them immediately after baking for best results. If prepping ahead, store uncooked breaded wings on a wire rack in the fridge for up to 24 hours—this keeps them crispy. For fully cooked wings, bake as directed, then reheat in a 375°F oven for 8-10 minutes on a wire rack (never a plate!) to restore crispiness.

- Spanish Coffee Recipe: Rich, Spiced Brew With Cinnamon Kick - November 8, 2026
- Costco Tri-Tip Steak Recipe: Smoky Grill Marks and Buttery Crust - November 8, 2026
- Maine Style Lobster Roll Recipe: Buttery Toasted Buns With Sweet Maine Lobster - November 8, 2026