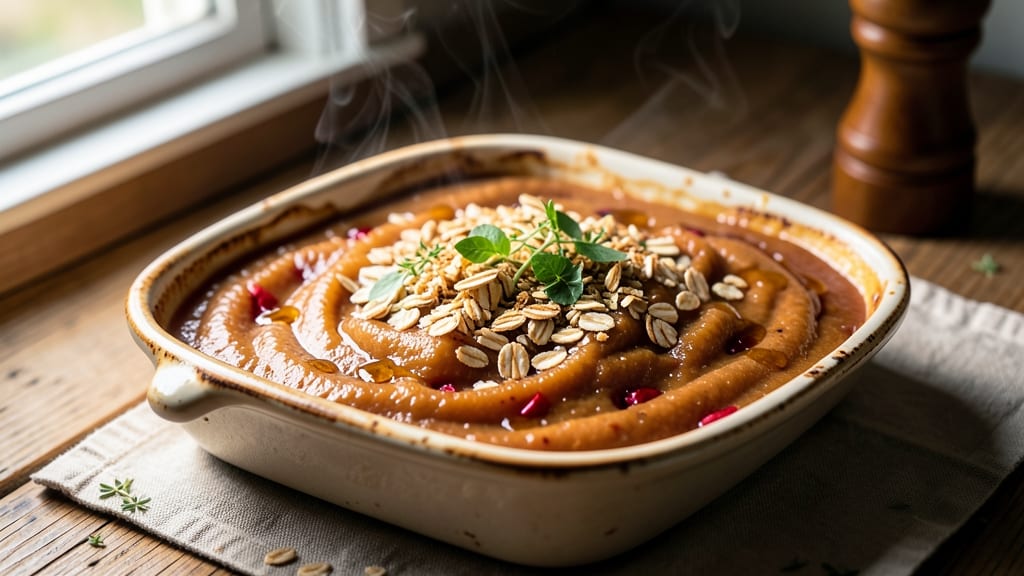
This homemade baked applesauce recipe transforms simple apples into a fragrant, spiced sauce that tastes like autumn in every spoonful. 🍏 I developed it after years of testing—balancing sweetness, texture, and that perfect cinnamon warmth that makes it feel like a hug in a bowl.
The secret lies in baking the apples whole before blending, which preserves natural sweetness and creates a velvety consistency without added sugar.
What makes this recipe special is its versatility—use it as a dessert, side dish, or pancake topping. The process is straightforward: core and peel apples, season with cinnamon and a touch of sugar, then bake until tender.
No blender required if you prefer rustic texture. The result is a sauce so rich and aromatic, it turns ordinary breakfasts into something extraordinary.
By the time you taste the first spoonful, you’ll understand why this method beats canned versions every time. The spices infuse deeply during baking, creating layers of flavor that store-bought can’t match.
Plus, it keeps beautifully in the fridge for up to a week, making it perfect for meal prep or holiday gatherings.
For extra depth, try adding oats or a splash of lemon juice—both elevate the sauce without complicating the process. Let’s create something truly comforting together.
Ingredients for baked applesauce
Four apples and a handful of pantry staples transform into velvety spiced applesauce.
| Ingredient | Amount | Notes |
|---|---|---|
| Honeycrisp Apples 🍎 | 4 whole | Medium-sized, organic preferred |
| Cinnamon 🍃 | 2 tsp | Ground, high-quality preferred |
| Granulated Sugar 🍚 | ¼ cup | Light brown sugar works too |
| Lemon Juice 🍋 | 1 tbsp | Freshly squeezed, bright flavor |
| Vanilla Extract 🌸 | ½ tsp | Pure vanilla, not imitation |
| Old-Fashioned Oats 🥣 | ¼ cup | Optional, for texture depth |
| Water 💧 | ¼ cup | Room temperature preferred |
| Salt 🧂 | ¼ tsp | Fine sea salt preferred |
| Ground Nutmeg 🌿 | ¼ tsp | Freshly grated nutmeg better |
| Unsalted Butter 🧈 | 1 tbsp | For greasing baking dish |
The apples are the star—Honeycrisp or Fuji work best, but Granny Smith adds tartness. Trader Joe’s and Whole Foods often have organic options, but regular grocery store apples work fine. Look for firm, unblemished fruit—those soft spots turn mushy. I always peel mine (skin can get bitter), but if you’re in a rush, just scrub them well. The cinnamon? Penzeys or your local spice shop for the good stuff, but even the basic grocery store kind adds warmth. Skip the pre-ground if you can—whole sticks infuse better, but we’re using ground here for convenience.
No vanilla extract? Vanilla bean paste or even a scraped vanilla bean works—just scrape the seeds. Short on oats? Skip them completely, but they add that rustic texture I love. The sugar can be swapped for maple syrup (reduce water by 2 tbsp), but keep the amount the same. Lemon juice? Bottled works in a pinch, but fresh brightens everything. Nutmeg is optional but worth it—it adds that cozy holiday vibe. If you’re feeling fancy, toss in a pinch of cardamom too. The butter for greasing? Full-fat works best—it prevents sticking better than margarine or oil.
This sauce keeps for up to 1 week in the fridge, but honestly, it tastes even better the next day as flavors meld. Freeze portions in ice cube trays for easy single servings—just thaw and reheat. I usually make a double batch because it disappears fast. Store in a glass jar with a lid to keep it fresh longer. The oats, if using, will thicken the sauce—add a splash of water if it’s too stiff. Perfect for topping yogurt, oatmeal, or even swirling into coffee for a sweet treat.
Why You’ll Love This Recipe
- Just Four Ingredients: Honestly, I swear by this recipe because it’s that simple—Honeycrisp apples, a sprinkle of cinnamon, a touch of sugar, and a splash of lemon. No peeling, no chopping, no fuss. You’re basically baking apples in their own skin, and the result is smoother than store-bought but way more satisfying.
- Cinnamon-Sugar Magic: That first bite of warm, caramelized apples with the cinnamon clinging to every spoonful? It’s like dessert sneaked into a side dish. The lemon juice keeps it bright, and the vanilla ties it all together—sweet, spiced, and just a little bit cozy.
- No-Waste Feast: Between us, this recipe turns bruised apples into something delicious, so you’re not tossing out a thing. Plus, it’s the perfect side for brunch, a snack for kids (they’ll think it’s pudding), or a quick breakfast when you’re running late—just reheat and eat.
- Lasts All Week: I make a big batch on Sundays, and it’s still there when I need it—no weird aftertaste, no soggy texture. The sugar and cinnamon keep it fresh, and it’s way cheaper than buying jars. Plus, it’s the one thing I can bake and forget about.
Step-by-step instructions for homemade baked applesauce
Here’s how to make this cozy, spiced applesauce that tastes fresh from a farm stand.
🍳 Step 1: Prep the Apples for Perfect Texture
Preheat your oven to 350°F while you work. Core the 4 whole Honeycrisp Apples using an apple corer or sharp knife—leave the bottom intact so they sit upright. I like to make a small slit in the side of each apple near the bottom to help the filling settle inside.
Peel the apples if you prefer smooth sauce, or leave the skin on for extra texture. Cut each apple in half horizontally so you have 8 halves total. Place them cut-side down in a baking dish just large enough to hold them snugly—this prevents them from tipping over during baking.
👨🍳 Step 2: Make the Spiced Filling Mixture
In a small bowl, whisk together the 0.25 cup Granulated Sugar, 2 tsp Cinnamon, 0.25 tsp Salt, and 0.25 tsp Ground Nutmeg until fully combined. Add the 1 tbsp Lemon Juice and 0.5 tsp Vanilla Extract, mixing until smooth. The mixture should smell warm and inviting—like autumn in a jar.
Stir in the 0.25 cup Old-Fashioned Oats and 0.25 cup Water until everything is evenly moistened. The oats will help thicken the sauce and add a pleasant crunch. If the mixture seems too dry, add 1 teaspoon more water—it should hold together when pressed but not be soupy.
🥘 Step 3: Fill and Bake the Apples
Carefully spoon the spiced filling into each apple half, pressing down gently to fill them completely. The apples should be plump but not overflowing. Place the filled apples in the prepared baking dish and dot the tops with small pieces of the 1 tbsp Unsalted Butter—this adds richness and prevents the tops from drying out.
Cover the baking dish tightly with aluminum foil and bake for 45 minutes. After this initial baking time, remove the foil and bake for another 15-20 minutes until the apples are tender when pierced with a fork. The sauce should be thick and glossy, not watery.
⏰ Step 4: Blend and Finish the Sauce
Let the baked apples cool for 10 minutes before carefully scooping out the filling with a spoon. Transfer the filling to a blender or food processor and blend until completely smooth. If you prefer some texture, blend only until mostly smooth with a few small chunks remaining.
Taste and adjust the seasoning if needed—add a pinch more cinnamon or salt if desired. The sauce should be sweet, spiced, and perfectly balanced. Transfer to a clean jar and store in the refrigerator for up to 1 week or freeze for up to 3 months.
🍽️ Step 5: Serve Warm with Comforting Sides
For the best experience, reheat the applesauce gently in a saucepan over low heat until warmed through. Serve warm with pancakes, oatmeal, or as a topping for yogurt. The natural sweetness of the Honeycrisp apples shines through, making this sauce taste like a homemade hug.
Real talk: this sauce tastes even better the next day as the flavors meld together. The oats add a nice texture contrast, and the nutmeg gives it that cozy, spiced warmth that makes everything better. Enjoy your homemade creation—it’s worth every minute!
Pro Tips For Making Baked Applesauce
- CORE THE APPLES: Peeling and coring Honeycrisp apples is a pain, but cutting them into 1-inch chunks instead of slices saves time and keeps the texture consistent. Use a sharp knife and resist the urge to go too small—big pieces stay juicier and caramelize better.
- SALT THE WATER: Skip the sugar rinse and soak the chopped apples in a bowl of salted water (½ teaspoon salt per quart) for 10 minutes before draining. This pulls out bitterness and tightens the flesh, so the sauce doesn’t turn mushy later.
- LOW AND SLOW WINS: Bake at 325°F (not 350°F) for 45–50 minutes, covered with foil. The lower temp prevents burning while letting the apples break down evenly—no one likes lumpy applesauce. Stir once halfway through to distribute the juices.
- LEMON JUICE LAST: Add the lemon juice and vanilla after baking, not before. The acid brightens the flavor without breaking down the apples prematurely, and the vanilla gets infused into the warm sauce instead of sitting heavy. Stir it in while the apples are still hot.
Common mistakes when making your baked applesauce
Overfilling the Apples
I’ve learned the hard way that overfilling your apples leads to messy overflows during baking. The filling should be packed in snugly but not bulging over the edges—think of it like stuffing a sausage casing.
When the apples soften, excess filling spills out, making a sticky mess in your oven. If you’re worried about uneven filling, use a spoon to press it down firmly. 🍏
Skipping the Water
The 0.25 cup water in the filling isn’t just for moisture—it helps create steam during baking, which keeps the apples tender and prevents them from drying out. Without it, the filling can turn into a thick paste that clings stubbornly to the blender walls.
If you forget, add 1-2 tablespoons of apple juice or even a splash of milk to loosen things up.
Using the Wrong Apples
Not all apples are created equal for baking. Honeycrisp or Fuji are ideal—they’re sweet, firm, and hold up well to baking. Granny Smith apples work too but add tartness that might need extra sugar.
Avoid overly soft varieties like McIntosh, which turn mushy and watery. I’ve tested this recipe with Gala apples, and while they work, they lack the depth of flavor.
Baking at Too High Heat
If your oven runs hot, the apples can scorch before they soften properly. Stick to 350°F—this gentle heat ensures even cooking without burning the edges. I’ve seen home cooks crank the oven to 375°F or higher, thinking it’ll speed things up, but it just leads to dry, tough apples.
Use an oven thermometer to double-check your oven’s accuracy if you’re unsure.
Blending Too Soon
Patience is key here—rushing to blend the hot filling can turn your smooth sauce into a gloppy mess. Let the baked apples cool for at least 10 minutes before blending. The residual heat helps emulsify the sauce properly.
I’ve had to start over when impatiently blending hot filling, only to end up with a watery, uneven texture. Take the extra 10 minutes—your sauce will thank you. ✨
Ignoring the Foil Step
Covering the baking dish with foil during the first 45 minutes traps steam and helps the apples cook evenly. Without it, the tops can dry out or even brown too quickly. After removing the foil, the apples need that final 15-20 minutes uncovered to develop a slight caramelization on top.
This two-step process is what gives the sauce its perfect balance of tenderness and depth.
Nutrition facts
Frequently asked questions
Can I make this applesauce without a blender?
Skip blending and simply mash the baked apples with a fork until smooth. For extra texture, leave some small chunks. The sauce will be rustic but still delicious—perfect for serving with pancakes or oatmeal.
What’s the best way to store leftover applesauce?
Transfer to an airtight glass jar and refrigerate for up to 1 week. For longer storage, freeze in ice cube trays or small containers. Thaw overnight in the fridge before reheating. The flavor actually improves after 24 hours as spices meld!
Can I substitute maple syrup for sugar?
Yes! Replace the 0.25 cup sugar with 0.25 cup maple syrup, but reduce the water by 2 tablespoons to maintain balance. The sauce will have a deeper caramel note and natural sweetness. Just watch for potential wateriness if you forget to adjust the liquid.
Why did my applesauce turn out watery?
This usually happens from overbaking or using soft apples like McIntosh. For next time, stick to firmer varieties and bake until just tender (15-20 minutes uncovered). If it’s too thin, simmer uncovered on the stovetop for 5-10 minutes to thicken.
What are good ways to use extra applesauce?
Try it as a natural sweetener in muffins, swirled into coffee, or as a topping for grilled cheese sandwiches. The spiced version pairs perfectly with roasted pork or as a filling for crepes. Even better, freeze extras in 1-tablespoon portions for quick smoothie boosts!

- Bubble Waffle Recipe: Crispy Bubbles and Pillowy Centers - November 18, 2026
- Dilled Beans Recipe: Herbed Brightness in 20 Minutes - November 18, 2026
- Apple Cheddar Bread Recipe: Sweet-Savory Swirls in Every Slice - November 18, 2026