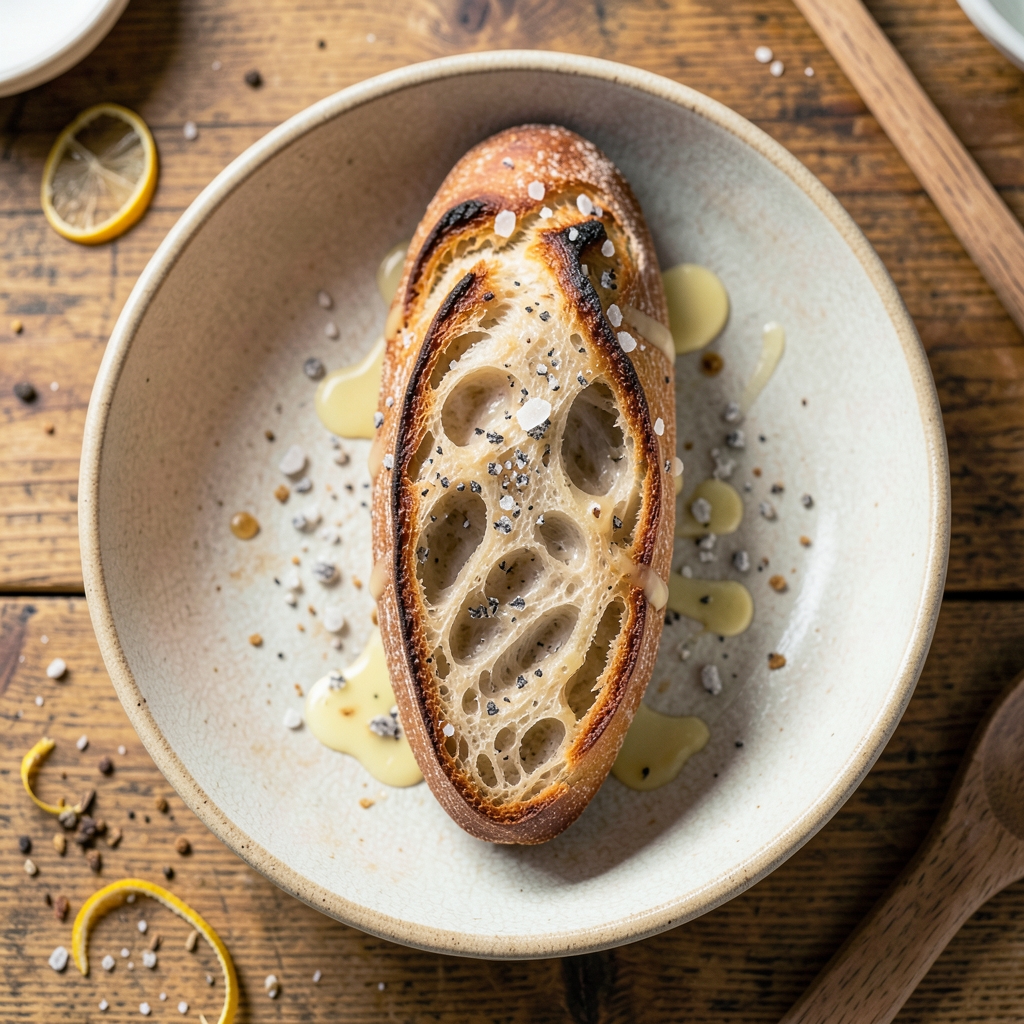
This artisan ciabatta bread recipe delivers the perfect balance of a fluffy crust and an airy, chewy interior—exactly what separates homemade loaves from store-bought. The secret lies in a high-hydration dough that develops an open crumb structure while maintaining that signature crispy exterior.
I’ve baked countless batches, and this method consistently produces results that rival professional bakeries, even in a standard home oven.
What makes this recipe work is the combination of precise ingredient ratios and careful technique—no fancy equipment required. The dough rests twice to develop gluten and flavor, then gets shaped into its signature irregular form before proofing.
Baking with steam ensures that crispy crust while keeping the interior tender. The process takes patience, but the reward is a loaf that’s impossible to resist.
By the time you slice into this ciabatta, you’ll notice the open, airy pockets that make it ideal for soaking up soups or dipping into olive oil. The crust remains crisp for hours, while the interior stays chewy and flavorful.
This isn’t just bread—it’s a textural experience that elevates any meal. Let’s get started on creating your perfect loaf.
Once baked, let the ciabatta cool completely before slicing—this ensures clean cuts through those airy pockets. Store wrapped at room temperature for up to 3 days, or freeze for longer storage.
The versatility of this bread makes it perfect for charcuterie boards, sandwiches, or simply enjoying with butter and jam. Every bite is proof that homemade bread is worth the effort.
Ingredients for artisan ciabatta bread
High-hydration dough and precise ratios create restaurant-quality ciabatta at home—no fancy tools needed.
| Ingredient | Amount | Notes |
|---|---|---|
| Bread Flour 🌾 | 5 cups | High-protein for chewy texture |
| Active Dry Yeast 🍞 | ¼ oz | Or 2 1/4 tsp (1 packet) |
| Granulated Sugar 🍚 | 1 tbsp | Feeds yeast for activation |
| Unsalted Butter 🧈 | ½ cup | Softened, full-fat for richness |
| Large Eggs 🥚 | 2 whole | Room temperature for best mixing |
| Warm Water 💧 | 2 ½ cups | 110°F for ideal yeast activation |
| Diamond Crystal Kosher Salt 🧂 | 2 tsp | Adjust to taste after kneading |
| Extra-Virgin Olive Oil 🫒 | 1 tbsp | Plus extra for dough shaping |
| Semolina Flour 🌾 | ¼ cup | For dusting and bread basket |
| Ice Cubes ❄️ | ½ cup | For chilling dough before shaping |
The bread flour is non-negotiable here—its high protein content gives that signature chewy texture. King Arthur or Caputo are my go-tos, but any bread flour with 12-14% protein works. The yeast should be fresh—check the date and store it in the freezer if you’re not using it soon. For the butter, Plugra or Land O’Lakes work perfectly, but avoid margarine. The eggs? Room temperature is crucial—they mix in more smoothly and help develop gluten properly. Preheat your oven to 450°F while you work; this bread bakes fast but needs that high heat for that crispy crust.
No bread flour? All-purpose flour plus 1 tbsp vital wheat gluten gets you close. Short on butter? Olive oil works 1:1**, but the flavor will be different. The ice cubes are a game-changer—don’t skip them. They chill the dough just enough to make shaping easier without refrigeration. For the olive oil, California Extra Virgin adds a nice fruity note, but any good quality oil will do. The semolina? Trader Joe’s has it cheap, or use regular flour if you’re in a pinch. Pro tip: If your dough feels too sticky, add flour 1 tbsp at a time—but don’t overdo it or you’ll lose that airy texture.
This dough is best made fresh, but you can prep it 24 hours ahead—just refrigerate the shaped loaf before proofing. Once baked, let it cool completely on a wire rack (at least 1 hour) to prevent sogginess. Store wrapped in a clean kitchen towel at room temperature for up to 3 days. For longer storage, freeze the cooled loaf wrapped in plastic—up to 3 months. The crust stays crisp for hours, but the interior is best enjoyed fresh. Slice with a serrated knife for those perfect open pockets—don’t use a regular knife or it’ll squish
Why You’ll Love This Recipe
- No-Knead Magic: I swear by this method—just mix, let it rise, and bake. The butter and eggs give it that almost restaurant-quality texture without the fuss of shaping dough by hand.
- Crispy-Creamy Obsession: That open crumb and golden crust? It’s the sugar and yeast working together, but honestly, it’s the butter that turns this into something you’ll fight over. (Yes, even on a Tuesday night.)
- Weeknight Superstar: Toss a loaf in the oven while you prep dinner—it’s ready by the time your pasta’s al dente. Slice it thick for sandwiches, toast it for bruschetta, or freeze half for lazy mornings.
- Budget-Friendly Luxury: A single batch costs less than takeout but feels like a splurge. The eggs and butter make it taste indulgent, and leftovers toast up just as well the next day. My wallet and taste buds win.
Step-by-step instructions for artisan ciabatta bread
This method delivers that signature open crumb and crispy crust—every time. The secret lies in the high-hydration dough and proper shaping.
Activate the Yeast and Mix the Dough
In a large mixing bowl, combine the 2.5 cups warm water (between 110°F and 115°F) with the 1 tbsp granulated sugar and 0.25 oz active dry yeast. Let this sit for 5-10 minutes until the mixture becomes frothy and bubbly—this confirms your yeast is alive and ready to work. If it doesn’t bubble, your yeast may be dead, and you’ll need to start over.
Once the yeast is active, add the 5 cups bread flour and 2 tsp diamond crystal kosher salt to the bowl. Using a wooden spoon or your hands, mix until a shaggy dough forms. Then, add the 0.5 cup softened unsalted butter and 2 whole large eggs (room temperature). Mix vigorously for 3-5 minutes until the dough comes together and begins to pull away from the sides of the bowl. The dough should be sticky but manageable—this high hydration is what gives ciabatta its signature airy texture.
Knead and Rest the Dough
Turn the dough out onto a lightly floured surface (use just enough semolina flour to prevent sticking) and knead for 8-10 minutes by hand. You’re not looking for a smooth, elastic dough like you would for baguettes—ciabatta should remain slightly rough and sticky. The goal is to develop some gluten without overworking the dough, which would make it tough. If the dough feels too wet, add 1-2 tablespoons of semolina flour at a time, but avoid adding too much or you’ll lose the signature chewiness.
Once kneaded, place the dough back in the bowl, cover it tightly with plastic wrap or a damp towel, and let it rest at room temperature for 1 hour. This initial rest allows the gluten to relax and the dough to hydrate evenly. You’ll notice the dough puffing up slightly—this is a good sign. If your kitchen is cold, place the bowl in a slightly warm spot (like near the oven with the light on) to encourage fermentation.
Shape and Cold Proof the Dough
After the 1-hour rest, turn the dough out onto a lightly floured surface again. Gently shape it into a loose, irregular log—don’t worry about perfection here. The beauty of ciabatta lies in its rustic, uneven shape. Fold the ends toward the center and tuck them under, then place the dough seam-side down on a parchment-lined baking sheet. Brush the top lightly with 1 tbsp extra-virgin olive oil to give it that signature glossy finish.
Cover the dough loosely with plastic wrap and refrigerate for 12-24 hours. This cold proofing step is crucial—it allows the yeast to ferment slowly, developing deep flavor and ensuring the bread rises properly. The dough should nearly double in size and develop a slight tang when you taste it. If you’re short on time, you can skip the cold proof and let it rise at room temperature for 2-3 hours, but the flavor won’t be as developed.
Preheat and Bake for a Crispy Crust
Preheat your oven to 425°F with a baking stone or inverted baking sheet on the middle rack. This creates steam, which is essential for that crispy crust. Once preheated, place the dough in the oven and bake for 25-30 minutes, until the crust is deep golden brown and the internal temperature reaches 190°F (use an instant-read thermometer). The bread should sound hollow when tapped on the bottom.
For the final touch, remove the bread from the oven and immediately brush the top with a mix of 1 tbsp melted unsalted butter and 1 tbsp extra-virgin olive oil. This step adds moisture and enhances the crust’s flavor. Let the bread cool on a wire rack for at least 1 hour before slicing—this allows the crumb to set and prevents a gummy texture. The result? A crust that’s crisp enough to stand up to soups and a chewy interior with those signature air pockets.
Pro Tips For Making Artisan Ciabatta Bread
- Use Lukewarm Water: DESCRIPTION: Your yeast won’t wake up if the water’s too hot or cold—aim for 100°F (38°C). I learned this the hard way when my first batch of ciabatta took forever to rise. Dissolve the sugar in the water first; it helps regulate temperature and feeds the yeast immediately.
- Knead Just Enough: DESCRIPTION: Ciabatta’s signature holes come from not overworking the dough. After the initial mix, do a quick 2-minute stretch-and-fold—no need for a stand mixer. Over-kneading turns it into dense bread, not airy, open-textured ciabatta.
- Skip the Butter Until Later: DESCRIPTION: Add the unsalted butter after the first rise, not at the start. It melts into the dough during bulk fermentation, making the crumb richer without stealing steam from the oven. (Yes, even if the recipe says otherwise.)
- Steam the First 10 Minutes: DESCRIPTION: Place a metal bowl of boiling water on the oven rack before baking. The steam creates that signature crisp crust—no fancy Dutch oven needed. I was skeptical until I tried it; now it’s non-negotiable for me.
Make-ahead tips for this recipe
Dough Prep Ahead
Mix your ciabatta dough up to 24 hours in advance—this is where the magic happens. After the initial 1-hour rest, shape the dough into its rustic log form, brush with olive oil, and refrigerate it in an airtight container.
The cold slow-ferment develops deeper flavor and improves texture. I like to prep mine the night before so it’s ready to bake first thing in the morning. 🌙
Proofing Shortcuts
Skip the overnight cold proof if you’re in a hurry, but expect less flavor development. Let the shaped dough rise at room temperature for 2-3 hours instead, covered loosely with plastic wrap.
For best results, place the dough in a warm spot—like your oven with the light on—to encourage faster fermentation. Just remember, the longer it proofs, the better it tastes!
Baked Storage Hacks
Fresh ciabatta stays crisp for 2-3 days when stored properly. Wrap the cooled loaf in a clean kitchen towel and place it in a paper bag—this traps moisture and keeps the crust from drying out.
For longer storage, freeze the bread (still wrapped) for up to 3 months. To revive, thaw at room temperature for 1-2 hours before toasting.
Reheating Perfection
Revive stale ciabatta by reheating it in a 350°F oven for 5-7 minutes wrapped in foil. For extra crispiness, place it directly on the oven rack. Alternatively, toast slices in a dry skillet over medium heat for 1-2 minutes per side until golden and crunchy.
The key is heat—never microwave, or you’ll end up with sad, gummy bread. 🔥
Freezing Dough
You can even freeze the shaped, unproofed dough for up to 1 month. Thaw it in the fridge overnight, then let it sit at room temperature for 1 hour before proofing.
This works great for meal prep—just shape your dough ahead, freeze, and bake as needed. The texture holds up surprisingly well after freezing and thawing!
Make-Ahead Slices
Pre-slice your ciabatta and freeze the pieces on a baking sheet lined with parchment paper. Once frozen solid, transfer them to a ziplock bag for easy grab-and-go toast.
To reheat, pop slices directly into a 375°F oven for 3-4 minutes until warmed through. Perfect for quick breakfasts or sandwiches when you’re short on time. 💡
Nutrition facts
Frequently asked questions
Why does ciabatta have those big air pockets?
The signature open crumb comes from the dough’s high hydration (about 70%) and minimal kneading. The gluten develops just enough to trap gas during fermentation, creating those dramatic air pockets. The shaping technique—folding the ends under—also encourages an irregular, open structure that’s perfect for soaking up soups and sauces.
Can I make this without a stand mixer?
This recipe is designed for hand mixing and kneading. Use a wooden spoon to combine ingredients, then knead by hand for 8-10 minutes on a lightly floured surface. The dough should remain slightly sticky—this is normal and essential for that authentic texture. No mixer needed!
What if my dough doesn’t rise properly?
Check these three things first: yeast freshness (test in warm water with sugar), water temperature (110°F-115°F), and proofing environment (warm spot, not cold drafts). If using expired yeast, replace it—it won’t activate. For extra insurance, let the dough proof in a slightly warm oven with the light on.
How do I get a crispier crust?
Bake with steam by placing a baking stone in the oven or using an inverted baking sheet. Preheat for 30 minutes at 425°F before adding the dough. Immediately brush the baked loaf with melted butter and olive oil for extra crispiness. Let it cool completely before slicing—this prevents a gummy interior.
Can I add herbs or garlic to this recipe?
Yes! For flavor variations, mix in 1 tbsp fresh rosemary, 2 cloves minced garlic, or 1 tsp dried oregano with the dough during the initial mixing. The herbs will infuse beautifully into the crust and crumb. Just reduce the water slightly if your dough becomes too sticky.

- Lemon Pound Cake Recipe: Bright Citrus Layers With Buttery Crumb - November 18, 2026
- Spumoni Cake Recipe: Layers of Fruit, Cream, and Chocolate Magic - November 18, 2026
- Chocolate Gnache Recipe: Silky Smooth Pour With Perfect Snap - November 18, 2026