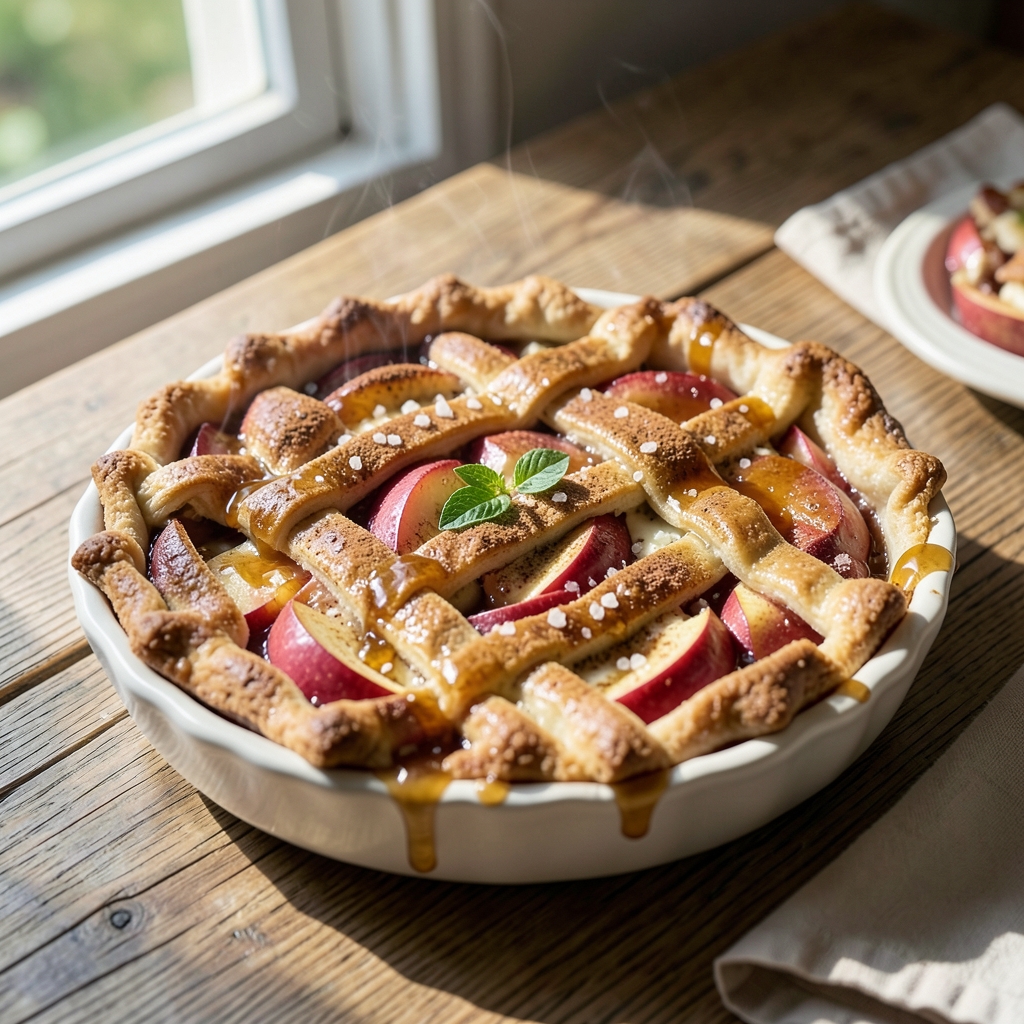
This apple pice recipe—with its flaky crust and cinnamon-spiced filling—is the kind of dish that brings comfort and tradition to any kitchen. 💛 I remember standing on a stool in my Nonna’s tiny Boston kitchen, watching her roll out dough with the precision of someone who’d done it a thousand times—each fold creating layers so delicate they practically dissolved on the tongue.
The secret to that perfect flaky crust lies in cold butter and a gentle touch—no rushing, no overworking the dough. Meanwhile, the filling transforms simple apples into something aromatic and sweet, with just the right balance of cinnamon, sugar, and a touch of lemon to brighten the flavors.
This recipe delivers on both fronts without shortcuts that compromise texture.
By the time it emerges from the oven, you’ll have golden, crisp edges on the crust and a bubbling, spiced filling that smells like autumn. The contrast between the tender fruit and the buttery, layered crust is what makes this pie unforgettable—worth every minute of prep and baking time.
Serve it warm with a scoop of vanilla ice cream or a drizzle of caramel for that extra touch of indulgence. Here’s how to make it from start to finish, just like Nonna taught me—with patience and love.
Ingredients for apple pice
Cold butter, flaky layers, and cinnamon-spiced apples—this is the classic combo that makes every bite unforgettable.
| Ingredient | Amount | Notes |
|---|---|---|
| All-Purpose Flour 🌾 | 3 ½ cups | Sifted for light texture |
| Unsalted Butter 🧈 | 1 cup | Cold, cubed for flakiness |
| Granulated Sugar 🍚 | ¾ cup | Plus 2 tbsp for filling |
| Ice Water 💧 | ½ cup | For dough elasticity |
| Salt 🧂 | 1 tsp | Kosher or sea salt |
| Ground Cinnamon 🌿 | 2 tbsp | Freshly ground preferred |
| Ground Nutmeg 🌿 | ½ tsp | Freshly grated nutmeg |
| Lemon Juice 🍋 | 2 tbsp | Freshly squeezed |
| Medium Apples 🍎 | 6 whole | Honeycrisp or Granny Smith |
| Brown Sugar 🍚 | ¾ cup | Packed, for filling |
| Flour (for filling) 🌾 | ½ cup | To thicken filling |
| Vanilla Extract 🍯 | 1 tsp | Pure vanilla preferred |
| Egg 🥚 | 1 whole | For egg wash |
The butter is non-negotiable—European-style unsalted (like Plugrá) gives the best flavor and texture. Keep it cold when cutting into cubes; warm butter = tough crust. I always grab my flour from King Arthur—it’s sifted and consistent. For the apples, Honeycrisp or Granny Smith hold up best to baking, but any crisp variety works. Peel them first (Nonna’s rule) and slice thinly for even cooking. The secret to that perfect flaky crust? Handle the dough as little as possible—just fold, chill, repeat.
No cinnamon? Cardamom or pumpkin pie spice at the same amount works in a pinch. Short on brown sugar? White sugar plus 1 tbsp molasses mimics the depth. The lemon juice brightens the filling—don’t skip it. For a deeper flavor, add 1 tsp apple cider to the filling. Want extra flakiness? Brush the crust with 1 tbsp apricot jam before adding the filling. And if you’re feeling fancy, sprinkle toasted pecans on top before baking for crunch.
This pie keeps beautifully—3 days at room temperature in a cool spot (like on a cake stand), or 2 weeks in the fridge. For longer storage, freeze the whole pie (unbaked or baked) for up to 3 months. I always bake mine a day ahead so the flavors meld. Reheat slices in a 350°F oven for 5 minutes—just enough to warm the filling without sogging the crust. Leftovers? Perfect for breakfast toast or ice cream topping.
Why You’ll Love This Recipe
- Four-Ingredient Magic: I swear by this—just flour, butter, sugar, and ice water. That’s it. No eggs, no yeast, no fancy ratios to memorize. Honestly, I’ve made it blindfolded (well, not really, but you get the idea).
- Sweet Butter Crunch: The cold butter cubes melt into those flakes, creating layers of buttery, crispy pockets. Between us, that first bite—when the sugar caramelizes just enough—makes it feel like dessert. (Yes, even on a Tuesday night.)
- Picnic to Potluck: Pack these in a cooler for a hike, toss them in a lunchbox for school, or bring them to a holiday gathering. They stay fresh for days, and no one will guess they’re just flour, butter, and sugar. My secret weapon for effortless sharing.
- Budget-Friendly Staples: You’re already buying these ingredients. No specialty items, no last-minute grocery runs. I’ve made a whole batch for under $5—perfect for when you’re pinching pennies but still want something that feels special. (And it reheats like a dream.)
Step-by-step instructions for apple pice with perfectly flaky crust
Here’s how to create a golden, flaky crust that holds up to the spiced apple filling every time.
👨🍳 Step 1: Make the Flaky Dough with Cold Butter
In a large mixing bowl, combine the 3.5 cups all-purpose flour and 1 tsp salt. Cut in the 1 cup cold cubed unsalted butter using a pastry cutter or your fingers until the mixture resembles coarse crumbs with pea-sized butter pieces. This cold butter creates those signature flaky layers when baked.
Add the 0.75 cup granulated sugar and mix until evenly distributed. Gradually pour in the 0.5 cup ice water while stirring with a fork. The dough will come together when you’ve added all the water—don’t overmix or you’ll develop gluten and lose that delicate texture. Form into a disk, wrap in plastic, and chill for 1 hour in the refrigerator.
🥘 Step 2: Prepare the Cinnamon-Spiced Apple Filling
Peel, core, and slice the 6 whole medium apples into ¼-inch thick slices. In a large bowl, combine the apple slices with 0.75 cup packed brown sugar, 2 tbsp ground cinnamon, 0.5 tsp ground nutmeg, 2 tbsp lemon juice, and 1 tsp vanilla extract. Toss gently to coat evenly. Let the mixture sit for 15 minutes—this allows the spices to infuse and the apples to release some juices.
In a small bowl, mix together the 0.5 cup flour for filling and 2 tbsp granulated sugar (the remaining amount from your ingredients). Sprinkle this mixture over the apples and toss again. This helps thicken the filling and prevents it from turning into a runny sauce during baking.
🍳 Step 3: Roll and Assemble the Pice
Preheat your oven to 375°F. On a lightly floured surface, roll out the chilled dough into a 12-inch circle about ⅛-inch thick. Transfer to a parchment-lined baking sheet. Spread the apple filling evenly over the dough, leaving a ½-inch border around the edges. This prevents the filling from oozing over the sides during baking.
Fold the dough edges up and over the filling, pinching gently to seal. Brush the top with the 1 whole egg beaten with 1 tablespoon water for a golden finish. Cut 6-8 slits in the top to allow steam to escape—this ensures your crust stays flaky and doesn’t puff up into a dome.
🔥 Step 4: Bake to Golden Perfection
Bake for 45-50 minutes until the crust is deep golden brown and the filling is bubbling through the slits. The center should still have a slight give when pressed gently—it will continue cooking as it rests. If the edges brown too quickly, cover them loosely with aluminum foil after 25 minutes.
Let the apple pice cool for 15 minutes before slicing. This resting time allows the juices to redistribute and the filling to set slightly. You’ll want slices that hold their shape but still release warm, spiced apple filling when cut. Serve warm with vanilla ice cream for the ultimate experience!
Pro Tips For Making Apple Pice
- Chill the Butter First: Take your unsalted butter straight from the fridge and cut it into cubes before mixing—this prevents the dough from turning greasy and keeps the texture light. I learned this the hard way after making a batch where the butter melted too fast, resulting in a dense, heavy pice.
- Measure Ice Water Precisely: Use a kitchen scale or measuring cup for the ice water—eyeballing it leads to uneven dough. Too much water makes the pice gummy; too little makes it dry. Aim for just enough to hold the dough together without making it sticky.
- Avoid Overworking the Dough: Mix the flour, butter, sugar, and salt until it just comes together—no more. Overmixing develops gluten, turning your pice into a tough, chewy mess. Stop when the crumbs are uniform and the dough holds when pressed.
- Bake in One Batch: Resist the urge to double-bake or crowd the pan—this steams the pice instead of browning them. Bake in a single layer for even golden color, then flip or rotate the tray halfway if needed. Yes, it takes longer, but it’s worth it.
Pro cooking tips for apple pice
Butter Temperature Matters
This is where most home cooks mess up—using warm butter instead of cold cubes. I learned this the hard way when my first crust turned out tough as shoe leather. Always keep your butter cold (even the cubes should feel firm to the touch) when cutting it into the flour.
If your kitchen gets warm, chill the butter for 10 minutes before using. The goal is pea-sized butter pieces in the dough—anything larger won’t melt evenly and create those perfect flaky layers.
Dough Chill Time
Never skip the 1-hour chill in the fridge or you’ll end up with a tough, dense crust. I once baked a pie straight from mixing and got a sad, flat result. The resting time lets the gluten relax and the butter harden again, preventing shrinking during baking.
Pro tip: Divide the dough in half, roll one circle, and freeze the other for later—this is how Nonna always made pies for the whole neighborhood.
Apple Prep Secrets
Thin, even slices cook more uniformly than thick chunks. Use a mandoline for perfect ¼-inch slices, or carefully hand-slice with a sharp chef’s knife. Tossing the apples with lemon juice 15 minutes before baking prevents browning and keeps them bright.
For extra tenderness, I sometimes add 1 tsp cornstarch to the filling mix—it creates a silky texture that’s pure comfort food magic.
Steam Escape Slits
Those decorative slits on top aren’t just for looks—they’re functional! Cut 6-8 slits in the dough before baking to release steam. Without them, your pie might puff up into a dome or develop a soggy bottom. I like to make them ½-inch long and space them evenly.
And here’s a trick: If your crust starts browning too fast, tent it with foil after 25 minutes to keep it golden all the way through.
Resting Prevents Sog
The 15-minute rest after baking is non-negotiable. This lets the juices redistribute so your first slice isn’t a watery mess. I’ve seen people cut into pies too soon and get disappointed—wait for it!
For serving, I like to transfer the pie to a wire rack to cool completely. This also makes slicing cleaner and prevents the bottom from getting soggy when you cut into it.
Nonna’s Egg Wash
That golden finish comes from beating the egg with 1 tablespoon water before brushing it on top. The water helps it spread evenly without making the crust too shiny. I’ve tried just egg whites, just yolks, and even milk—nothing beats this classic combo.
Brush it on right before baking so it has time to set. For extra shine, I sometimes add ½ teaspoon vanilla extract to the egg wash—it adds a subtle depth of flavor that pairs perfectly with the cinnamon.
Nutrition facts
Frequently asked questions
Can I use store-bought crust instead of making dough from scratch?
For a quicker version, use a pre-made pie crust—just make sure it’s refrigerated until ready to use. I recommend a double-crust style for that classic look, but a single crust works too. If using frozen crust, thaw it completely before assembling to prevent sogginess. For extra flakiness, brush the bottom crust with 1 tablespoon melted butter before adding the filling.
What’s the best way to prevent a soggy bottom crust?
Prevent sogginess by creating a thin flour barrier between the crust and filling. Sprinkle ½ cup flour over the bottom crust before adding the apples. Another trick: Blind-bake the bottom crust for 8-10 minutes at 375°F before adding filling. This gives it a head start on crisping up. Always chill the pie for 15 minutes after baking before slicing—this lets the juices set properly.
Can I make this pie ahead of time?
This pie actually tastes better the next day! Assemble it completely (unbaked) and refrigerate for up to 24 hours before baking. For longer storage, you can freeze the unbaked pie (wrapped tightly) for 2 months. Bake from frozen, adding 10-15 extra minutes to the baking time. The flavors develop beautifully overnight, making it perfect for holiday gatherings.
What if my crust turns out too dark before the filling is done?
Cover the edges with aluminum foil after 25 minutes of baking to protect them while the center finishes. If your oven runs hot, reduce the temperature to 350°F for the last 15 minutes of baking. Another trick: Place a baking sheet on the rack below your pie to reflect heat upward more evenly. The key is patience—let the filling cook through completely before removing from the oven.
How do I store leftovers?
Store slices in an airtight container at room temperature for 3 days, or refrigerate for up to 5 days. For longer storage, freeze individual slices (wrapped tightly) for 3 months. To reheat, warm at 350°F for 5-7 minutes** until heated through. The crust stays crispy when reheated this way—just avoid microwaving, which makes it rubbery.

- Homemade Kombucha Recipe: Fermented Tangy Elixir With Probiotic Power - November 17, 2026
- Banana Pudding Recipe: Preppy Kitchen’s Vanilla Bean Cream Magic - November 17, 2026
- Brio Steak Salad Recipe: Crispy-Crusted Beef Over Peppery Arugula - November 17, 2026