An all-purpose sourdough bread recipe that delivers restaurant-quality results with minimal effort is exactly what you need for weeknight meals or holiday tables. This no-knead method transforms simple ingredients into a loaf with a tangy crust and airy interior that rivals artisanal bakeries—without requiring advanced skills.
The secret lies in precise fermentation and baking techniques that create that signature open crumb structure and complex flavor.
What sets this recipe apart is its foolproof approach that works for beginners yet delivers professional results. You’ll start with a simple starter culture that develops over 5 days, then mix, proof, and bake a single dough that yields a perfect loaf every time.
The process requires just one hour of active time and 12 hours of passive proofing, making it ideal for busy schedules.
By following these steps, you’ll achieve a loaf with a golden, crisp crust that gives way to a tender, open crumb filled with air pockets. The flavor develops depth through proper fermentation, creating that signature sourdough tang without overpowering the mild, all-purpose character.
This bread freezes beautifully and tastes even better the next day.
Perfect for sandwiches, toast, or serving alongside soups and stews, this recipe builds confidence in home baking. Whether you’re feeding a family or preparing for a gathering, you’ll have a reliable, delicious loaf that impresses everyone at the table. Let’s get started with the detailed instructions that make this possible.
Ingredients for all purpose sourdough bread
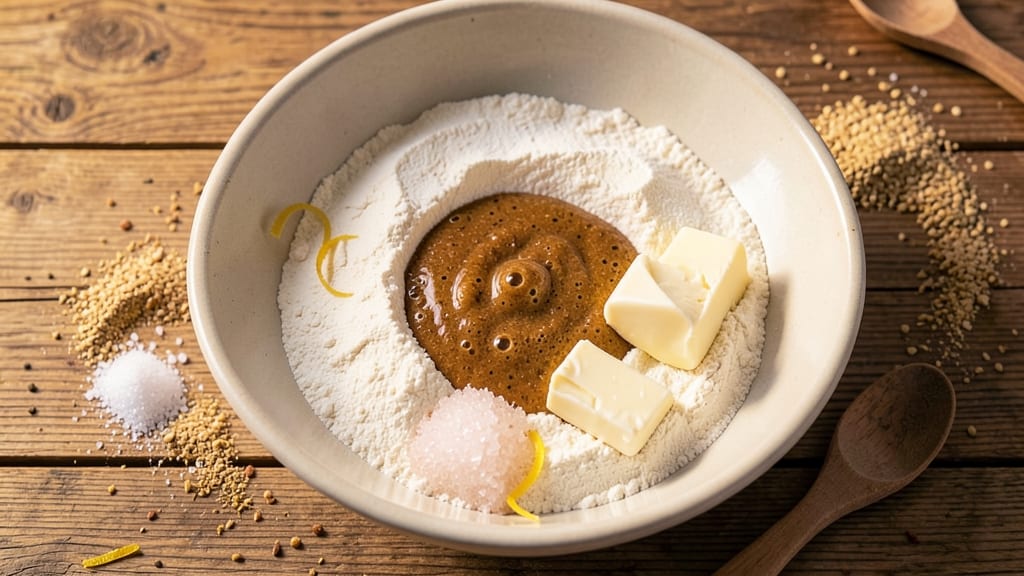
Nine simple ingredients transform into restaurant-quality sourdough with minimal effort and maximum flavor.
| Ingredient | Amount | Notes |
|---|---|---|
| Active Sourdough Starter 🍞 | ½ cup | Well-fed, bubbly culture |
| All-Purpose Flour 🌾 | 3 ½ cups | White bread flour preferred |
| Whole Wheat Flour 🌾 | ½ cup | For subtle nutty flavor |
| Granulated Sugar 🍚 | ¼ cup | Feeds starter and dough |
| Unsalted Butter 🧈 | ¼ cup | Cold, cubed for texture |
| Diamond Crystal Kosher Salt 🧂 | 1 ½ tsp | Fine grain preferred |
| Water 💧 | 1 ½ cups | Room temperature, filtered |
| Cornmeal 🌽 | ¼ cup | For dusting baking sheet |
| Ice Water ❄️ | ½ cup | For final dough adjustment |
The sourdough starter is the foundation—King Arthur or Bob’s Red Mill flours create optimal fermentation. Your starter should be at its peak activity (doubled in 4-6 hours) before using. For the flours, White Lily or Caputo deliver professional results, though any all-purpose works. The butter should be cold and cubed to create that signature tender crumb. Plugrá or Land O’Lakes unsalted butter are excellent choices. Measure your water precisely—this dough is sensitive to hydration variations. If using a scale, 1 cup water equals roughly 240 grams.
No sourdough starter? Commercial baker’s yeast (1 tsp) can substitute, though flavor will differ. Whole wheat flour can be swapped for additional all-purpose if unavailable. For a tangier crust, increase sugar by 1 tsp. The cornmeal is optional but creates a beautiful crust texture—Bob’s Red Mill fine cornmeal works best. If your kitchen is warm, chill the dough for 30 minutes before shaping to prevent overproofing. The ice water is crucial for final dough adjustment—use it to achieve the perfect consistency for shaping.
Store the starter at room temperature in a glass jar with a loose lid. Feed daily with equal parts flour and water for maintenance. The dough can be refrigerated for up to 24 hours before baking—this enhances flavor development. Baked loaves keep well at room temperature for 3 days wrapped in a cotton towel. For longer storage, freeze slices for up to 3 months. The bread reheats beautifully in a 350°F oven for 5-10 minutes to restore freshness.
Why You’ll Love This Recipe
- No-Fuss Mix-In: I swear by this combo—just toss in whole wheat flour for a subtle nutty depth without the dense texture of 100% whole grain. The all-purpose base keeps it light, so it’s foolproof even when I’m distracted (looking at you, mid-baking coffee spills).
- Buttery Tang Magic: That little pinch of sugar caramelizes in the oven, while the butter adds a rich, almost brioche-like softness. Honestly, it’s the kind of bread that makes toast taste like a treat—no fancy ingredients, just happy accidents.
- Weeknight Workhorse: I bake a loaf every Sunday, and it handles everything: grilled cheese that doesn’t fall apart, sandwiches for lunchboxes, or toasted with jam when I’m too tired to cook. Between us, it’s my go-to for lazy mornings and last-minute dinner guests.
- Dollar Stretcher: A single batch costs me pennies but lasts for days—perfect for stretching meals when groceries feel tight. The sourdough starter’s tang cuts through richness, so a little butter goes a long way. My wallet (and my stomach) thank me.
Step-by-step instructions for all purpose sourdough bread
This method delivers a perfectly balanced loaf with a crisp crust and open crumb—no kneading required.
Mix the Dough with Wet Ingredients
In a large mixing bowl, combine the 0.5 cup active sourdough starter, 1.5 cups water, 0.25 cup granulated sugar, and 1.5 tsp diamond crystal kosher salt. Whisk vigorously until the sugar and salt dissolve completely—this ensures even distribution throughout the dough. The mixture should be smooth with no visible sugar crystals.
Next, add the 0.25 cup cold, cubed unsalted butter to the wet ingredients. Using a wooden spoon, gently fold the butter pieces into the mixture until they begin to emulsify. The butter should create small, pea-sized pockets rather than sitting in clumps. This cold butter incorporation will create that signature tender crumb we’re after.
Incorporate the Dry Ingredients
Gradually add the 3.5 cups all-purpose flour and 0.5 cup whole wheat flour to the wet mixture while stirring with a wooden spoon. Begin with half the flour and mix until a shaggy dough forms, then add the remaining flour. The dough will be sticky but should pull away from the sides of the bowl—this is normal for a no-knead sourdough.
Use a dough scraper to fold the dough over itself 8-10 times, pressing down firmly to develop some gluten structure without overworking it. The dough should come together into a cohesive mass that leaves a clean bowl. If it’s too sticky to handle, wet your hands slightly to prevent sticking. This folding technique creates the right balance of texture without requiring traditional kneading.
Bulk Fermentation with Controlled Rest
Cover the bowl with a damp kitchen towel and let the dough rest at room temperature for 4-6 hours. The dough will rise noticeably, with bubbles forming on the surface and along the sides of the bowl. You’re looking for about 50-75% increase in volume—this indicates proper fermentation.
After 2 hours, perform the “poke test” by inserting a finger gently into the center of the dough. If it springs back slowly (like jelly), it needs more time. If it leaves a slight indentation, it’s ready. The ideal dough should feel slightly tacky and have a pleasant, tangy aroma from the active starter. This fermentation step develops the bread’s complex flavor and open crumb structure.
Shape and Final Proof
Lightly dust a clean work surface with the 0.25 cup cornmeal. Turn out the dough and gently shape it into a round boule by pulling the edges toward the center while rotating the dough. The surface should be smooth but slightly tacky—this helps create the signature sourdough crust. Place the shaped dough seam-side up on a parchment-lined baking sheet.
Cover loosely with plastic wrap and refrigerate for 12-16 hours. This cold proofing slows fermentation, intensifies flavors, and allows the gluten to relax for an even bake. When ready to bake, remove the dough from the fridge and let it sit at room temperature for 1 hour. You’ll see it puff up slightly and develop a more pronounced tangy aroma—this is your signal that it’s ready for the oven.
Bake for Maximum Crust Development
Preheat your oven to 450°F with a Dutch oven inside for 45 minutes. This creates a steam environment that promotes oven spring and crust development. Carefully transfer the dough (still on its parchment) into the hot Dutch oven, cover with the lid, and bake for 30 minutes.
Remove the lid and continue baking for an additional 15-20 minutes until the bread reaches an internal temperature of 205-210°F. The crust should be deep golden brown with dark spots, and you should hear a hollow sound when you tap the bottom. If the top browns too quickly, tent loosely with foil to prevent over-browning while maintaining the crust’s crisp texture.
Pro Tips For Making All Purpose Sourdough Bread
- Weigh Your Flours: Ditch the cups—scooping whole wheat flour packs it down, throwing off hydration. Use a kitchen scale for exact measurements (I learned this after two dense, gummy loaves). The all-purpose to whole wheat ratio matters more than you’d think.
- Skip the Over-Kneading: This isn’t French baguette—you’re not fighting gluten here. Once the dough passes the “windowpane test” (stretch a piece thin enough to see light), stop. Overworking it with whole wheat turns the crumb tough, and your starter’s flavor gets lost in the struggle.
- Butter the Pan Cold: If you’re adding that butter to the loaf pan, do it before baking—cold, in small dollops. Melted butter pools at the bottom; cold butter spreads evenly and gives you that golden, shatter-prof crust without greasing your hands halfway through.
- Proof Until Puffy, Not Peak: Your dough should nearly double but not collapse when poked—whole wheat slows fermentation, so resist the urge to bake early. A slow rise (1.5–2 hours at room temp) gives better flavor than rushing it in the fridge overnight. (Yes, even if you’re impatient like me.)
Wine and beer pairings for all purpose sourdough bread
Crisp White Wine
For this all-purpose sourdough’s mild yet tangy profile, I recommend a dry Riesling from Germany or Alsace—its crisp acidity and subtle citrus notes complement the bread’s crust without overpowering its delicate flavor.
A Pinot Grigio from Italy’s Alto Adige region also works beautifully, offering a clean finish that enhances the bread’s nutty undertones from the whole wheat flour. Serve slightly chilled to let the wine’s brightness cut through the sourdough’s richness. 🍷
Hoppy Beer Pairings
A Belgian Witbier like Stella Artois or Hoegaarden provides the perfect balance—its coriander and orange peel notes mirror the bread’s subtle sweetness while the effervescence cleanses your palate between bites.
For a bolder option, try a German Pilsner such as Warsteiner or Bitburger, which highlights the sourdough’s tangy crust with its crisp, herbal character. Avoid heavy stouts or dark ales that could clash with the bread’s delicate texture.
Red Wine for Bold Eaters
If you prefer red wine, a light-bodied Pinot Noir from Oregon or Burgundy offers enough acidity to stand up to the sourdough’s crust while complementing its buttery richness. Look for wines with bright cherry and earthy notes—these enhance the bread’s nutty complexity.
Avoid heavy Cabernets or Syrahs, as their tannins can overpower the bread’s tender crumb. Serve at 55-60°F to preserve the wine’s freshness and balance.
Non-Alcoholic Options
For a refreshing non-alcoholic pairing, try sparkling apple cider like Martinelli’s or a ginger beer such as Feather’s. The effervescence and slight tartness enhance the sourdough’s crust, while the ginger’s spice complements the bread’s subtle tang.
For a more sophisticated option, a dry sparkling wine like Freixenet Cordon Negro mirrors the wine pairings without alcohol, making it a crowd-pleaser for any gathering. ✨
Seasonal Adaptations
In summer, pair your sourdough with a rosé (especially Provence-style) to balance the bread’s warmth with its crisp, fruity profile. During winter, opt for a dry sparkling wine or light red blend to stand up to the bread’s intensified flavors after long fermentation.
The key is matching the wine’s acidity to the bread’s tang—this creates harmony with every bite.
Nutrition facts
Frequently asked questions
Why does this recipe use both all-purpose and whole wheat flour?
The combination creates a perfect balance—all-purpose flour delivers a light, tender crumb while whole wheat flour adds subtle nutty flavor and slight density. This hybrid approach prevents the bread from becoming too heavy or dense. For a lighter loaf, you can reduce whole wheat to 0.25 cup if needed.
Can I make this without a Dutch oven?
Yes! If you don’t have a Dutch oven, use a heavy baking sheet or oven-safe skillet. For extra steam, place a tray of boiling water on the lower rack during the first 20 minutes of baking. The crust won’t be as crisp, but the interior will still develop beautifully. A pizza stone also works well for achieving a crispier crust.
How do I know when my starter is ready to use?
Your starter should be bubbly, doubled in size, and have a pleasant tangy aroma within 4-6 hours after feeding. Perform the “float test” by dropping a small spoonful in water—if it floats, it’s active and ready! Avoid using starter with a strong alcohol smell or grayish hue, as this indicates it’s overripe or contaminated.
Why did my bread turn out dense instead of airy?
Dense bread usually results from underproofing (not enough fermentation time) or overmixing the dough. Ensure your dough rises 50-75% during bulk fermentation and perform the poke test for readiness. Also, avoid kneading—gentle folding is key. If your kitchen is warm, refrigerate the dough during bulk fermentation to slow the process and improve texture.
Can I use this dough for sandwiches or should I bake it fresh?
This bread is best enjoyed fresh, but it keeps well for 3 days at room temperature wrapped in a cotton towel. For sandwiches, lightly toast slices to restore crispness. If storing longer, freeze slices for up to 3 months—reheat in a 350°F oven for 5-10 minutes to revive texture and flavor.

- Currant Jam Recipe Without Pectin: Naturally Thickened Fruit Intensity - November 9, 2026
- Crisp Sweet Pickle Canning Recipe: Glittering Green Gems in Glass - November 9, 2026
- Cod and Sun-Dried Tomatoes Recipe: Mediterranean Pan-Seared Brilliance - November 9, 2026