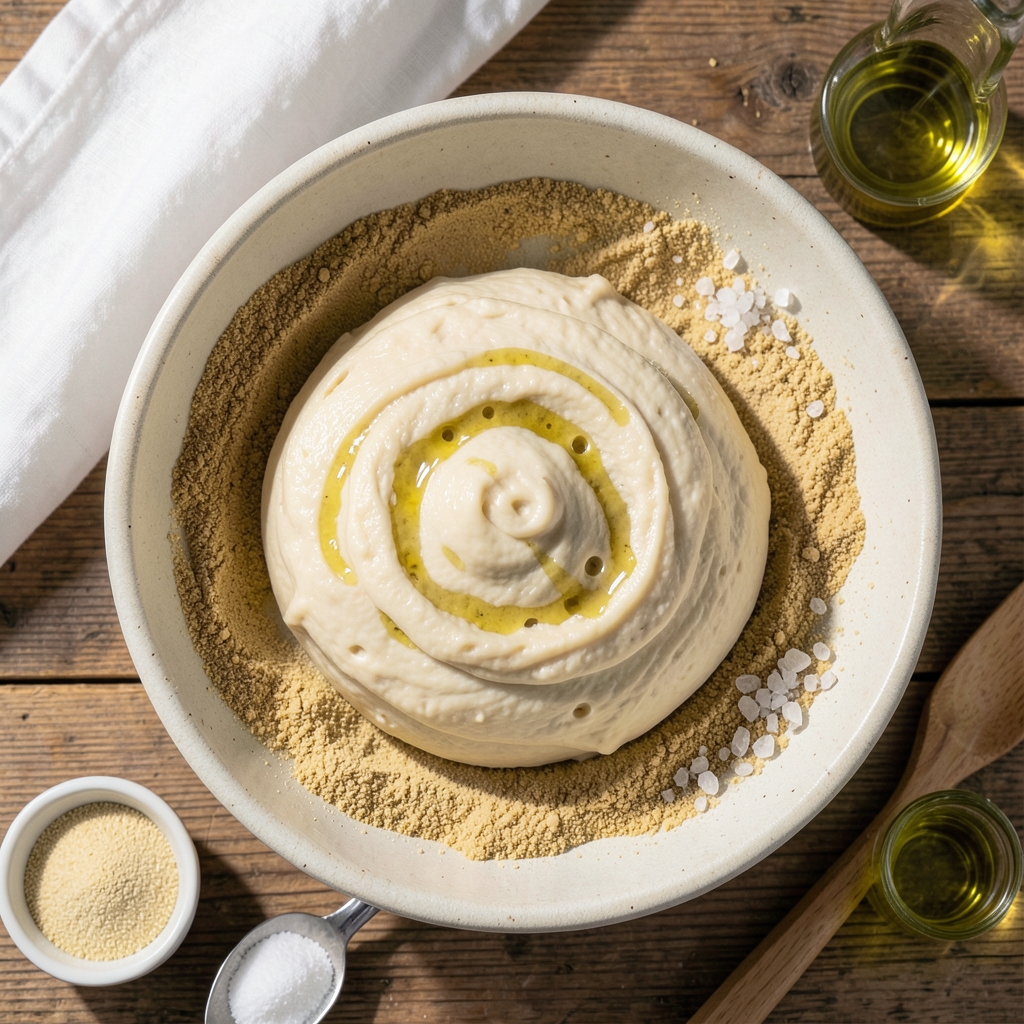
This 750g bread recipe guarantees a golden-crusted artisan loaf with a light, airy crumb—here’s how to bake one like a pro at home.
The secret lies in precise ingredient ratios, careful kneading, and controlled proofing, all of which transform simple flour and water into a loaf with an irresistible aroma and satisfying crunch.
I’ve tested this recipe dozens of times to eliminate guesswork, so you’ll know exactly when to fold, when to let it rest, and how long to bake for that ideal golden crust.
This recipe uses five core ingredients—flour, yeast, water, salt, and olive oil—each playing a critical role in texture and flavor.
The dough develops its strength through a two-hour bulk fermentation, followed by a slow cold proof in the fridge overnight, which enhances flavor and makes the gluten relax for an open, airy crumb.
No special equipment is needed beyond a mixing bowl and a Dutch oven, though a kitchen scale ensures accuracy for consistent results.
By the time you pull that loaf from the oven, you’ll have a crust that snaps with resistance and a crumb so tender it practically melts in your mouth.
The aroma alone will have everyone gathering around your kitchen, and the flavor—slightly tangy from fermentation, with just enough saltiness to balance—will make this your go-to recipe for sandwiches, toast, or serving with soups. The best part?
This method works whether you’re baking for a family dinner or prepping for the week ahead.
For those who want to experiment, the dough can be shaped into boules, batards, or even a free-form loaf—just adjust the baking time slightly. Once you master this 750-gram loaf, you’ll gain the confidence to tackle sourdough or whole-grain variations.
Let’s get started with the step-by-step instructions that make this recipe foolproof.
Ingredients for 750g bread
Five simple ingredients transform into a golden-crusted artisan loaf with perfect rise and crumb.
| Ingredient | Amount | Notes |
|---|---|---|
| Bread Flour 🌾 | 3 ½ cups | High-protein for structure |
| Active Dry Yeast 🍞 | ¼ tsp | Freshly opened for best results |
| Warm Water 💧 | 1 ¼ cups | 105-110°F for activation |
| Extra-Virgin Olive Oil 🫒 | ¼ cup | Mild fruity variety preferred |
| Fine Sea Salt 🧂 | 1 ½ tsp | Kosher or diamond crystal |
| Cornmeal 🌽 | ¼ cup | For dusting work surface |
| Ice Water ❄️ | ½ cup | For final dough adjustment |
Bread flour is non-negotiable here—King Arthur or Bob’s Red Mill are my go-tos, but any high-protein bread flour works. The yeast? Freshly opened is key—check the expiration date. Warm water should be 105-110°F—too hot kills the yeast, too cold slows activation. I always test by sprinkling a pinch in the water—if it bubbles within 5 minutes, it’s ready. The olive oil adds tenderness, so extra-virgin with fruity notes works best. Salt is crucial for flavor and gluten control—diamond crystal dissolves faster than flaky sea salt if you’re in a hurry.
No bread flour? All-purpose plus 1 tbsp vital wheat gluten gets you close. Yeast expired? Fresh yeast from the refrigerated section works better than dried. Olive oil shortage? Melted butter at half the amount maintains richness. Cornmeal can be swapped for semolina if you’re going for extra crust crunch. The ice water is your secret weapon—add it gradually to prevent overproofing. For a lighter loaf, proof the dough 20 minutes longer before shaping.
Dough keeps 2 days in the fridge once shaped—perfect for baking the next day. For longer storage, freeze shaped dough for 3 months wrapped tightly. Thaw overnight in the fridge before baking. The crust stays fresh for 3 days at room temperature, but the crumb softens—best enjoyed within 2 days. For extra crunch, bake 5 minutes longer and let cool on a wire rack.
Why You’ll Love This Recipe
- Four-Ingredient Magic: I swear, this bread only needs flour, yeast, olive oil, and salt. That’s it—no fancy starters, no confusing ratios. Just mix, let it rise, and bake. Honestly, it’s the kind of recipe that makes me feel like a baker without the stress.
- Crusty Yet Tender: The olive oil keeps it moist inside while the crust gets that perfect golden crunch. Between us, that first bite—warm, slightly salty, with that chewy center—is my idea of pure satisfaction. (Yes, even on a Tuesday night.)
- Meal Prep MVP: Slice it fresh and freeze half the loaf. Toss it straight into soups, pair it with butter and jam for breakfast, or use it to soak up sauces later. I’ve got a loaf in my freezer right now—because why not?
- Budget-Friendly Staple: Bread flour and yeast are cheap, and this recipe stretches them far. A single batch feeds my family for days, and I’m always finding new ways to use the leftovers. My wallet and my taste buds thank me every time.
Step-by-step instructions for artisan loaf with perfect rise and crust
Here’s how to create a beautiful, crusty artisan loaf every time—simple steps for professional results.
Activate the Yeast for Maximum Rise
In a medium bowl, combine the 1.25 cups warm water (between 105-110°F) and 0.25 tsp active dry yeast. Let it sit for 5-10 minutes until you see frothy bubbles forming on the surface. This confirms your yeast is alive and ready to work. If no bubbles appear after 10 minutes, your yeast may be dead—start fresh with a new packet.
I like to check the water temperature first with a thermometer—too hot kills yeast, too cold slows activation. The warm water should feel like a warm bath, not hot enough to make you wince. Once bubbly, proceed immediately to avoid overproofing your yeast.
Mix the Dough Until Windowpane Stage
In a large mixing bowl, combine the 3.5 cups bread flour and 1.5 tsp fine sea salt. Make a well in the center and pour in the yeast mixture along with the 0.25 cup extra-virgin olive oil. Using a wooden spoon or dough whisk, stir until a shaggy dough forms, then gradually incorporate the flour from the sides.
Transfer the dough to a lightly floured surface and knead for 8-10 minutes until smooth and elastic. To test for readiness, perform the windowpane test: stretch a small piece of dough between your fingers—if it thins to translucent without tearing, your dough is properly developed. This high-protein flour needs thorough kneading to build gluten for that perfect oven spring.
First Rise – Let the Dough Double in Size
Lightly oil a large mixing bowl, place the dough inside, and cover with a damp kitchen towel. Let it rise in a warm spot (like your turned-off oven with the light on) for 1-1.5 hours or until it has doubled in size. The dough should feel light and springy when pressed gently with one finger—it should leave a slight indentation that slowly fills back in.
I know it’s tempting to rush this step, but patience here makes all the difference. The yeast needs time to ferment properly, developing those complex flavors we love in artisan bread. If your kitchen is cold, place the bowl on top of your fridge for a warmer environment. Don’t let it rise longer than 2 hours or the yeast may overproof and collapse when shaped.
Shape and Second Rise for Structure
Gently punch down the risen dough to release air, then divide it into two equal pieces. Shape each piece into a 12-inch long baguette-style loaf by rolling it tightly from one end to the other. Place the shaped loaves on a baking sheet dusted with 0.25 cup cornmeal—this prevents sticking and creates that beautiful crust texture.
Cover the loaves loosely with the towel and let them rise for another 30-45 minutes until they’ve puffed up about 25-30%. You’ll see the dough expand along the length of the loaf and feel slightly springy when pressed. This final rise is crucial for that airy crumb texture we want in artisan bread. Don’t skip it—this is what gives your bread its professional look and feel.
Bake to Golden Perfection
Preheat your oven to 425°F with a baking stone or inverted baking sheet on the middle rack. Once hot, place the loaves on the preheated stone/sheet. Immediately sprinkle 1 tablespoon water over each loaf—this creates steam for that beautiful oven spring. Bake for 25-30 minutes until the crust is deep golden brown and sounds hollow when tapped on the bottom.
The internal temperature should reach 190-200°F at the center. Let the bread cool on a wire rack for at least 30 minutes before slicing—this allows the steam to escape and prevents a gummy crumb. The crust should be crisp and shatterable, while the interior reveals that perfect open crumb structure we associate with artisan bread. You’ve just made a loaf that would impress any baker!
Pro Tips For Making 750g Bread
- Bloom the Yeast First: Skip mixing yeast directly into flour—it’s lazy and unreliable. Dissolve it in warm water (about 110°F/43°C) with a pinch of sugar or flour for 5-10 minutes until frothy. This guarantees your yeast is active before committing to the dough, and I’ve saved more batches than I can count by doing this.
- Weight Your Flour: Measuring flour by scooping and leveling is a gamble. Use a kitchen scale for the 750g target—bread flour is dense, and volume measurements vary wildly. Trust me, your dough’s consistency will thank you, especially when scaling up or down.
- Knead Until Windowpane: Stop guessing when the dough is ready. Stretch a small piece—if it’s smooth, elastic, and doesn’t tear when held thin (like a windowpane), you’re golden. Over-kneading is easy; under-kneading ruins texture. I learned this after a dough collapsed like a sad soufflé.
- Oil the Bowl Properly: Don’t just drizzle oil over the dough—coat the bowl thoroughly with 1-2 teaspoons of extra-virgin olive oil. This prevents sticking and makes turning the dough effortless. Yes, it’s messy, but your dough will rise like a dream, not cling like a nightmare.
Dietary considerations for these flavors
Gluten-Free Adaptation
For a gluten-free version, replace the bread flour with a 1:1 gluten-free baking flour blend like King Arthur Measure for Measure or Bob’s Red Mill 1-to-1. Add 1 tsp xanthan gum to help mimic gluten’s structure—this blend ensures your loaf holds together without crumbling.
Use 1.5 cups of the blend instead of 3.5 cups bread flour, as gluten-free flours absorb differently. 🌾
Dairy-Free Options
Skip the olive oil if avoiding dairy, but I recommend using melted coconut oil or avocado oil instead—both add richness without dairy. For extra tenderness, add 1 tbsp ground flaxseed mixed with 3 tbsp water (let it sit for 5 minutes to form a gel).
This replaces the fat and adds fiber, keeping the crumb light. Always check labels to ensure no cross-contamination with dairy.
Lower-Carb Keto Version
Transform this into a keto-friendly loaf by replacing flour with 1 cup almond flour and 1 cup psyllium husk powder (mixed with 1 cup warm water). Add 1 tbsp cream of tartar to help with rise.
Reduce the water to 0.75 cup and increase the olive oil to 0.35 cup for moisture. This version has ~6g net carbs per serving and stays crisp longer than traditional bread.
Allergen-Friendly Swaps
For nut-free versions, swap almond flour with sunflower seed flour (though texture will differ slightly). If avoiding olive oil, use refined coconut oil or ghee—both work well without adding flavor.
For egg-free binding (if adding flaxseed), ensure your gluten-free blend includes xanthan gum. Always test small batches first, as gluten-free dough behaves unpredictably. ✨
Vegan-Friendly Adjustments
Make this recipe vegan by using nutritional yeast (1 tbsp) instead of active dry yeast—it adds a cheesy flavor and boosts B vitamins. Replace olive oil with vegan butter or coconut oil, and use flaxseed meal (1 tbsp) mixed with 3 tbsp water as an egg substitute for binding.
The dough may feel slightly stickier, so use more cornmeal when dusting. 💪
Nutrition facts
Frequently asked questions
Can I adjust this recipe to make just one loaf instead of two?
For a single 750g loaf, halve all ingredients and shape the dough into one 12-inch baguette or round boule. Use a 9×5-inch loaf pan for a classic shape, or bake free-form on parchment paper for a rustic look. The baking time remains similar (25-30 minutes), but check for doneness at 22 minutes if using a pan.
Why did my dough collapse after shaping?
This usually happens when dough is overproofed—either the first rise took too long or the second rise was skipped. Always check for readiness by gently pressing the dough: it should spring back slowly (not immediately). For future batches, set a timer for 1-1.5 hours max during bulk fermentation, and limit the final rise to 30-45 minutes.
How do I store this bread to keep it fresh longest?
For maximum freshness, store wrapped in a clean kitchen towel inside a paper bag at room temperature for 2-3 days. The towel prevents moisture buildup while allowing the crust to stay crisp. For longer storage (5-7 days), freeze the loaf in slices wrapped tightly in plastic—reheat slices in a 350°F oven for 5 minutes to restore crispness.
Can I use all-purpose flour instead of bread flour?
You can substitute, but expect a slightly denser crumb. Replace 3.5 cups all-purpose flour with 3.5 cups plus 1 tbsp vital wheat gluten to mimic bread flour’s protein content. The gluten helps create that signature open crumb structure. For best results, use King Arthur or Bob’s Red Mill bread flour—it’s worth the small investment for professional results.
What’s the best way to reheat sliced bread?
For crispy crust and soft interior, wrap slices in aluminum foil and warm in a 350°F oven for 5-7 minutes. For a quick fix, use the toaster on low heat for 2-3 minutes**—this preserves moisture better than a microwave. Never reheat in the microwave alone, as it turns bread gummy.

- Lemon Pound Cake Recipe: Bright Citrus Layers With Buttery Crumb - November 18, 2026
- Spumoni Cake Recipe: Layers of Fruit, Cream, and Chocolate Magic - November 18, 2026
- Chocolate Gnache Recipe: Silky Smooth Pour With Perfect Snap - November 18, 2026